Transition animations are an essential element of any mobile operating system. They give the user a sense of what's happening on the screen, where the apps are coming from, and where they're going.
The stock transition animations on the Nexus 5 are some of the most boring ones out there. A simple fade or slide transition here and there, and that's pretty much it.
Developer Rui Santos was also underwhelmed by the stock transition animations on the Nexus 5. So much so, that he went ahead and ported some of the more dramatic animations from various custom builds of Android, and made them into flashable ZIP files for everyone to enjoy.
So if you're rooted with TWRP installed, you can easily liven up the transitions on your stock Nexus 5.
Choose a Set of Transition Animations
Santos has ported three different sets of transition animations to the Nexus 5. The second and third options are only slightly different, but I've made a few demo videos for you to use in determining the right fit for your style.
Option #1: Fade Animations
To download the flashable ZIP file for Option #1, head to this link.
Option #2: Twirl Animations
To download the flashable ZIP file for Option #2, head to this link.
Option #3: Vortex Animations
To download the flashable ZIP file for Option #3, head to this link.
Note that these ZIP files were designed specifically for use with TWRP—do not attempt to install them with any other custom recovery. If you have CWM instead of TWRP, you can download the appropriate files over at Rui's post.
Install the Transition Animation ZIP
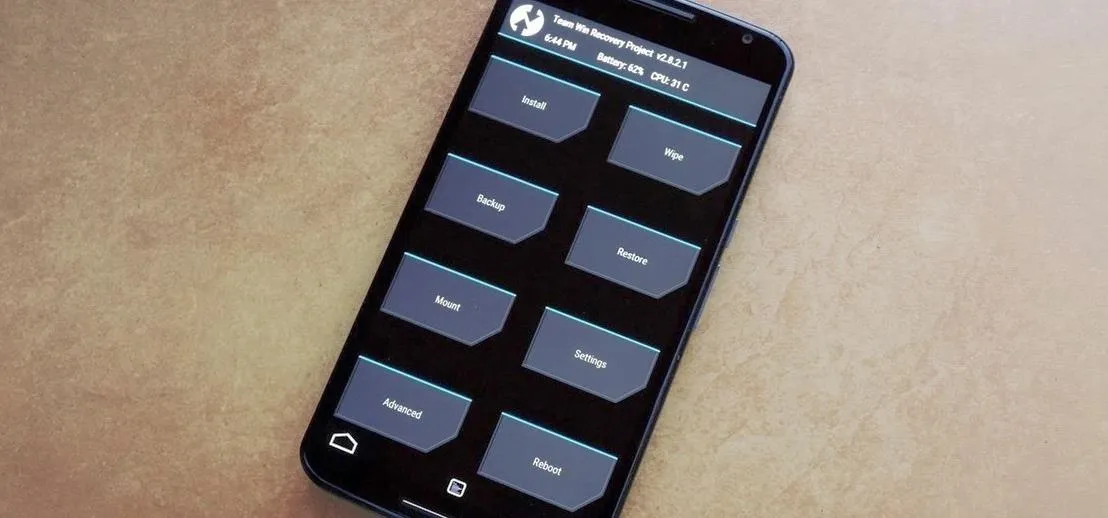
To install the ZIP file that you just downloaded, simply boot into TWRP. If you're not familiar with the process behind that, refer to my complete TWRP guide for more info.
From TWRP's main screen, start by tapping the Install button. From here, navigate to the Download folder on your device to locate the ZIP you just downloaded.
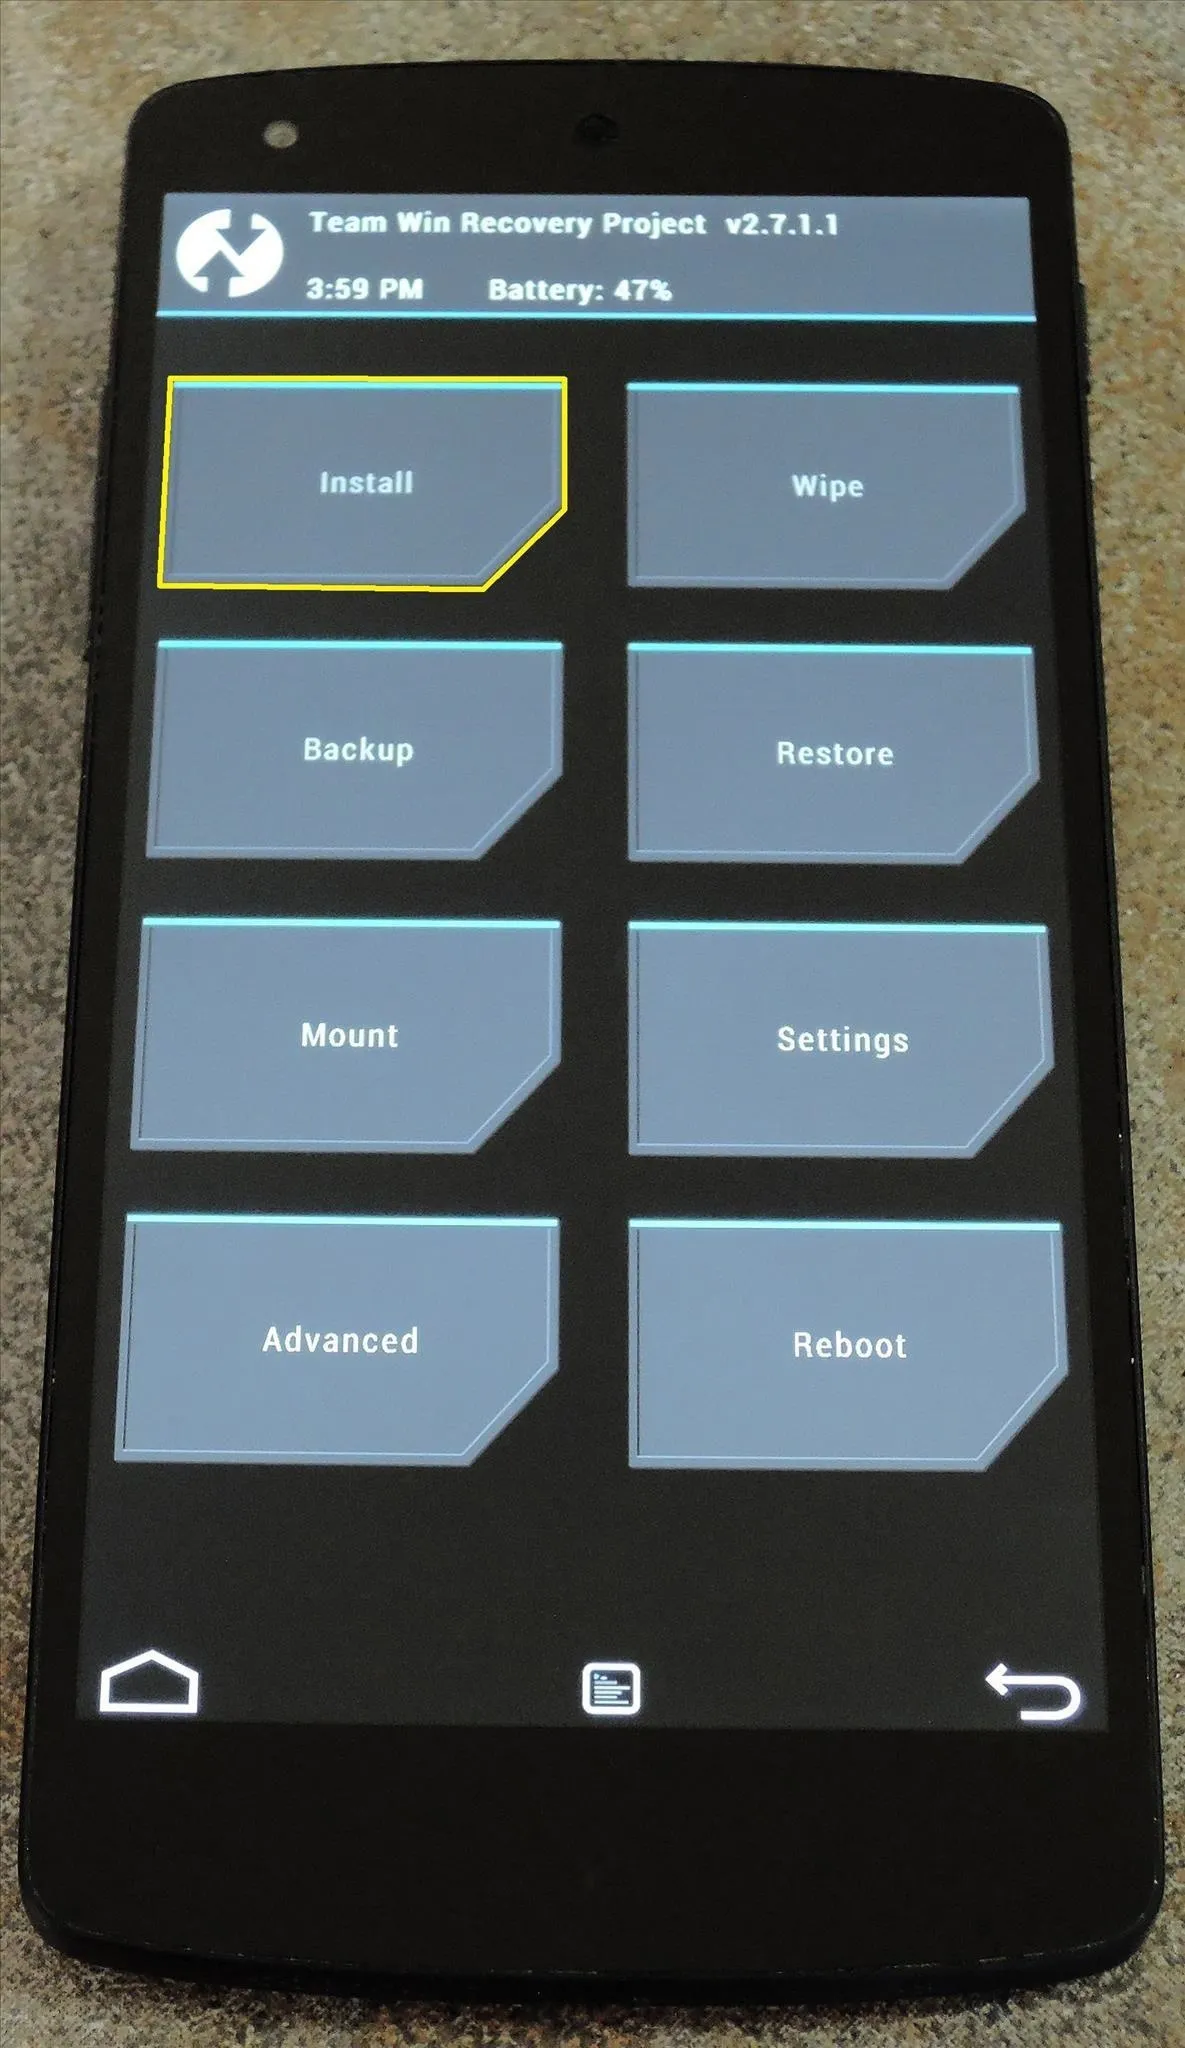
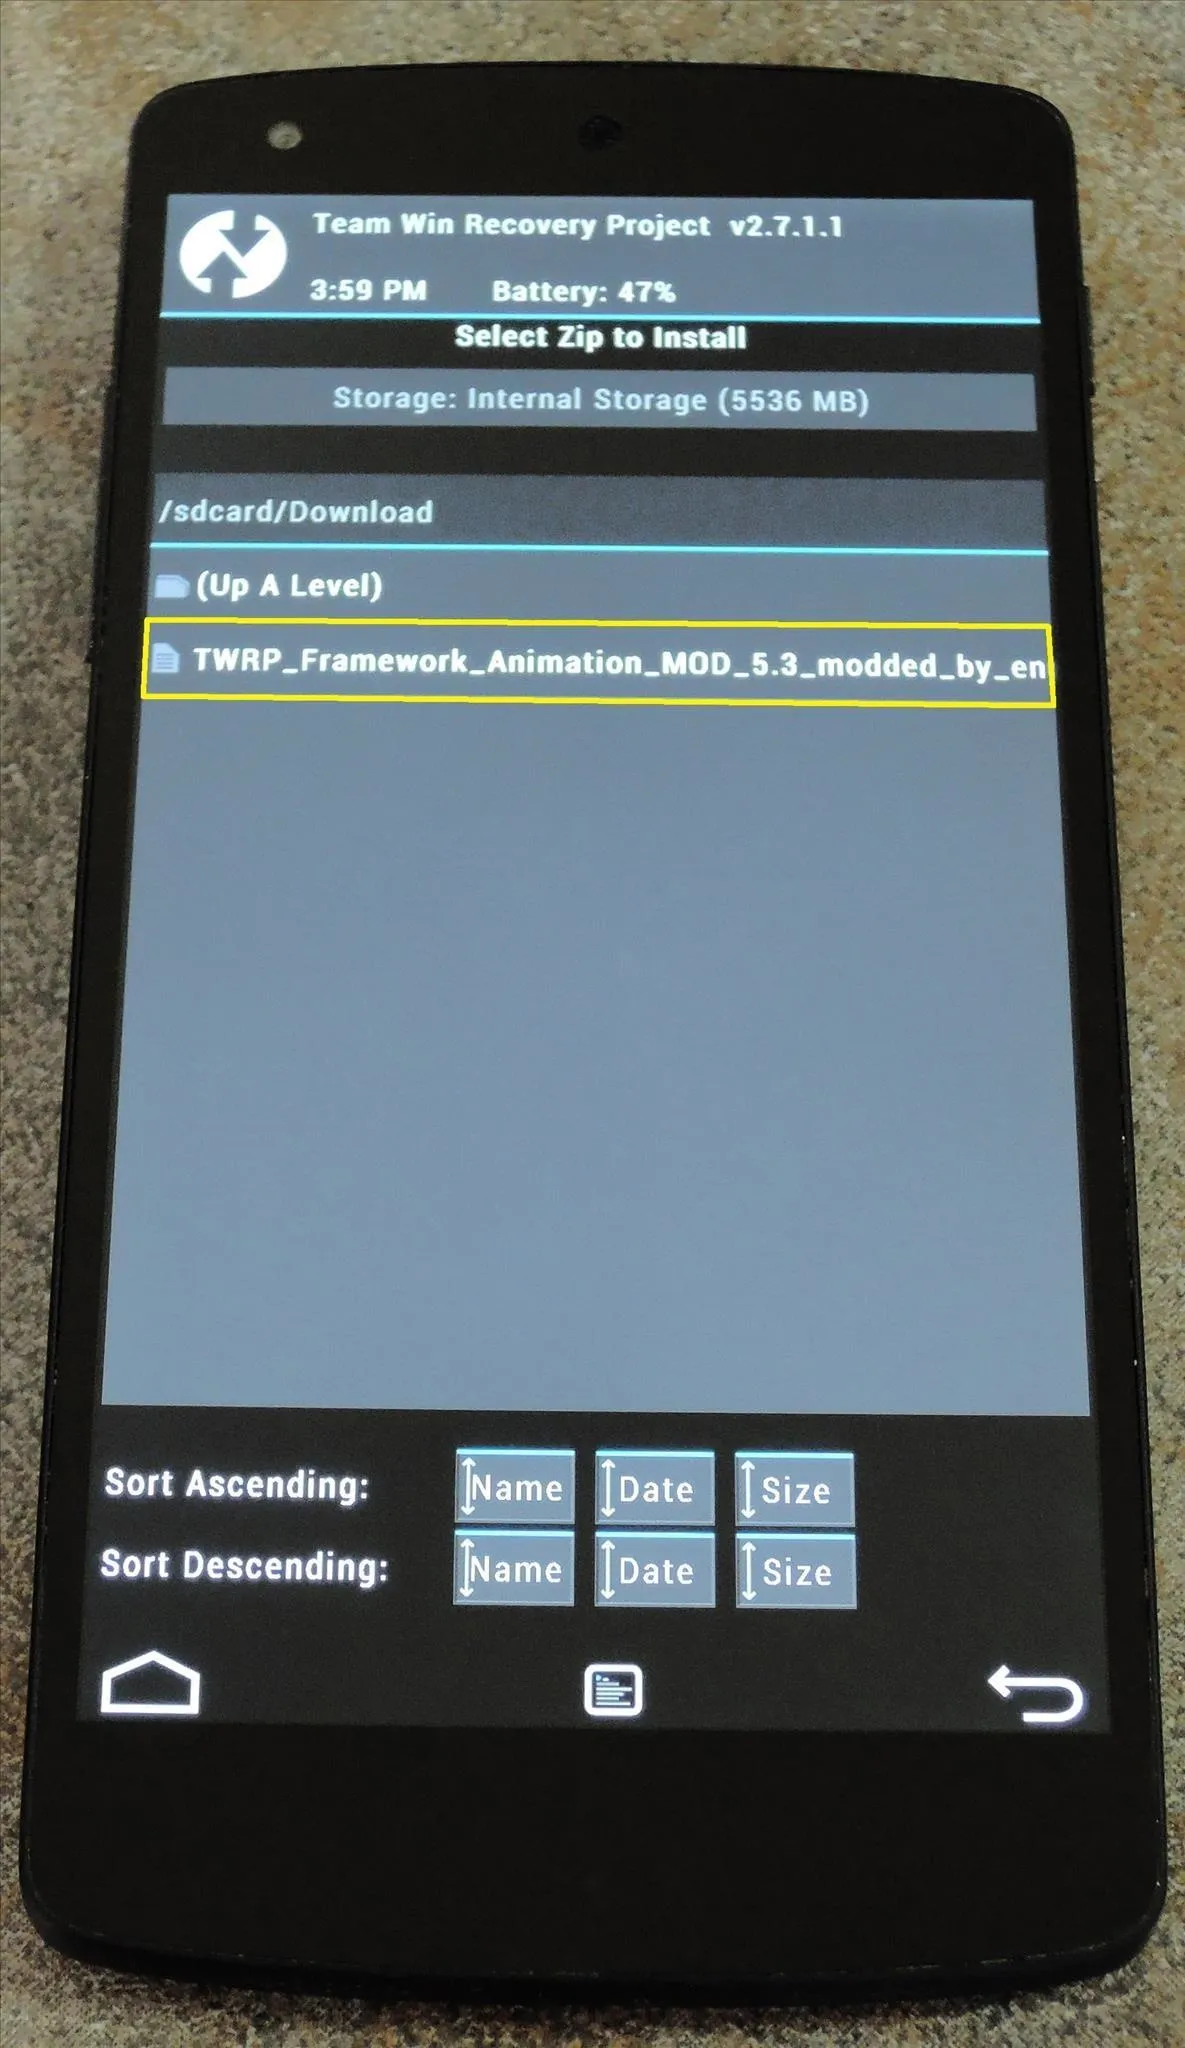


Tap the TWRP_Framework...zip file, then swipe the slider at the bottom of the next screen to install the mod. When the process is finished, tap Reboot System.
Adjust Transition Scale Values (Optional)
When you've finished booting back up, the new transition animations will already be in place. These animations are much more grandiose than the stock animations, so they take a bit more time to complete.
If you'd like to speed up the new transition animations, there's a setting for that under Developer options.
If you don't have Developer options in your phone's Settings menu already, it's really simple to activate—just head to Settings, then About Phone. Scroll down to the bottom of this list and tap Build Number seven times. You'll know that you activated the hidden menu when you see a toast message that says You are now a developer.
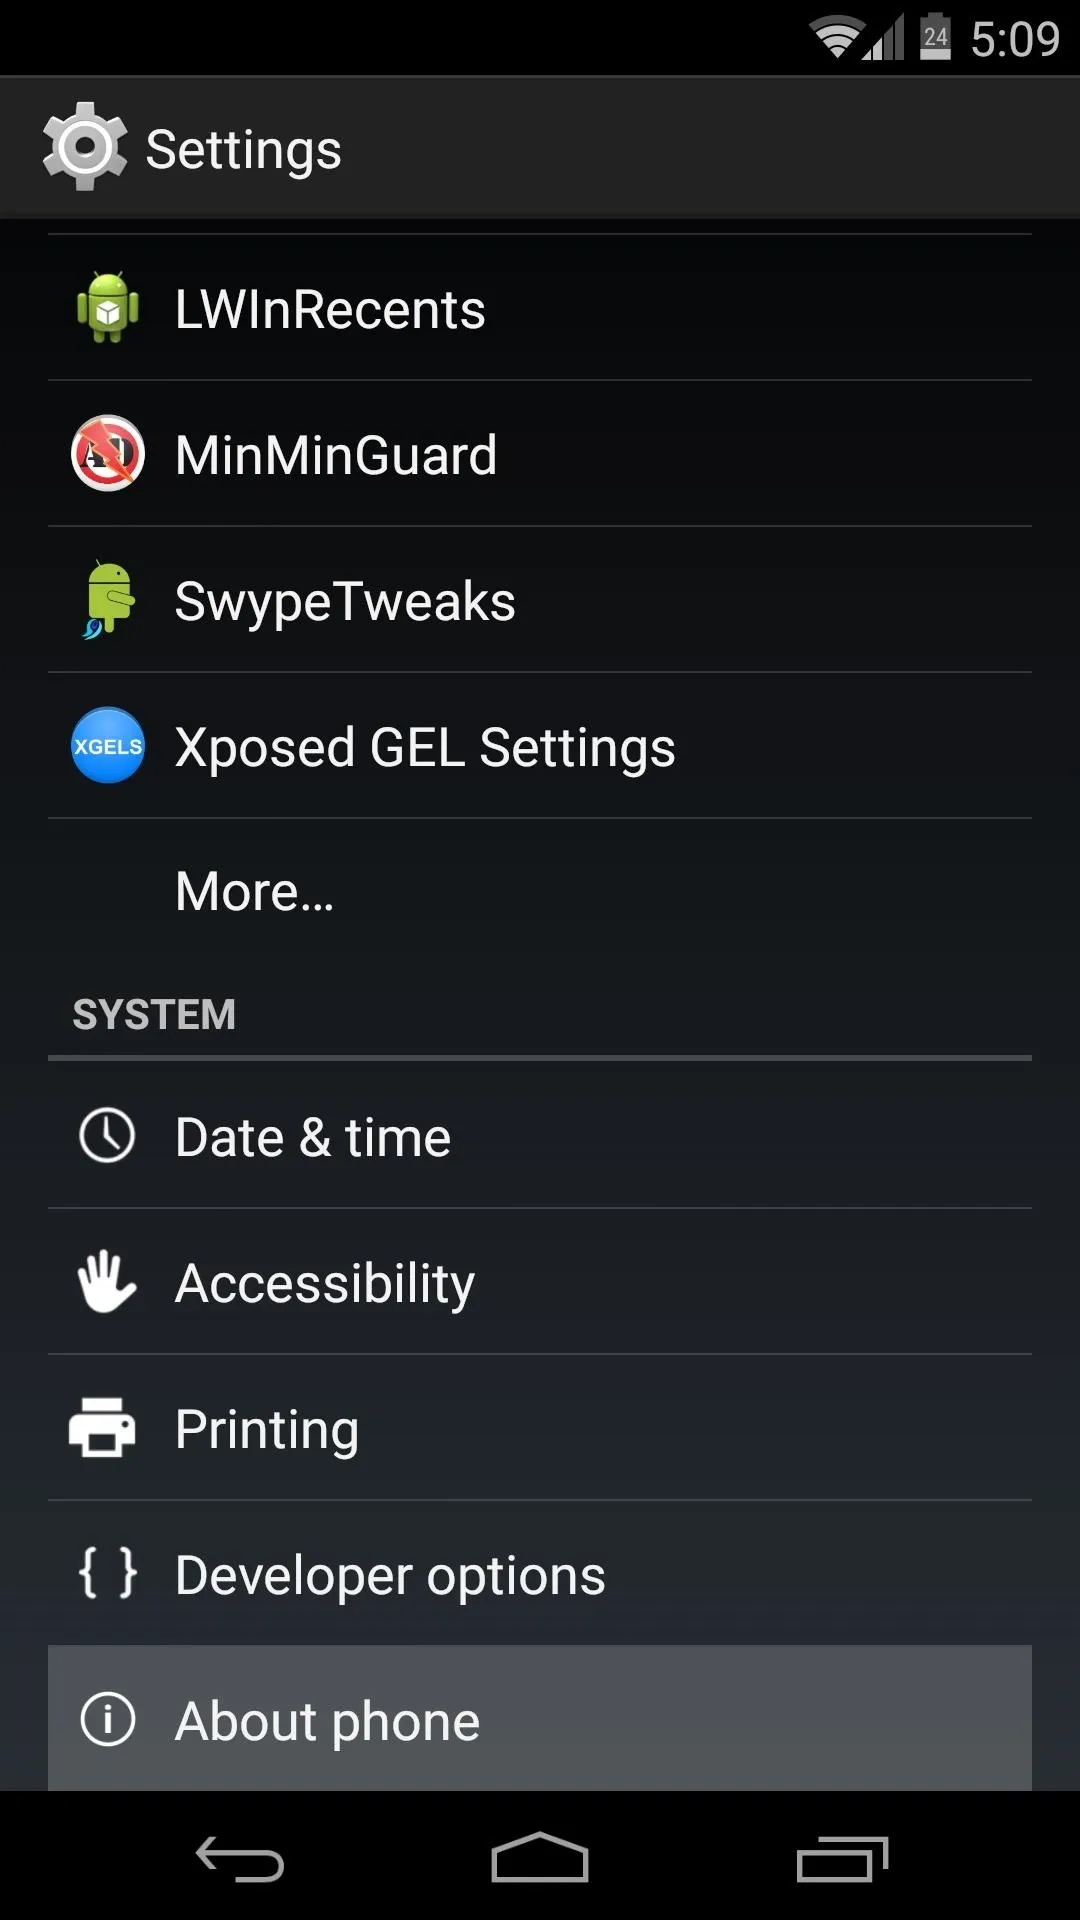
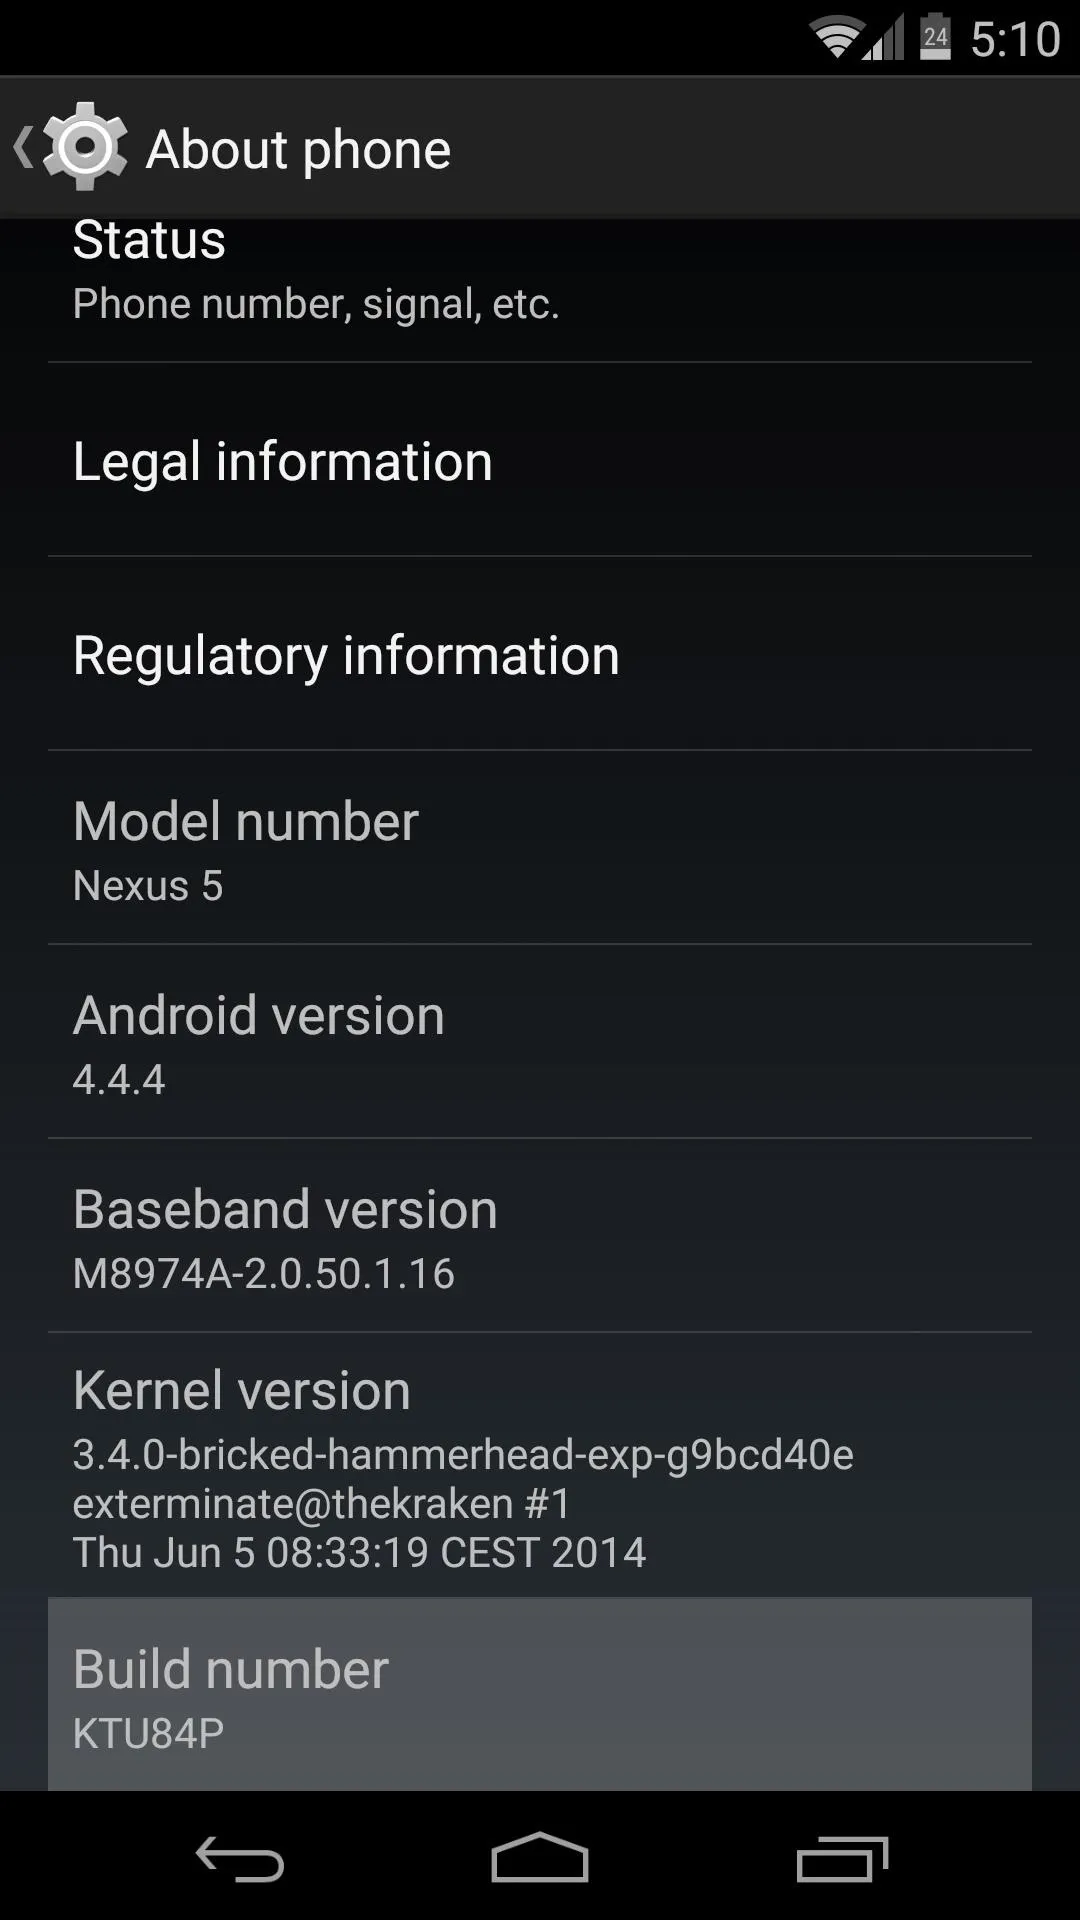


Now, back out one level and head into the newly-activated Developer options menu.
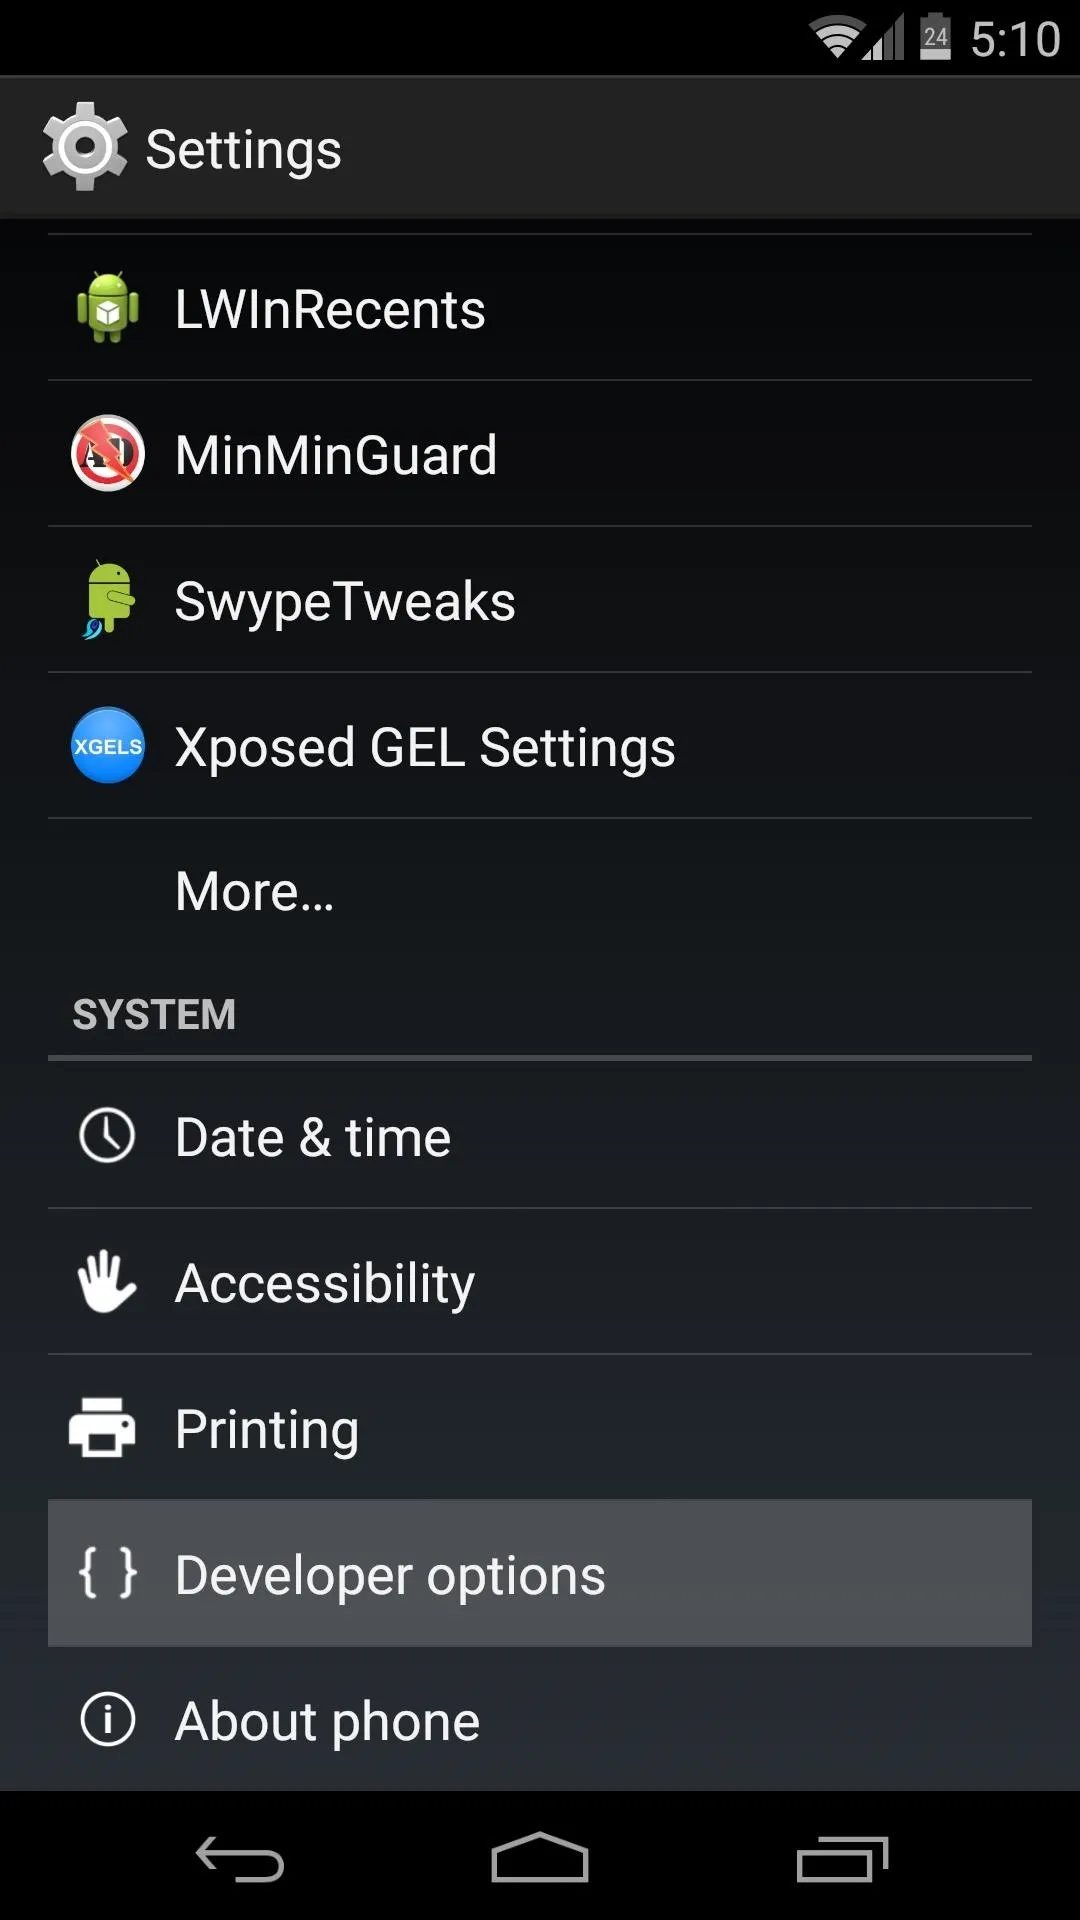
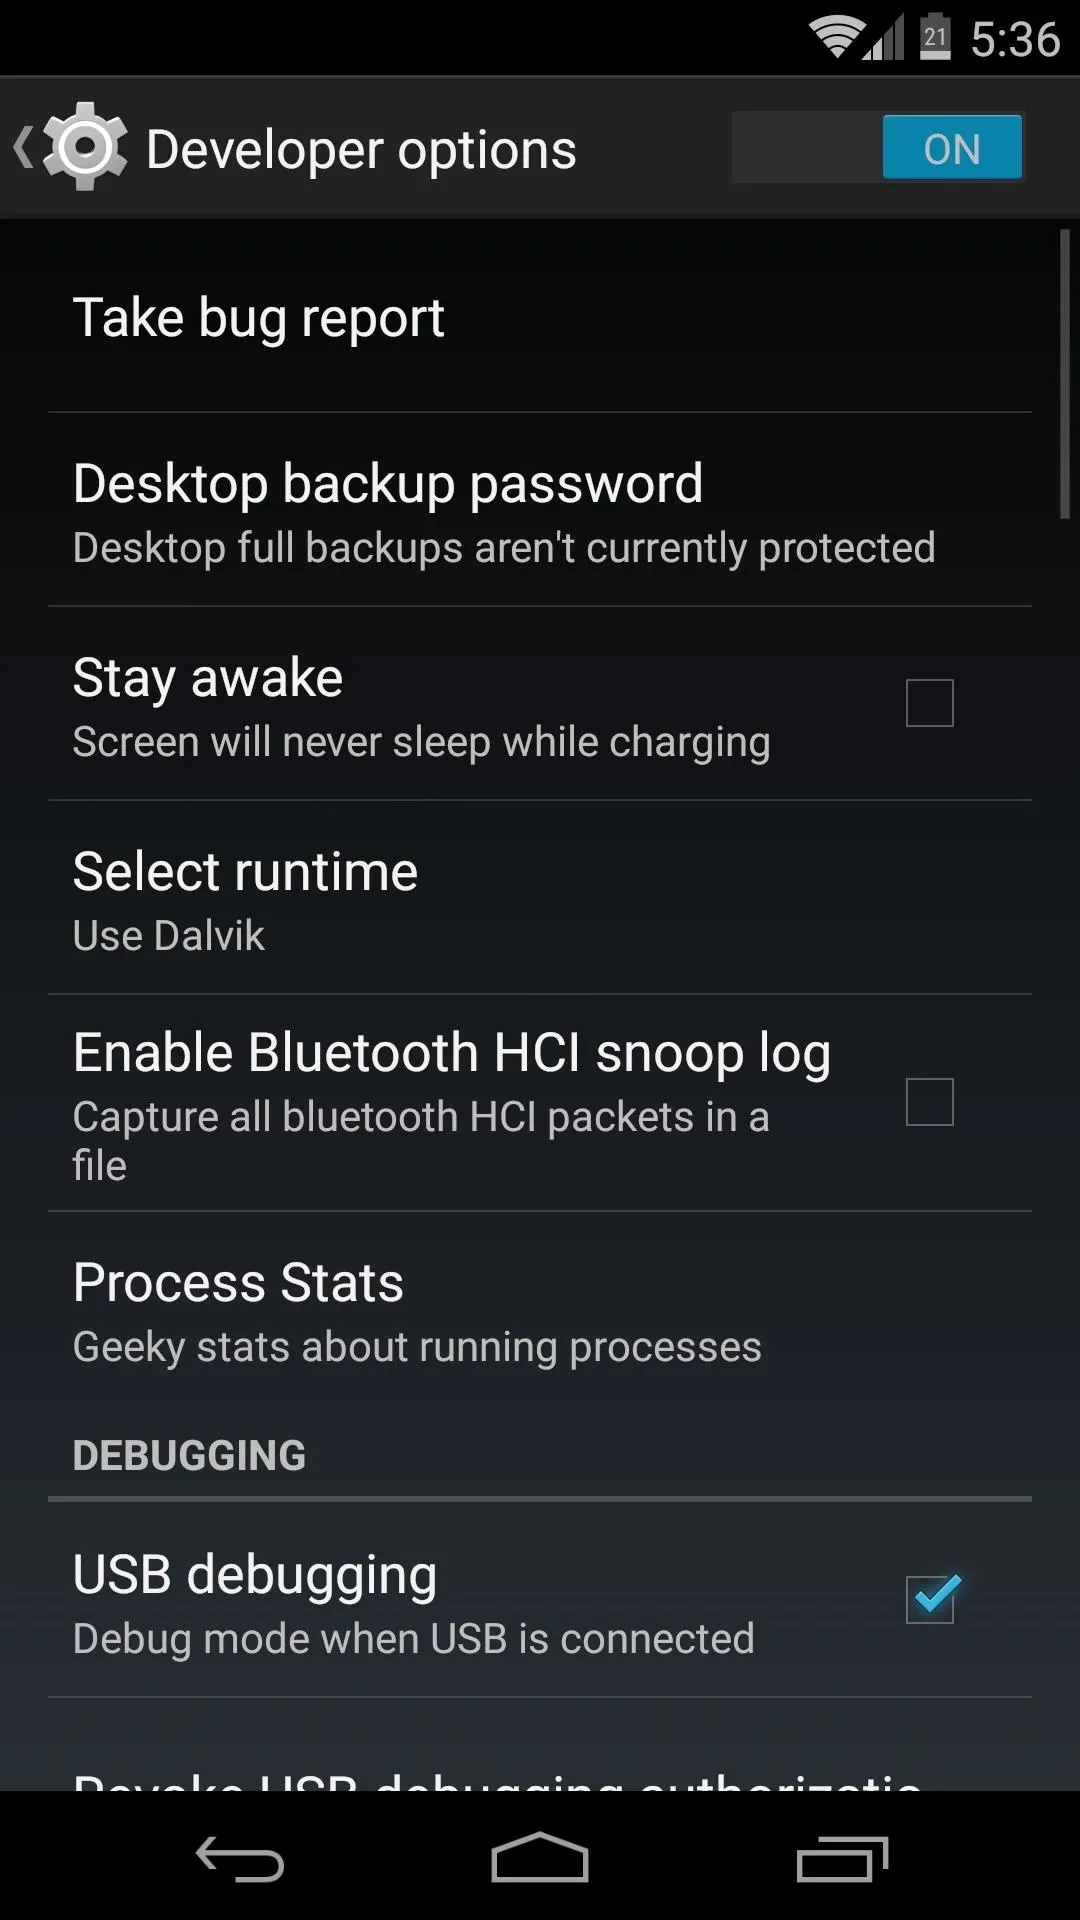


From here, scroll down a bit and tap the entry for Window Animation Scale. Use the following menu to select a value that is smaller than the default of 1x. I've found that .75x is a pretty good value.
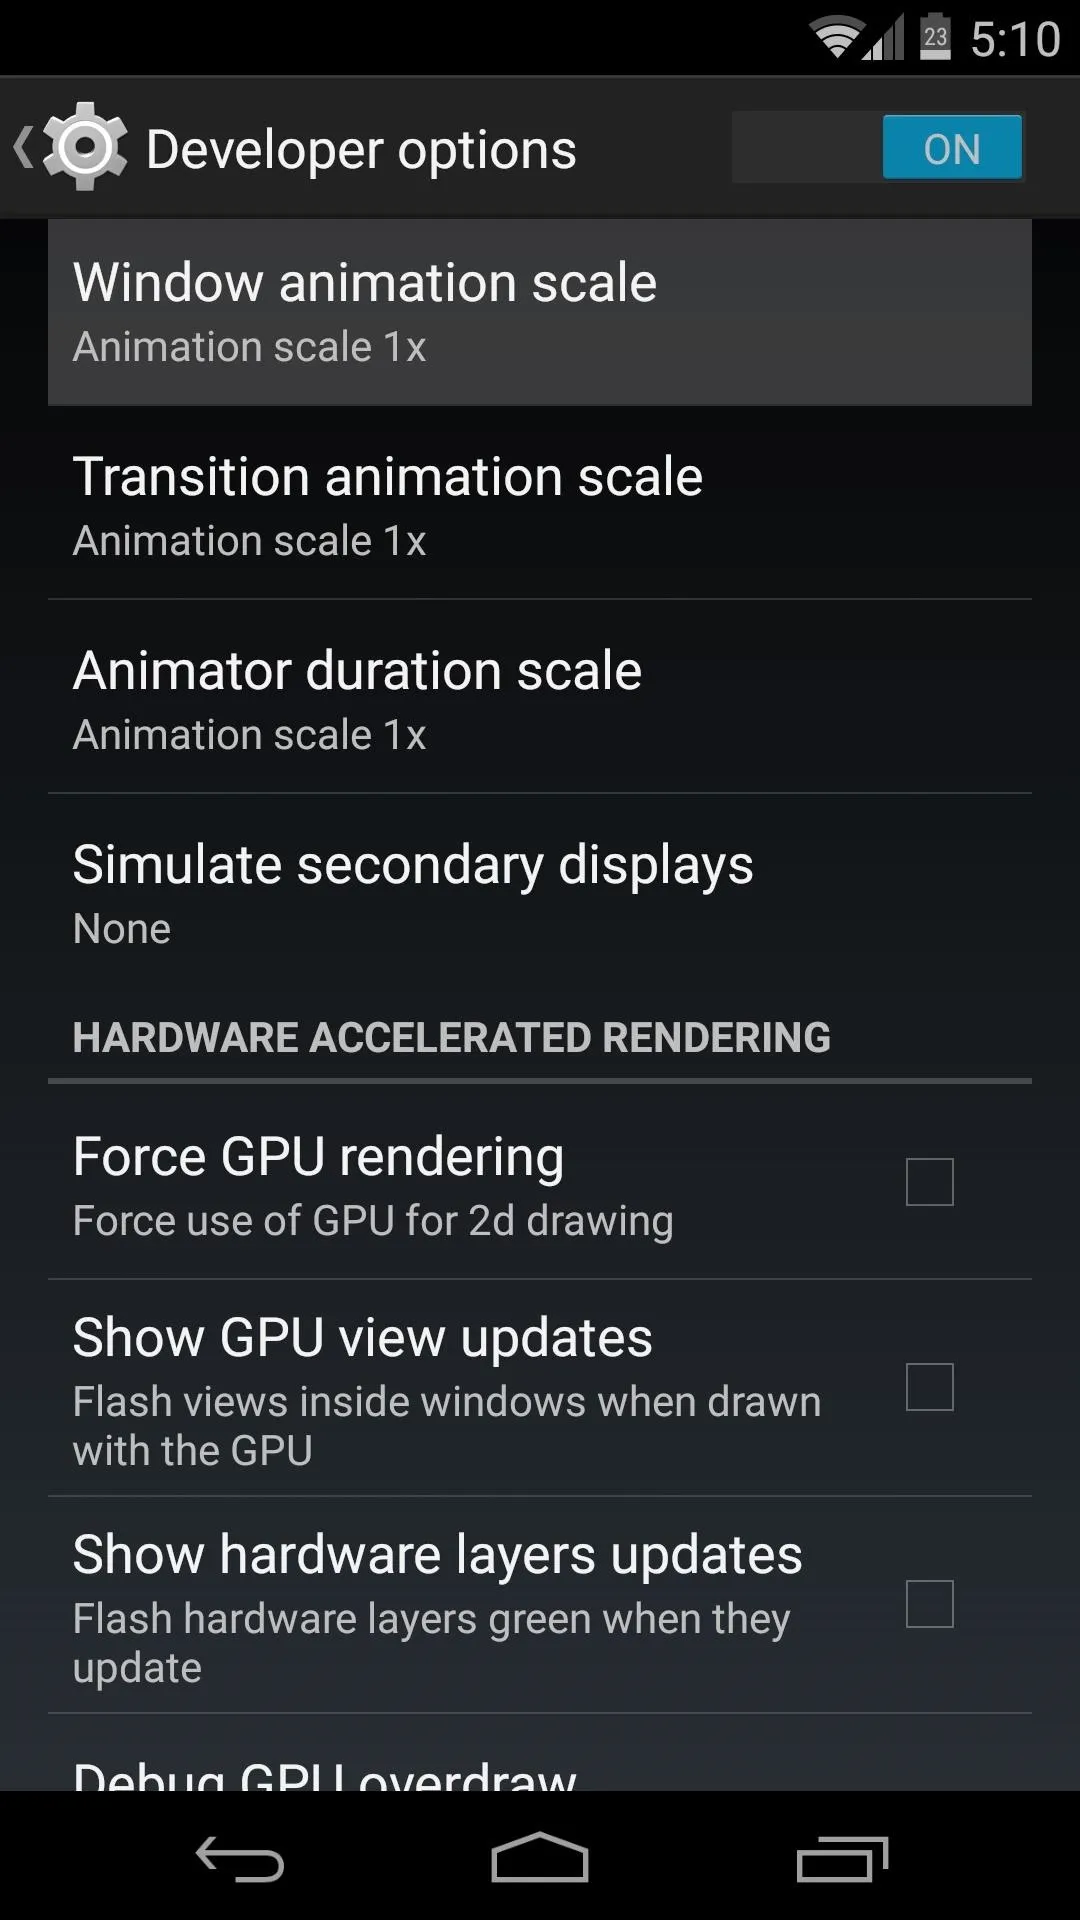
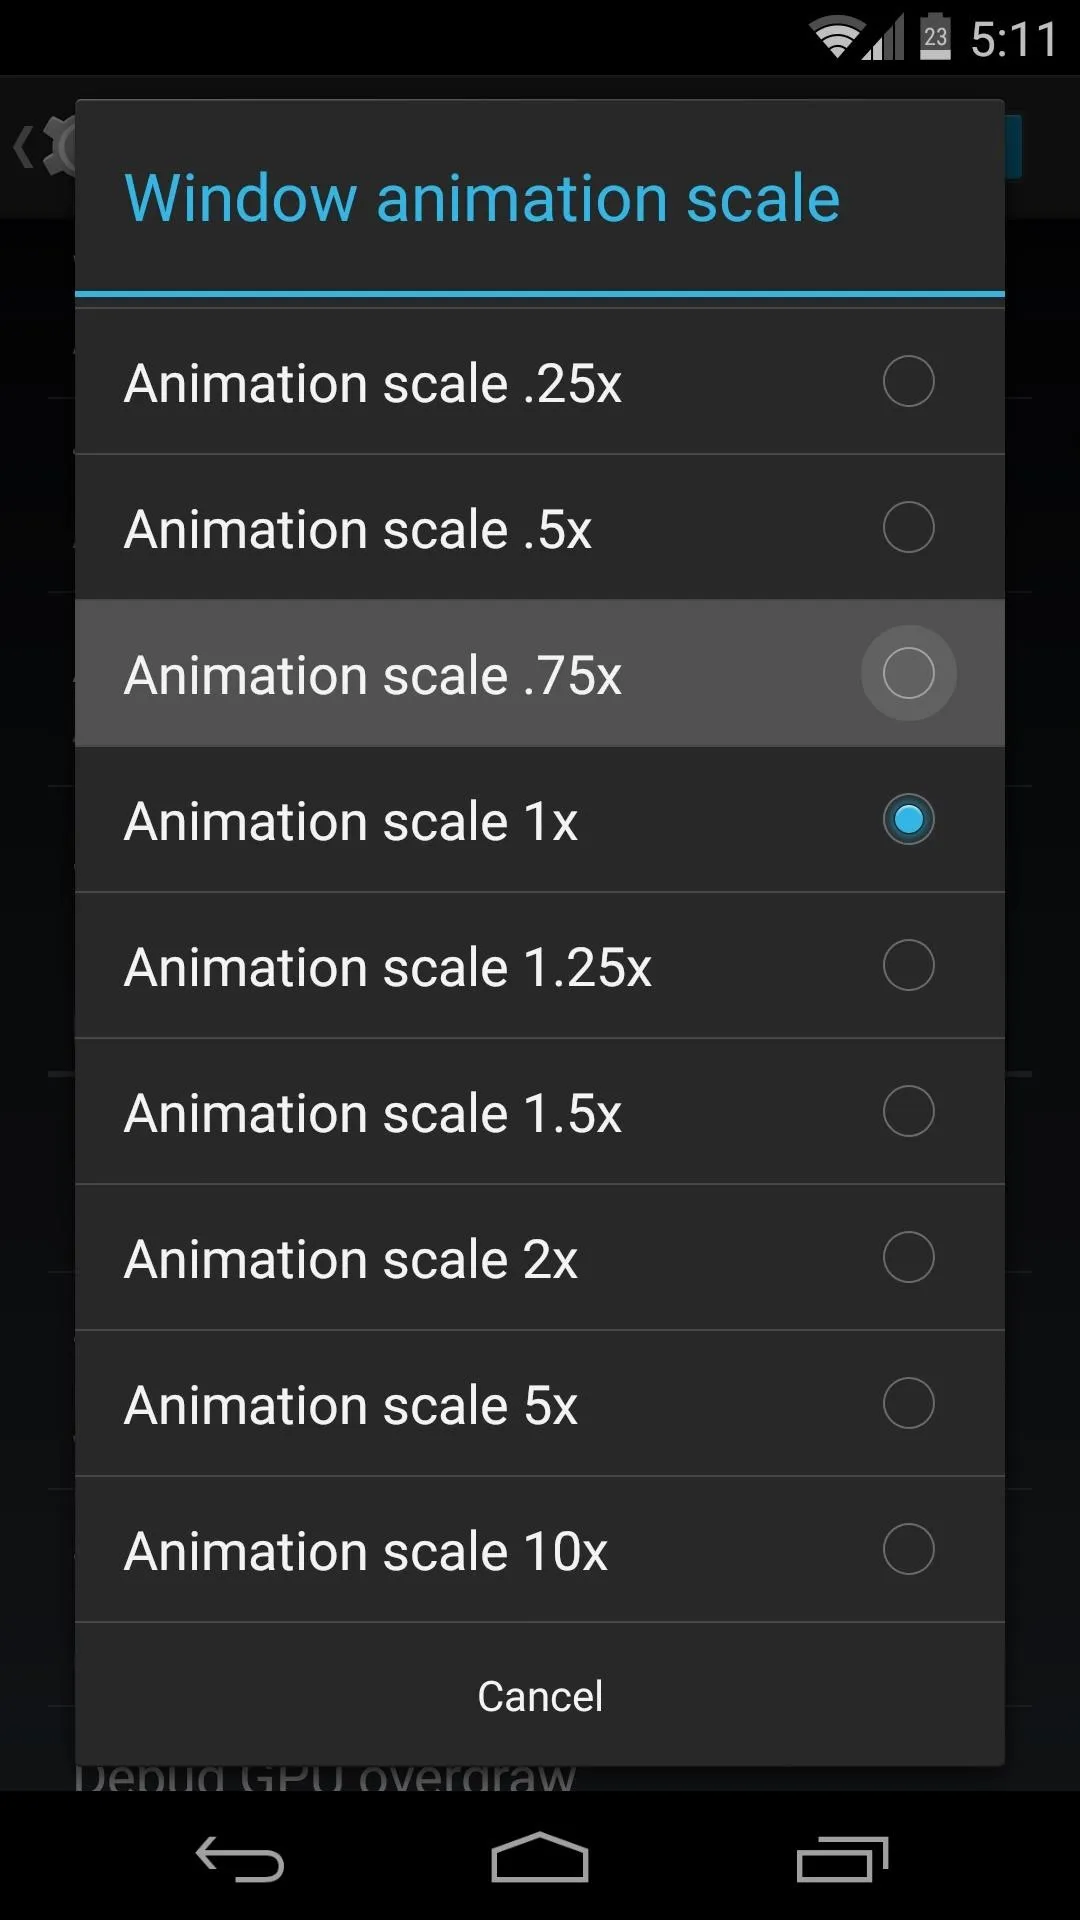


Next, give the same treatment to the Transition Animation Scale entry.
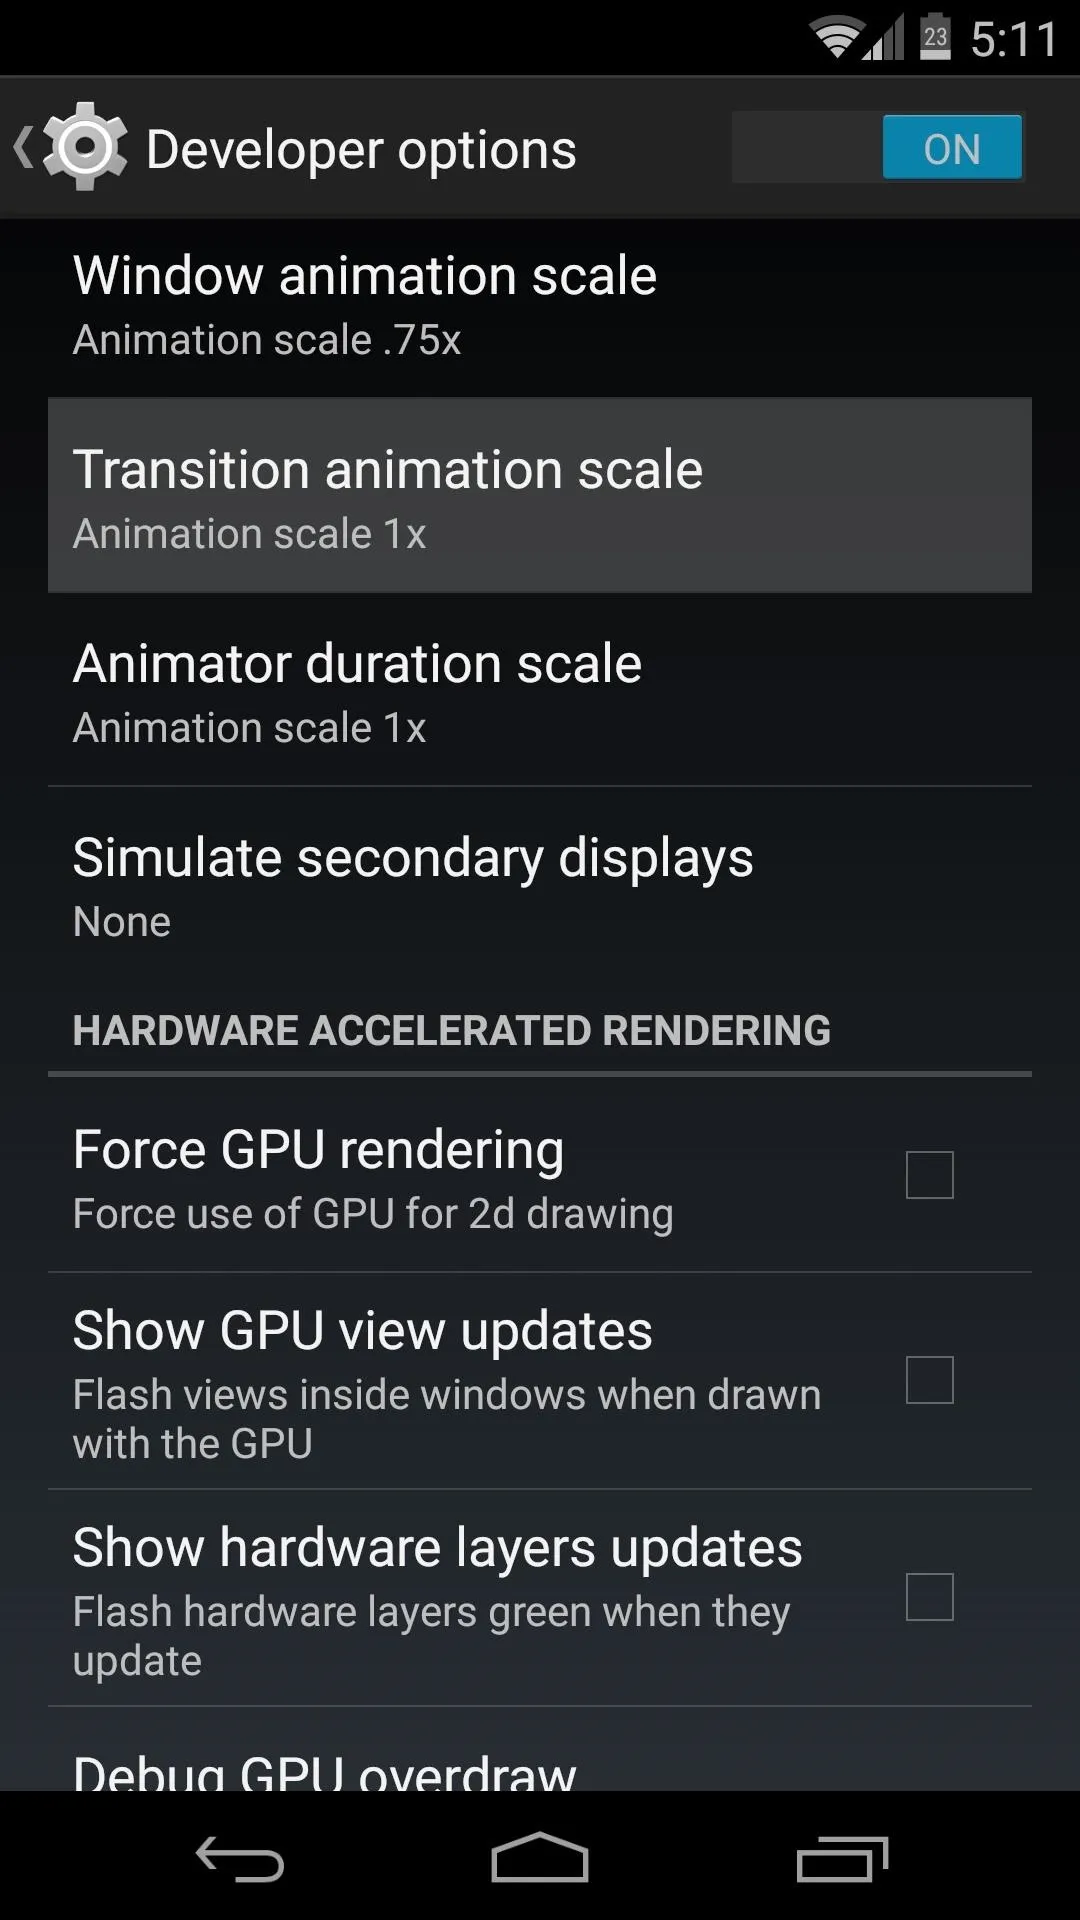
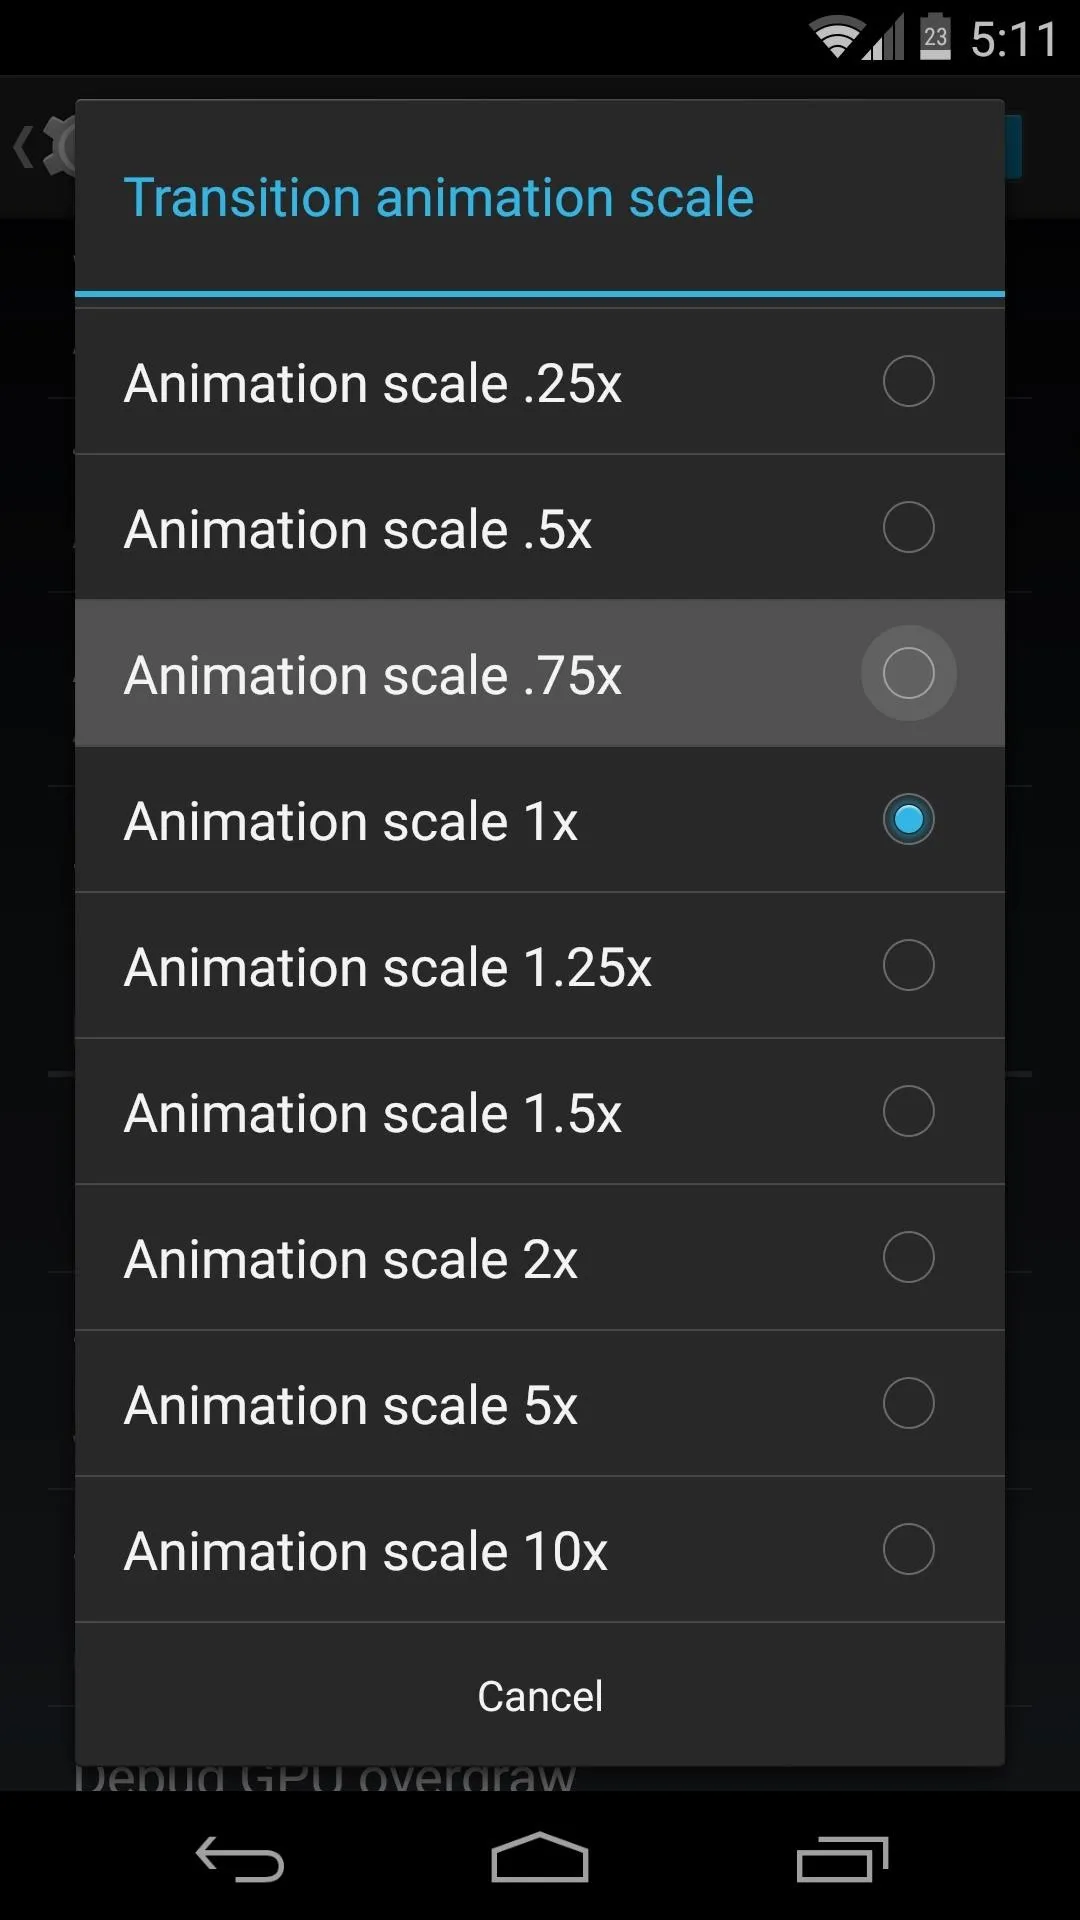


After that, your custom transition animations should look nice and smooth.
Revert Back to Stock Animations (Optional)
If you decide that you'd rather switch back to the stock transition animations after applying one of these mods, there's a fairly simply way.
The ZIP that applied the animations in the first place actually backed up the file with your original system animations attached to it. Unfortunately, you can't restore this file from within Android, as it is an essential component that is required for Android to continue running.
You can, however, restore this file using TWRP recovery. So go ahead and boot into that if you're ready to switch back to your stock animations.
Mount the System Partition
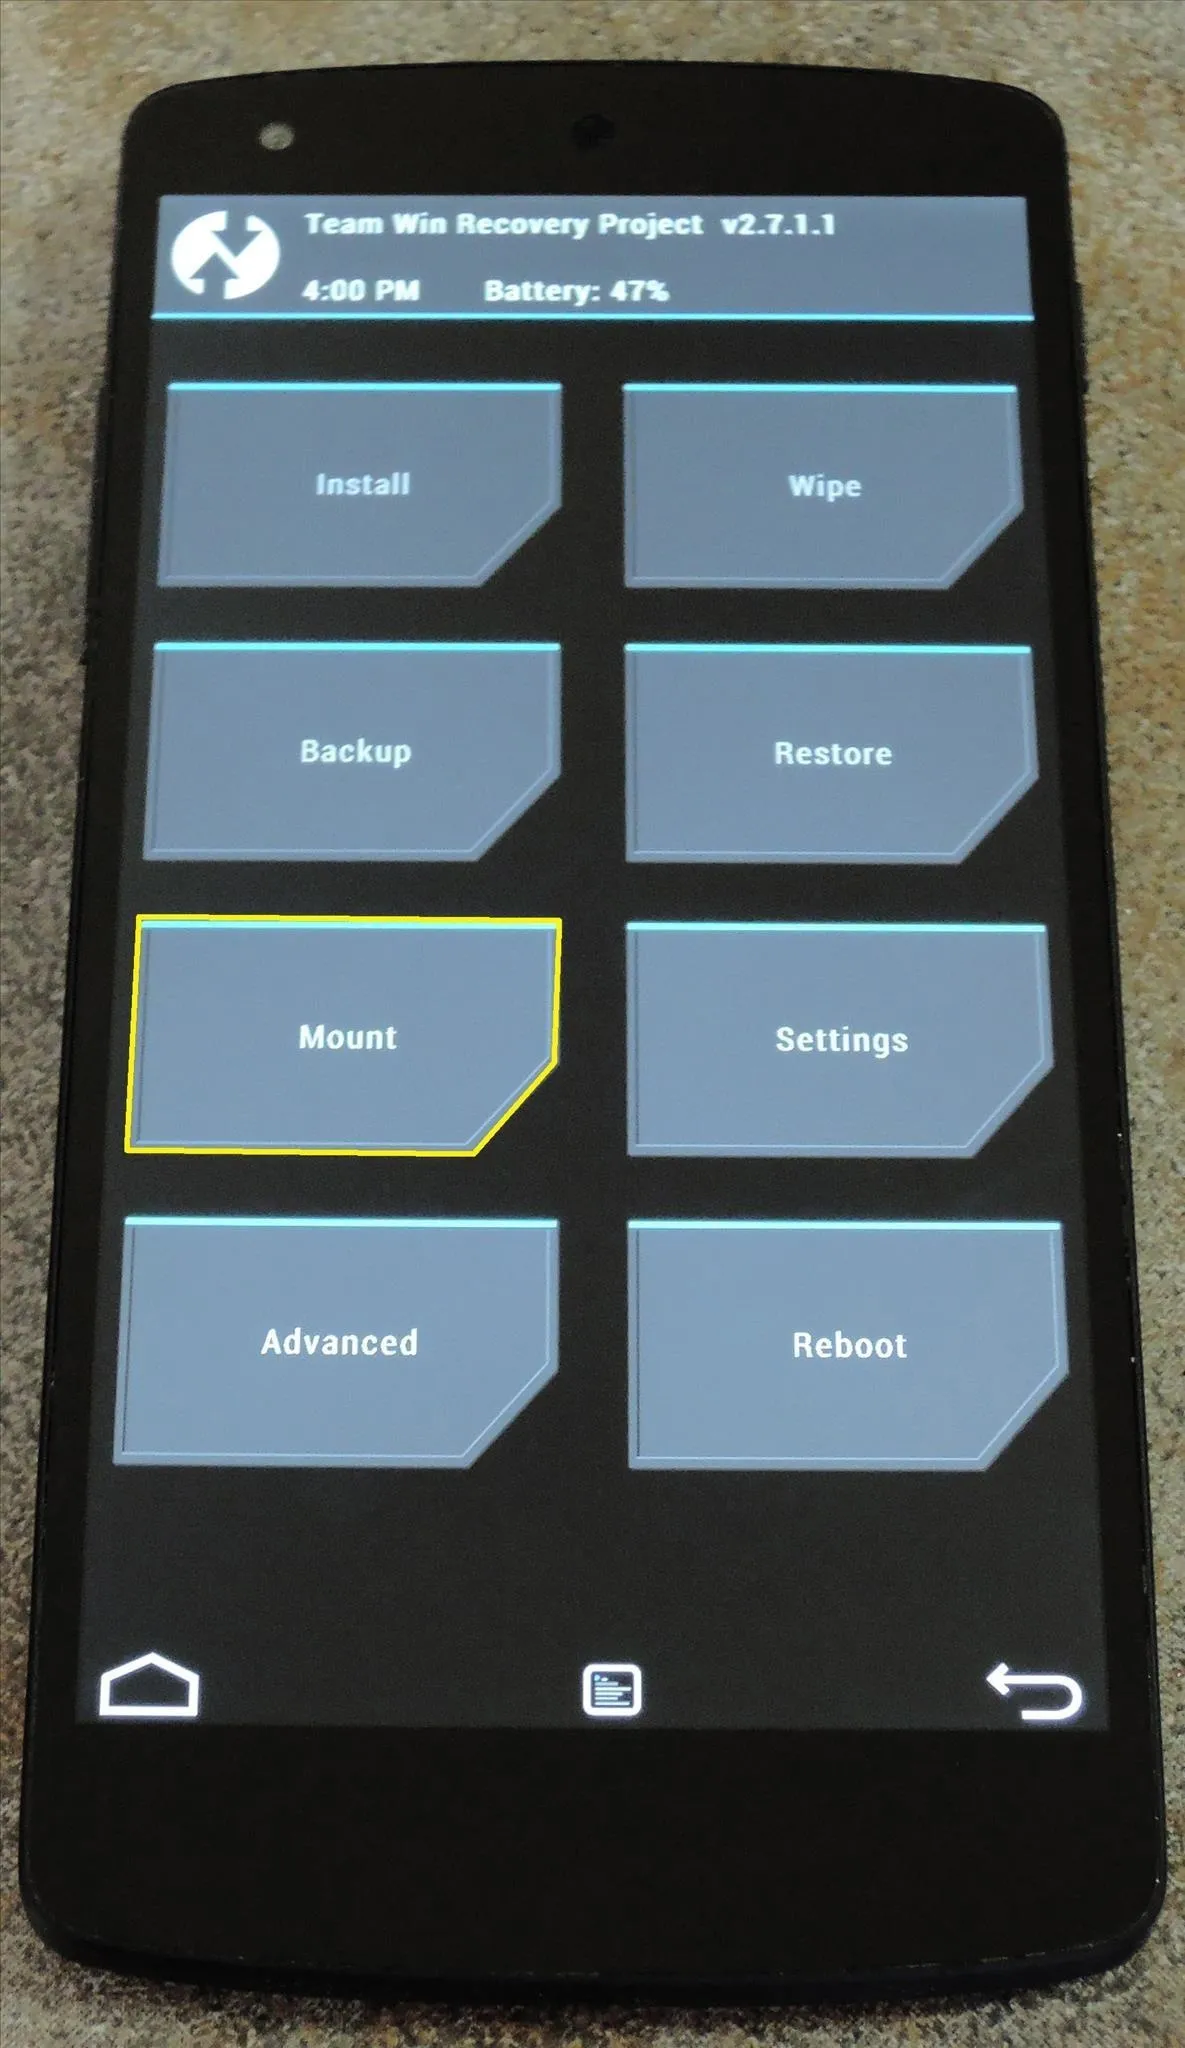
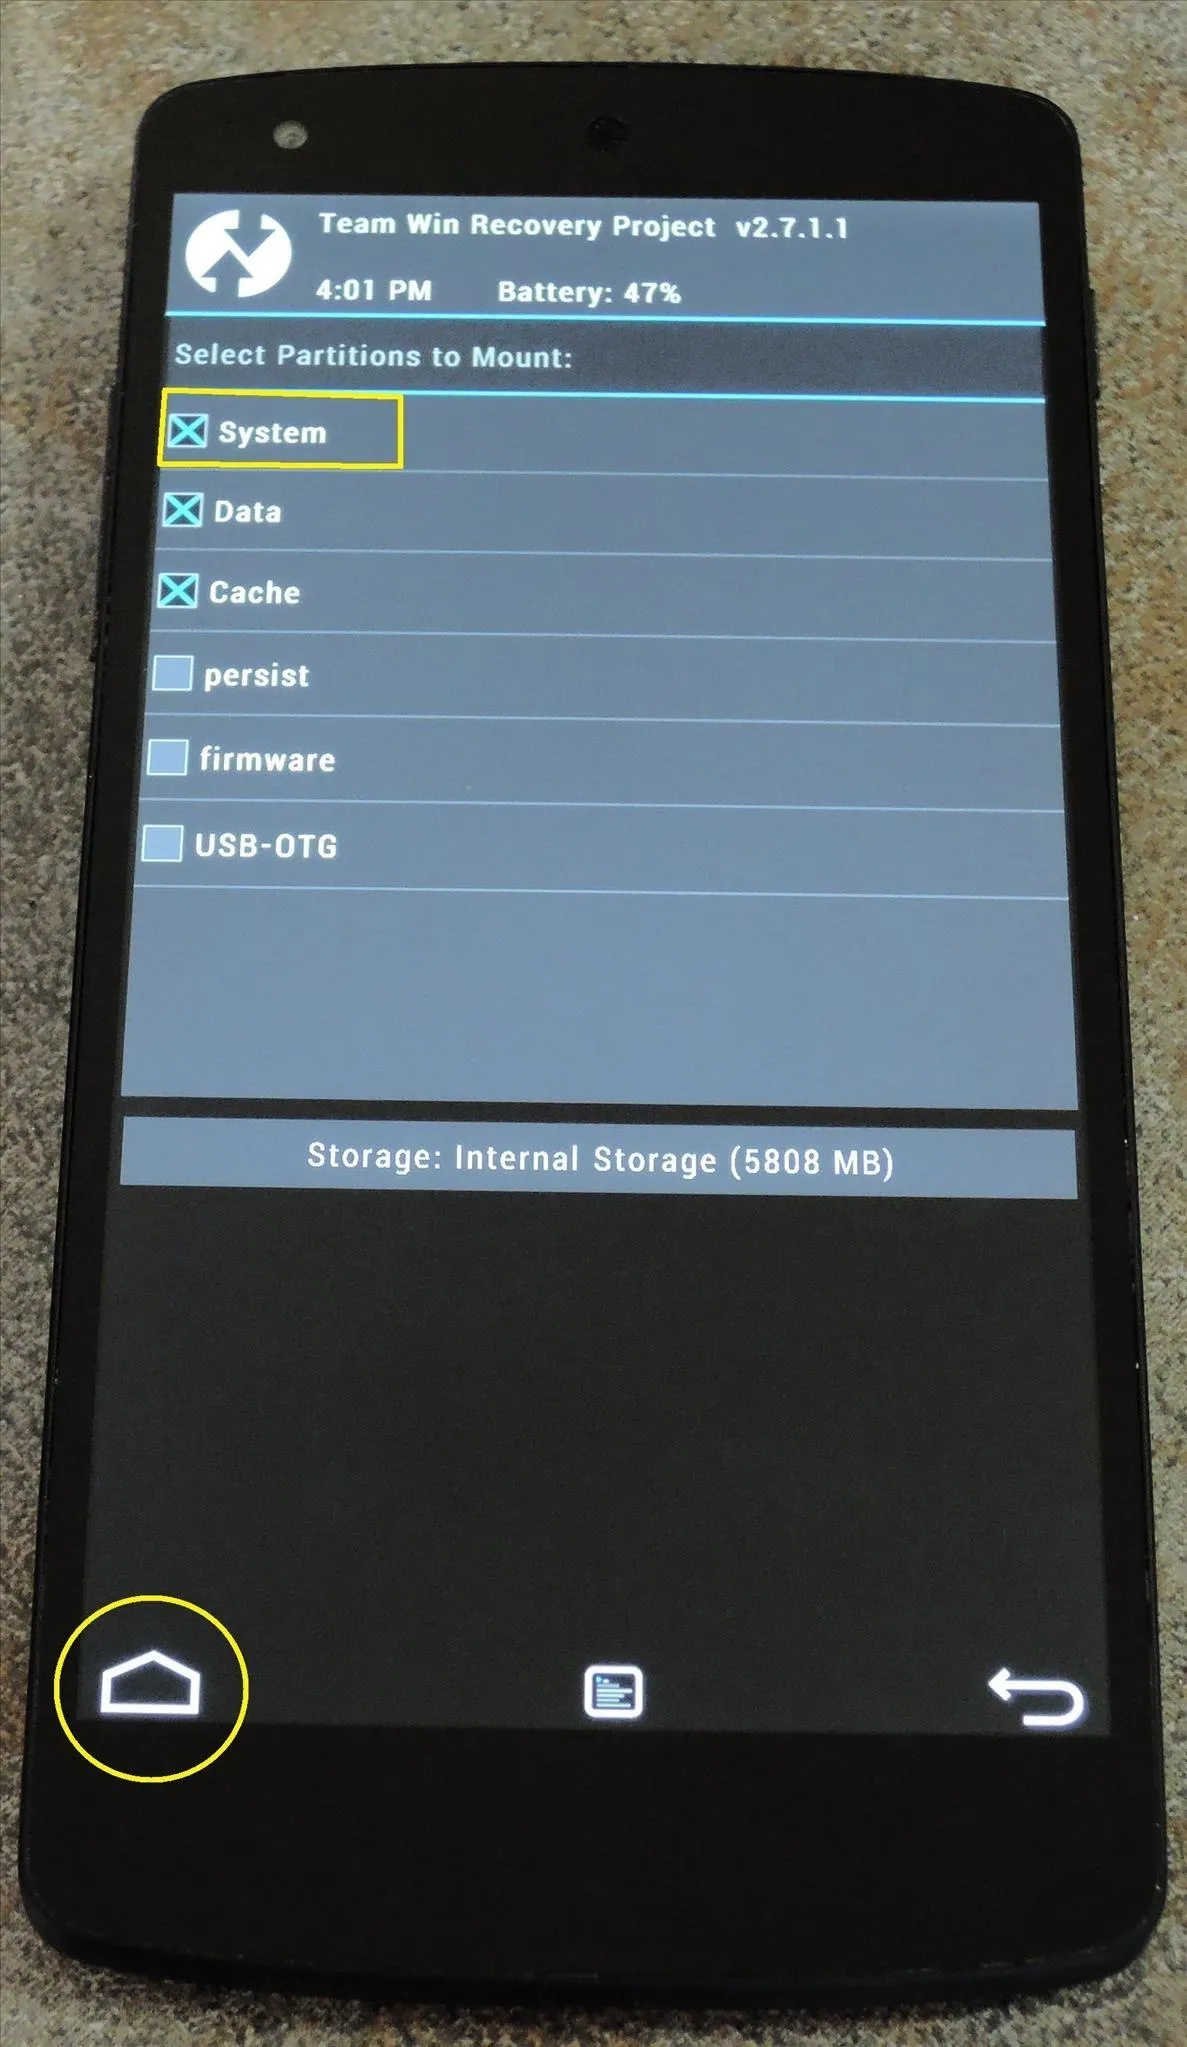
First up, you'll need to mount the System partition. From TWRP's home screen, tap the Mount button. Next, tick the box next to the System entry, then tap the Home icon at the bottom-left.


Restore the Framework-res.apk File to Its Original Location
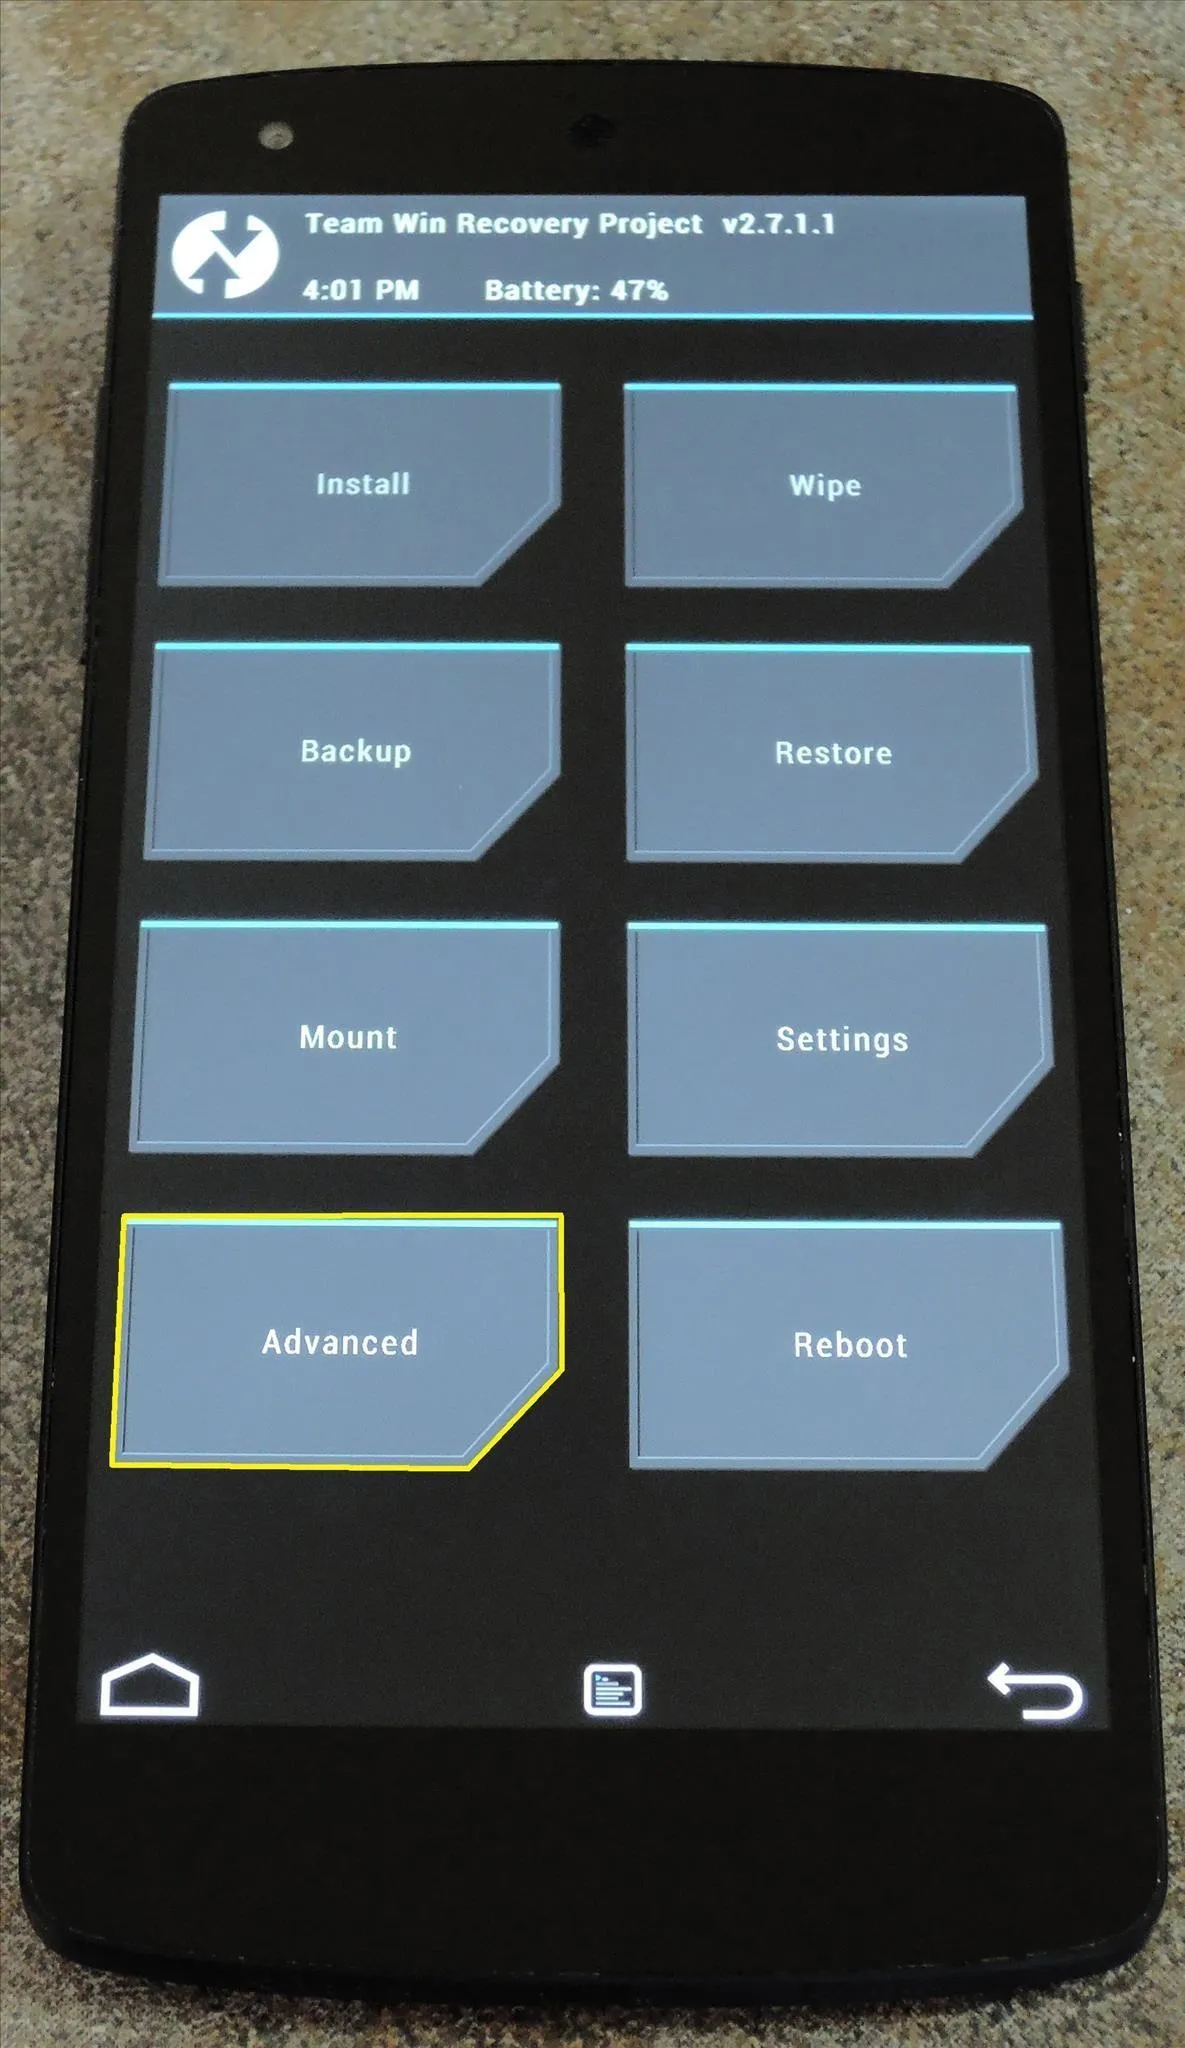
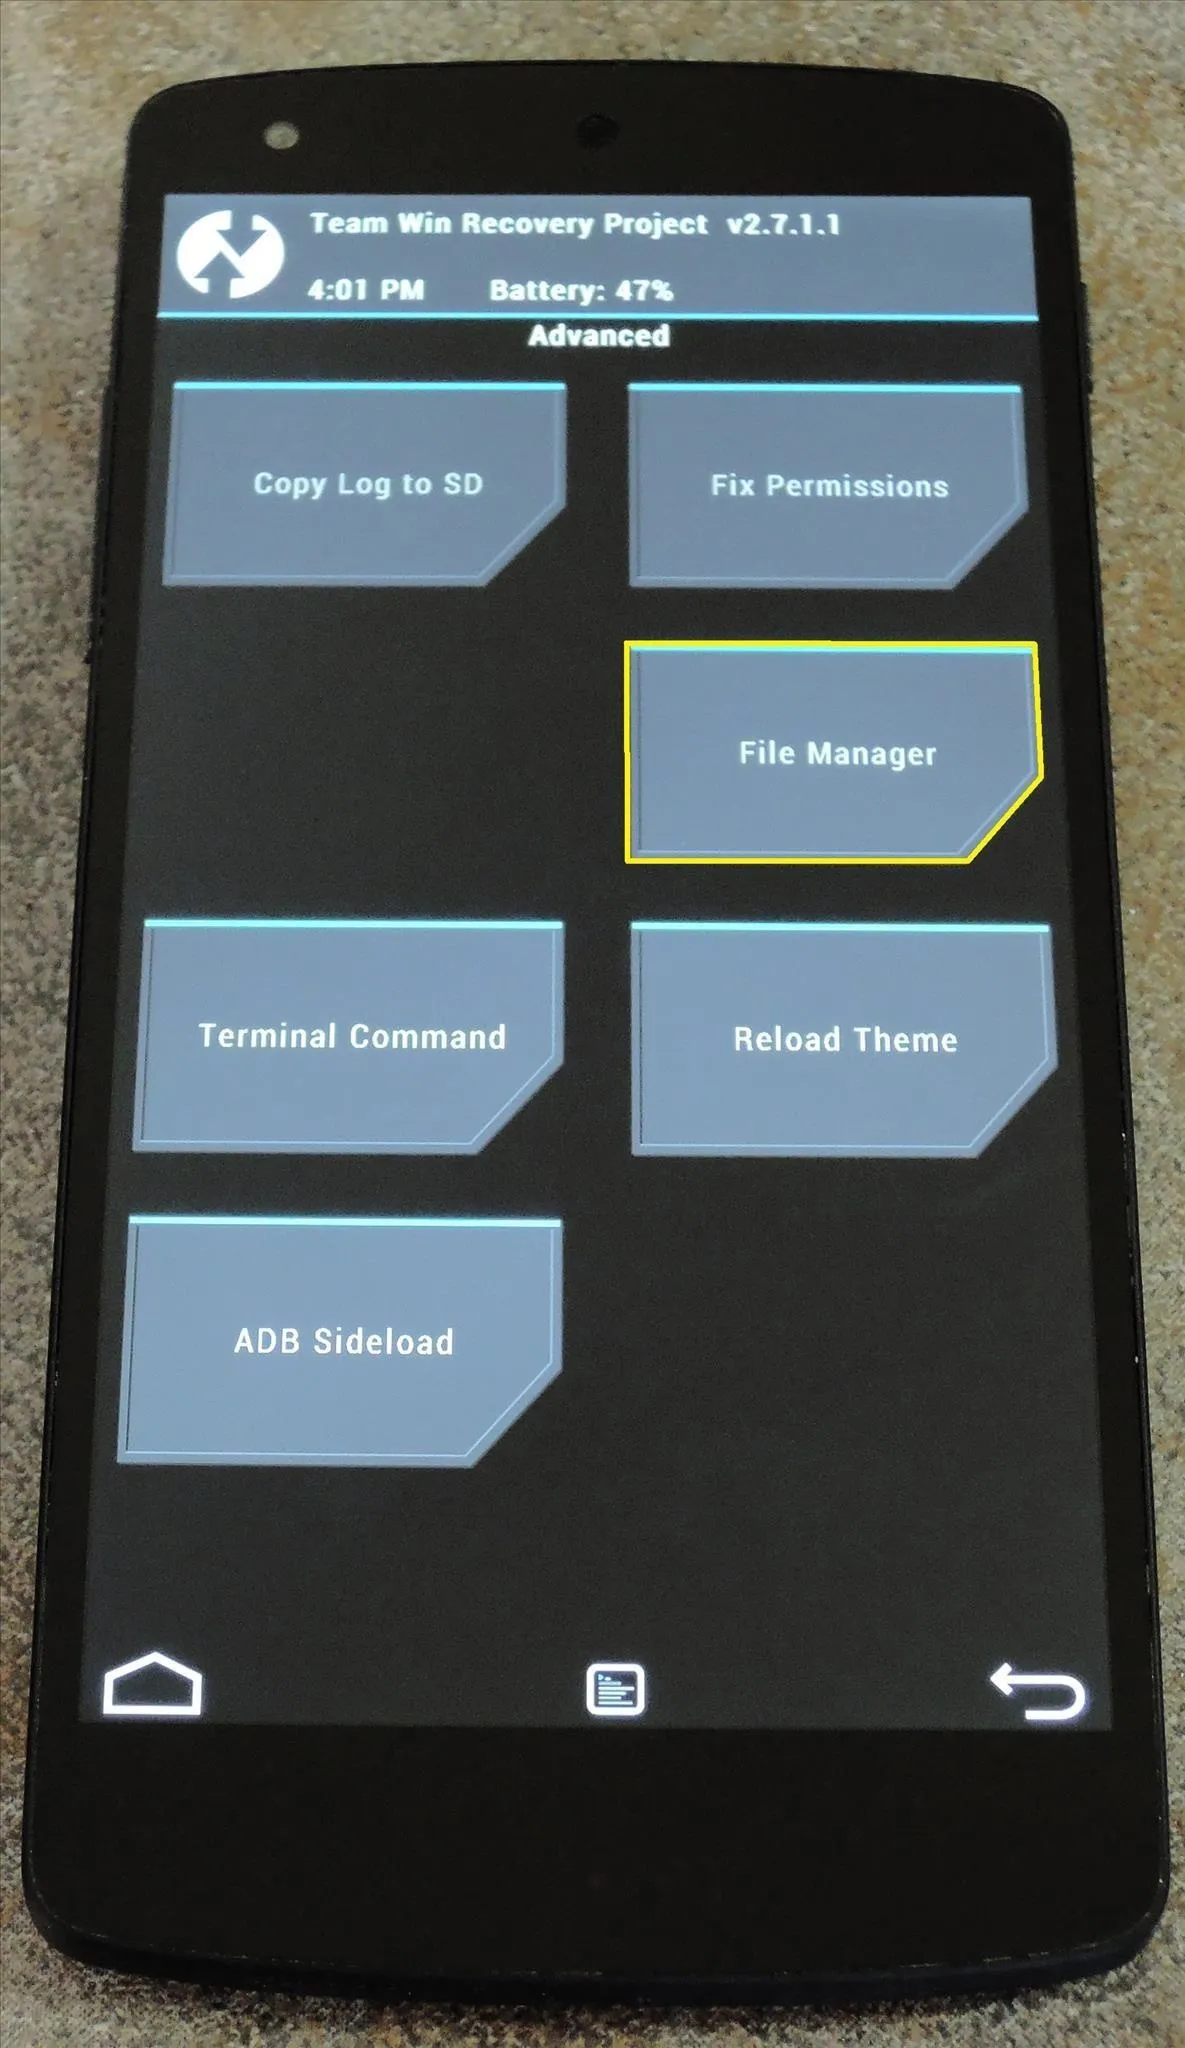
With the system partition mounted, you can now copy the file back to its original location. Start by tapping the Advanced button, then choose File Manager from the following menu.


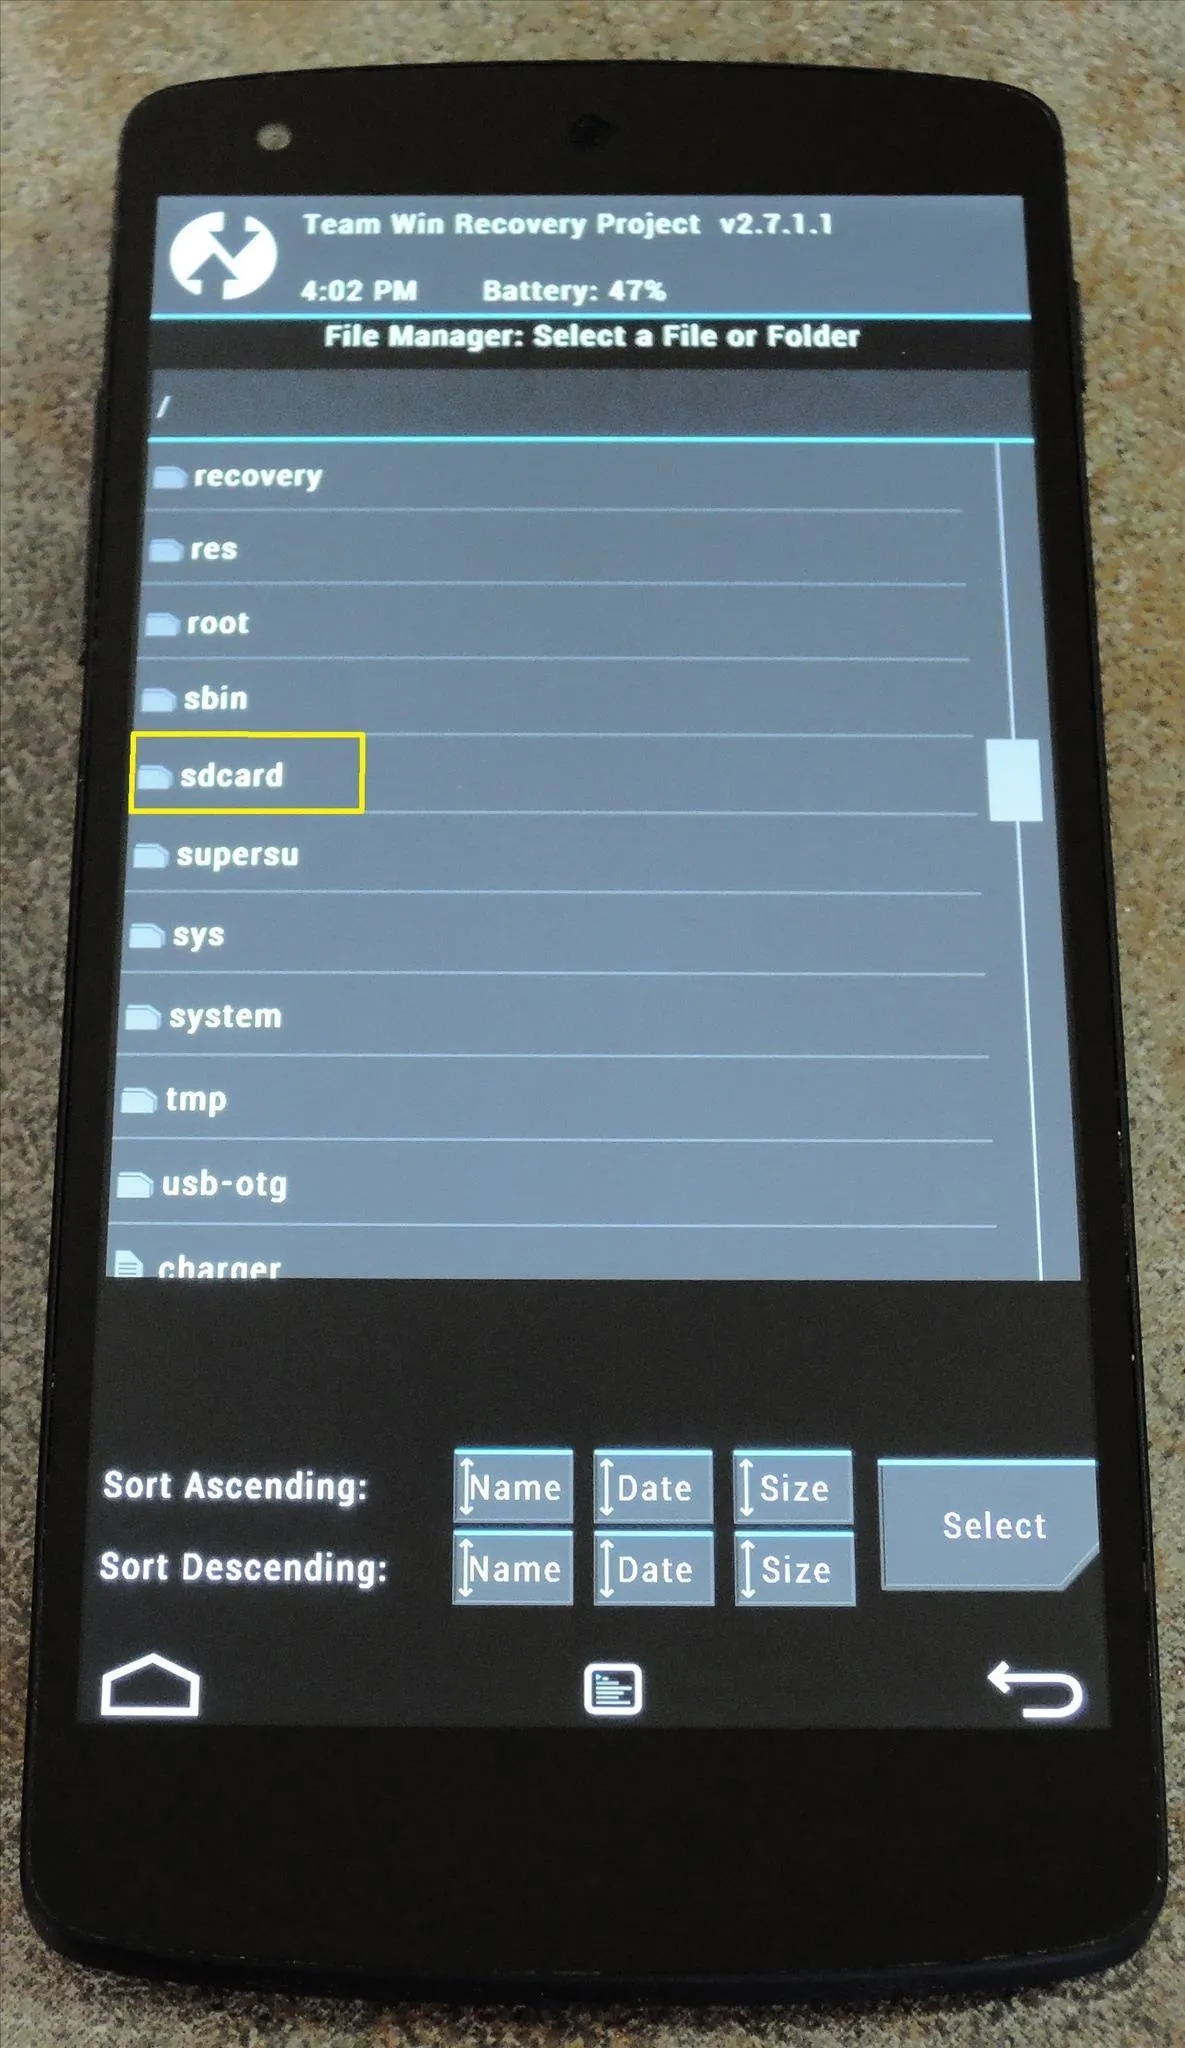
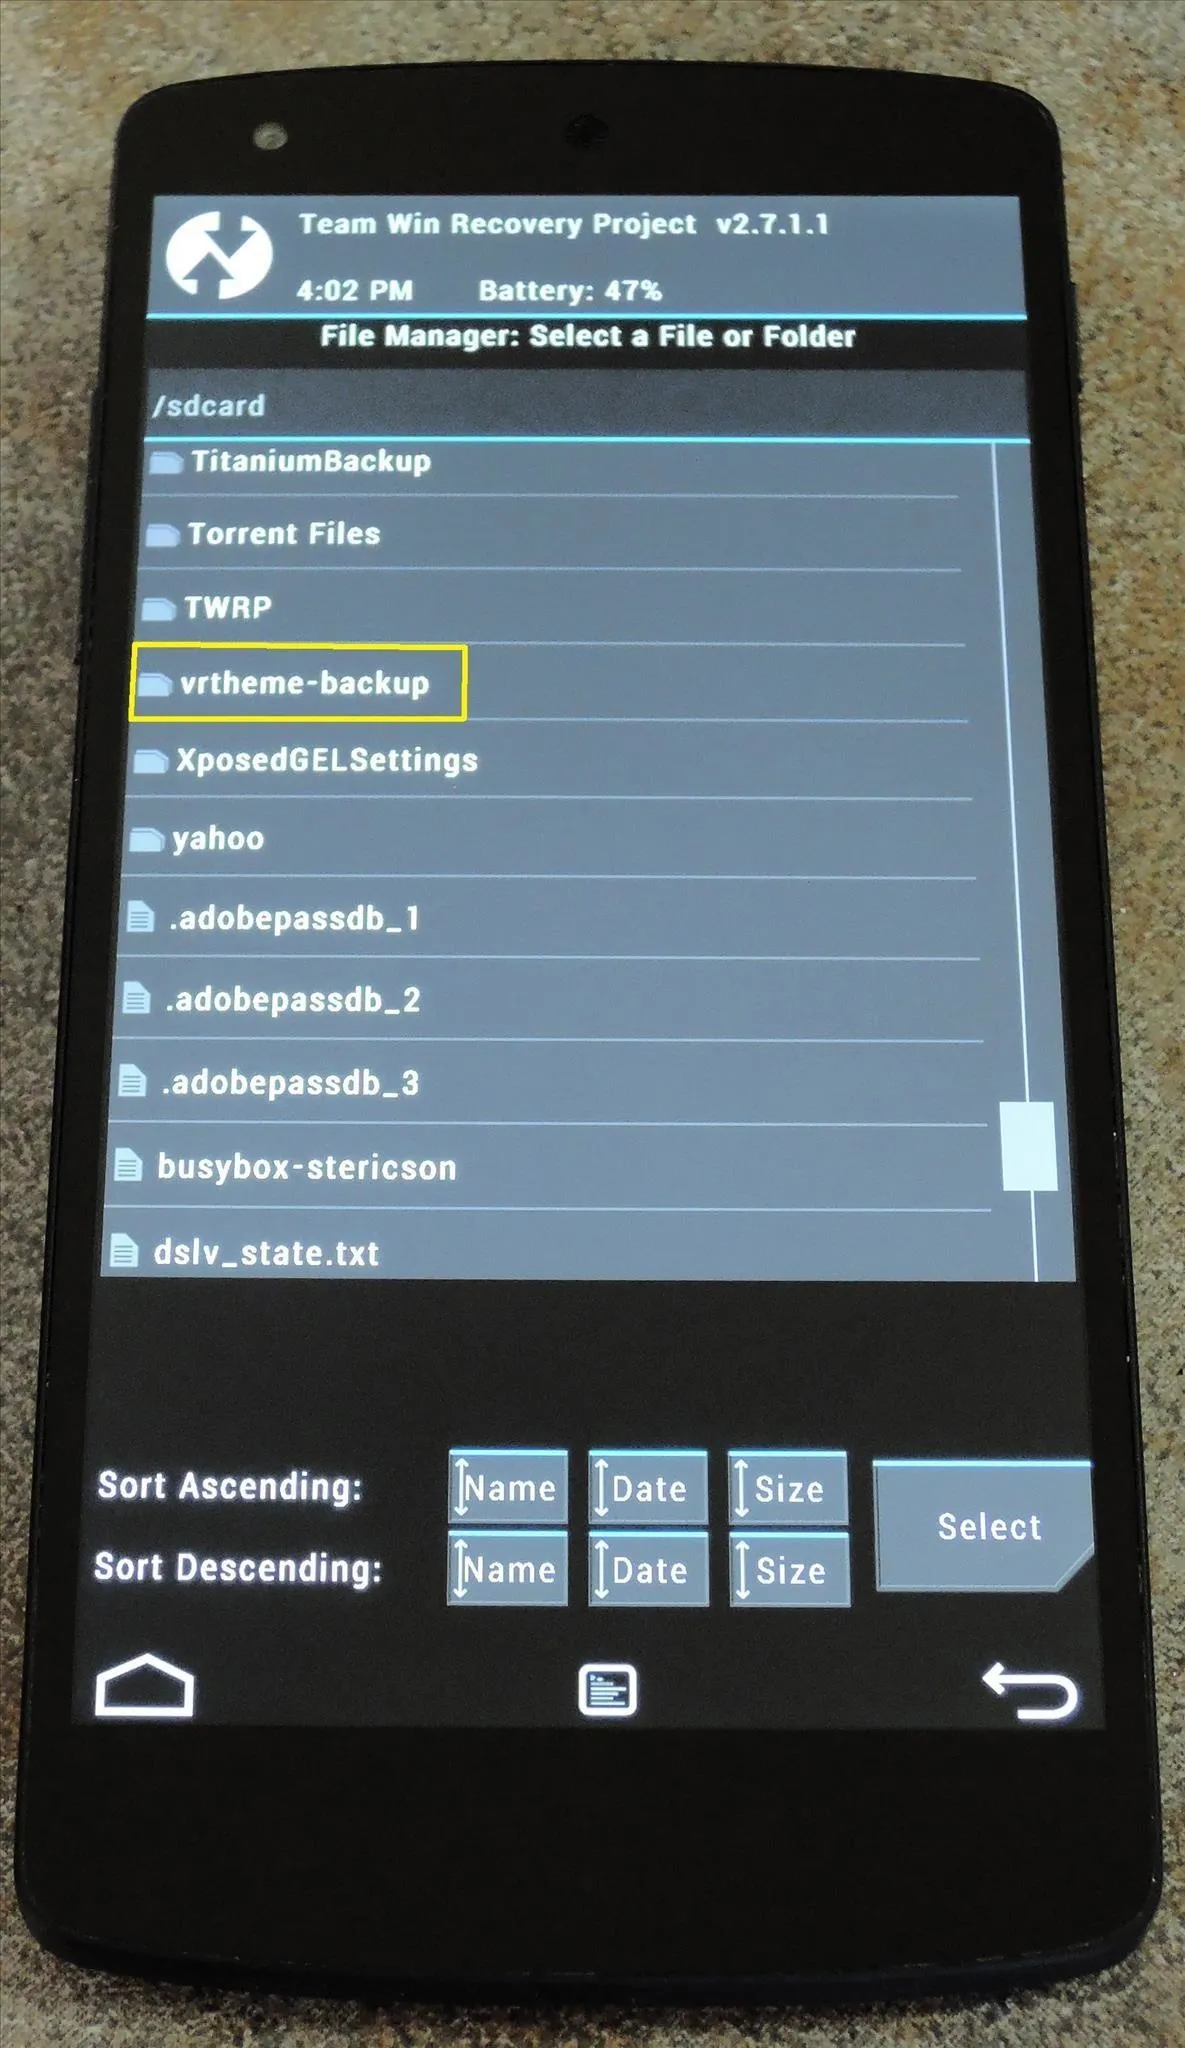
Use this file browser to navigate to the SD Card entry, then head into the vrtheme-backup folder.


From here, head into the system folder, then the framework folder within that.
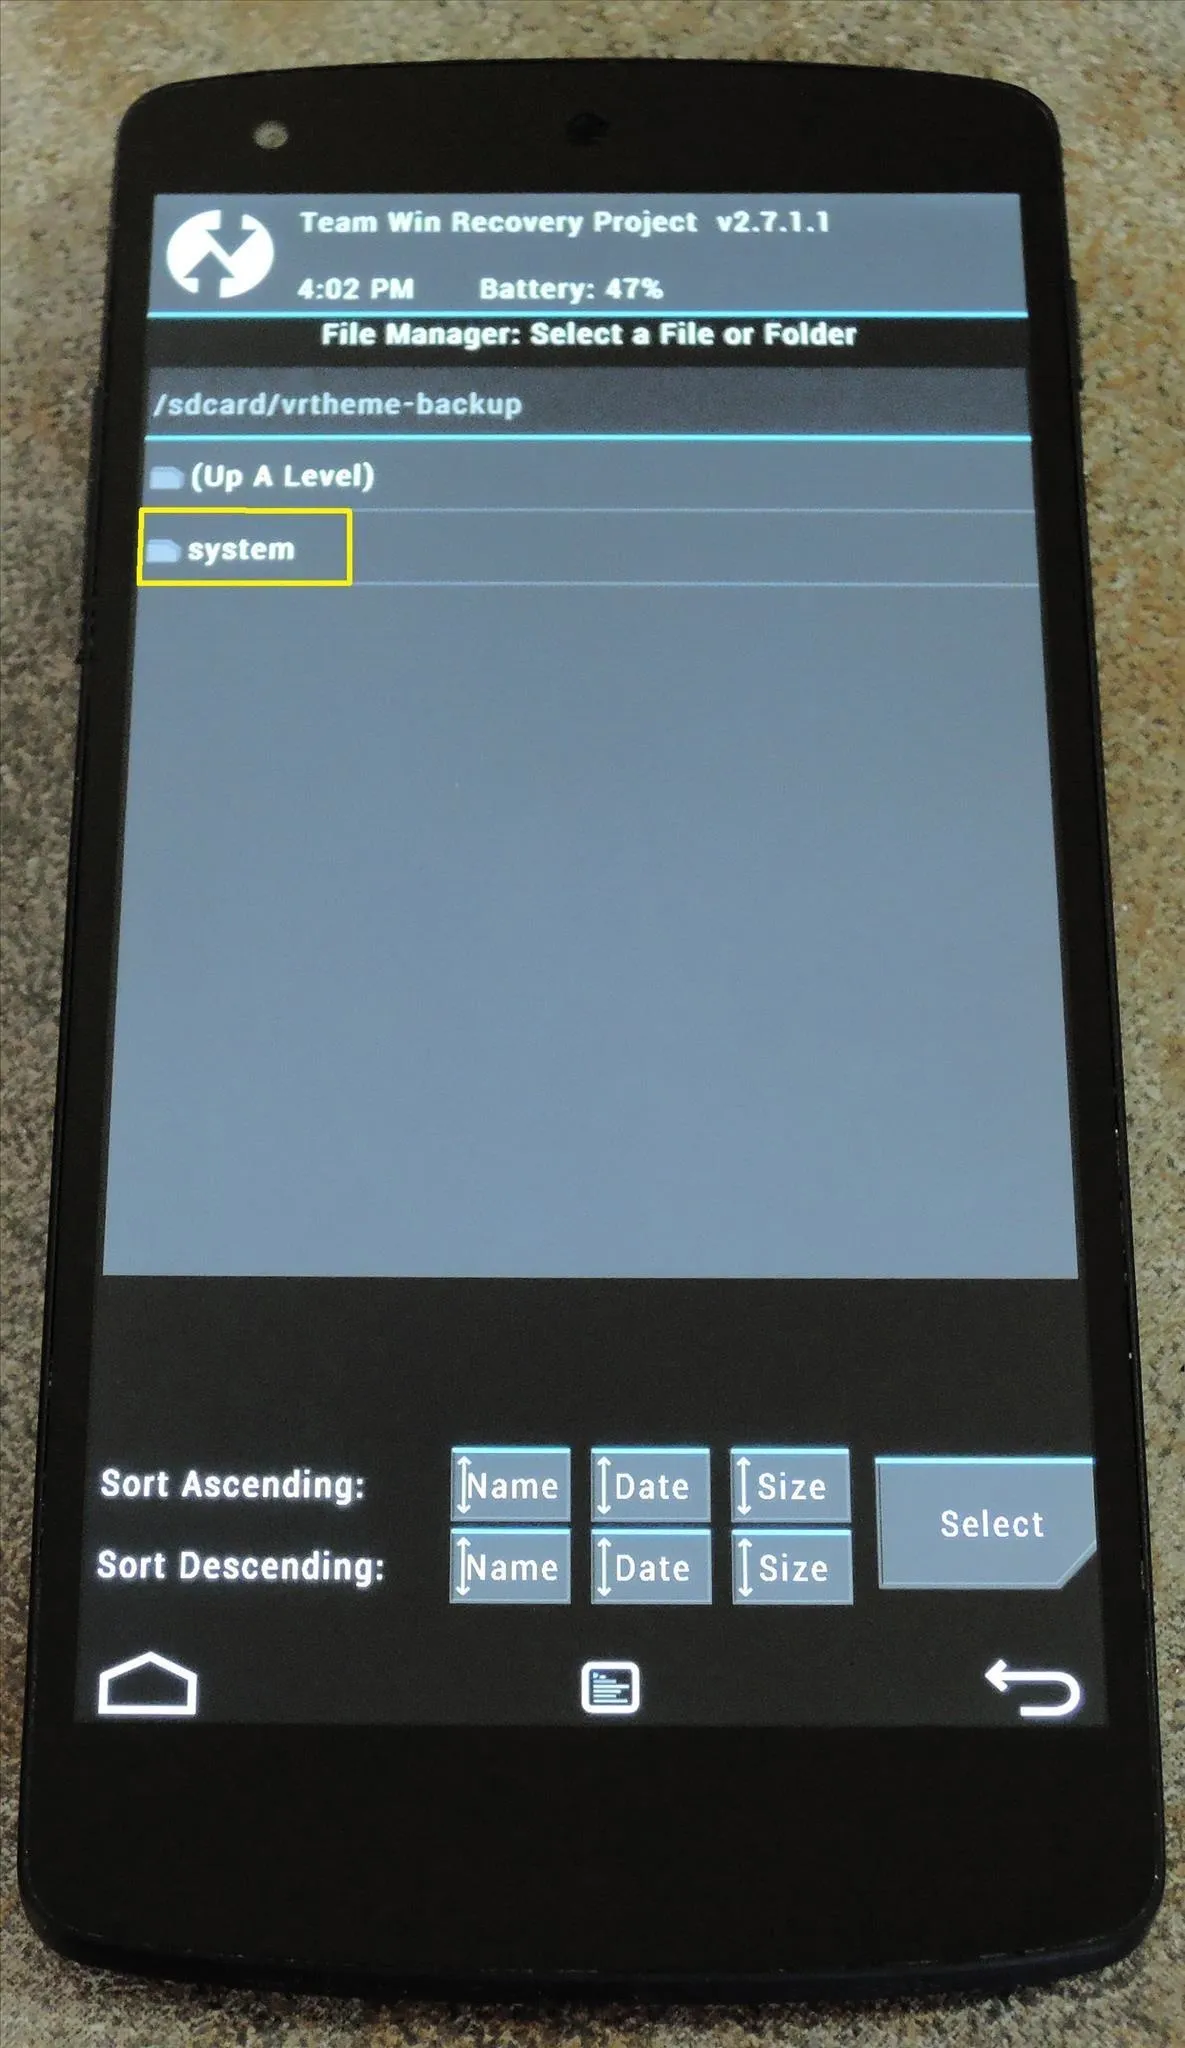
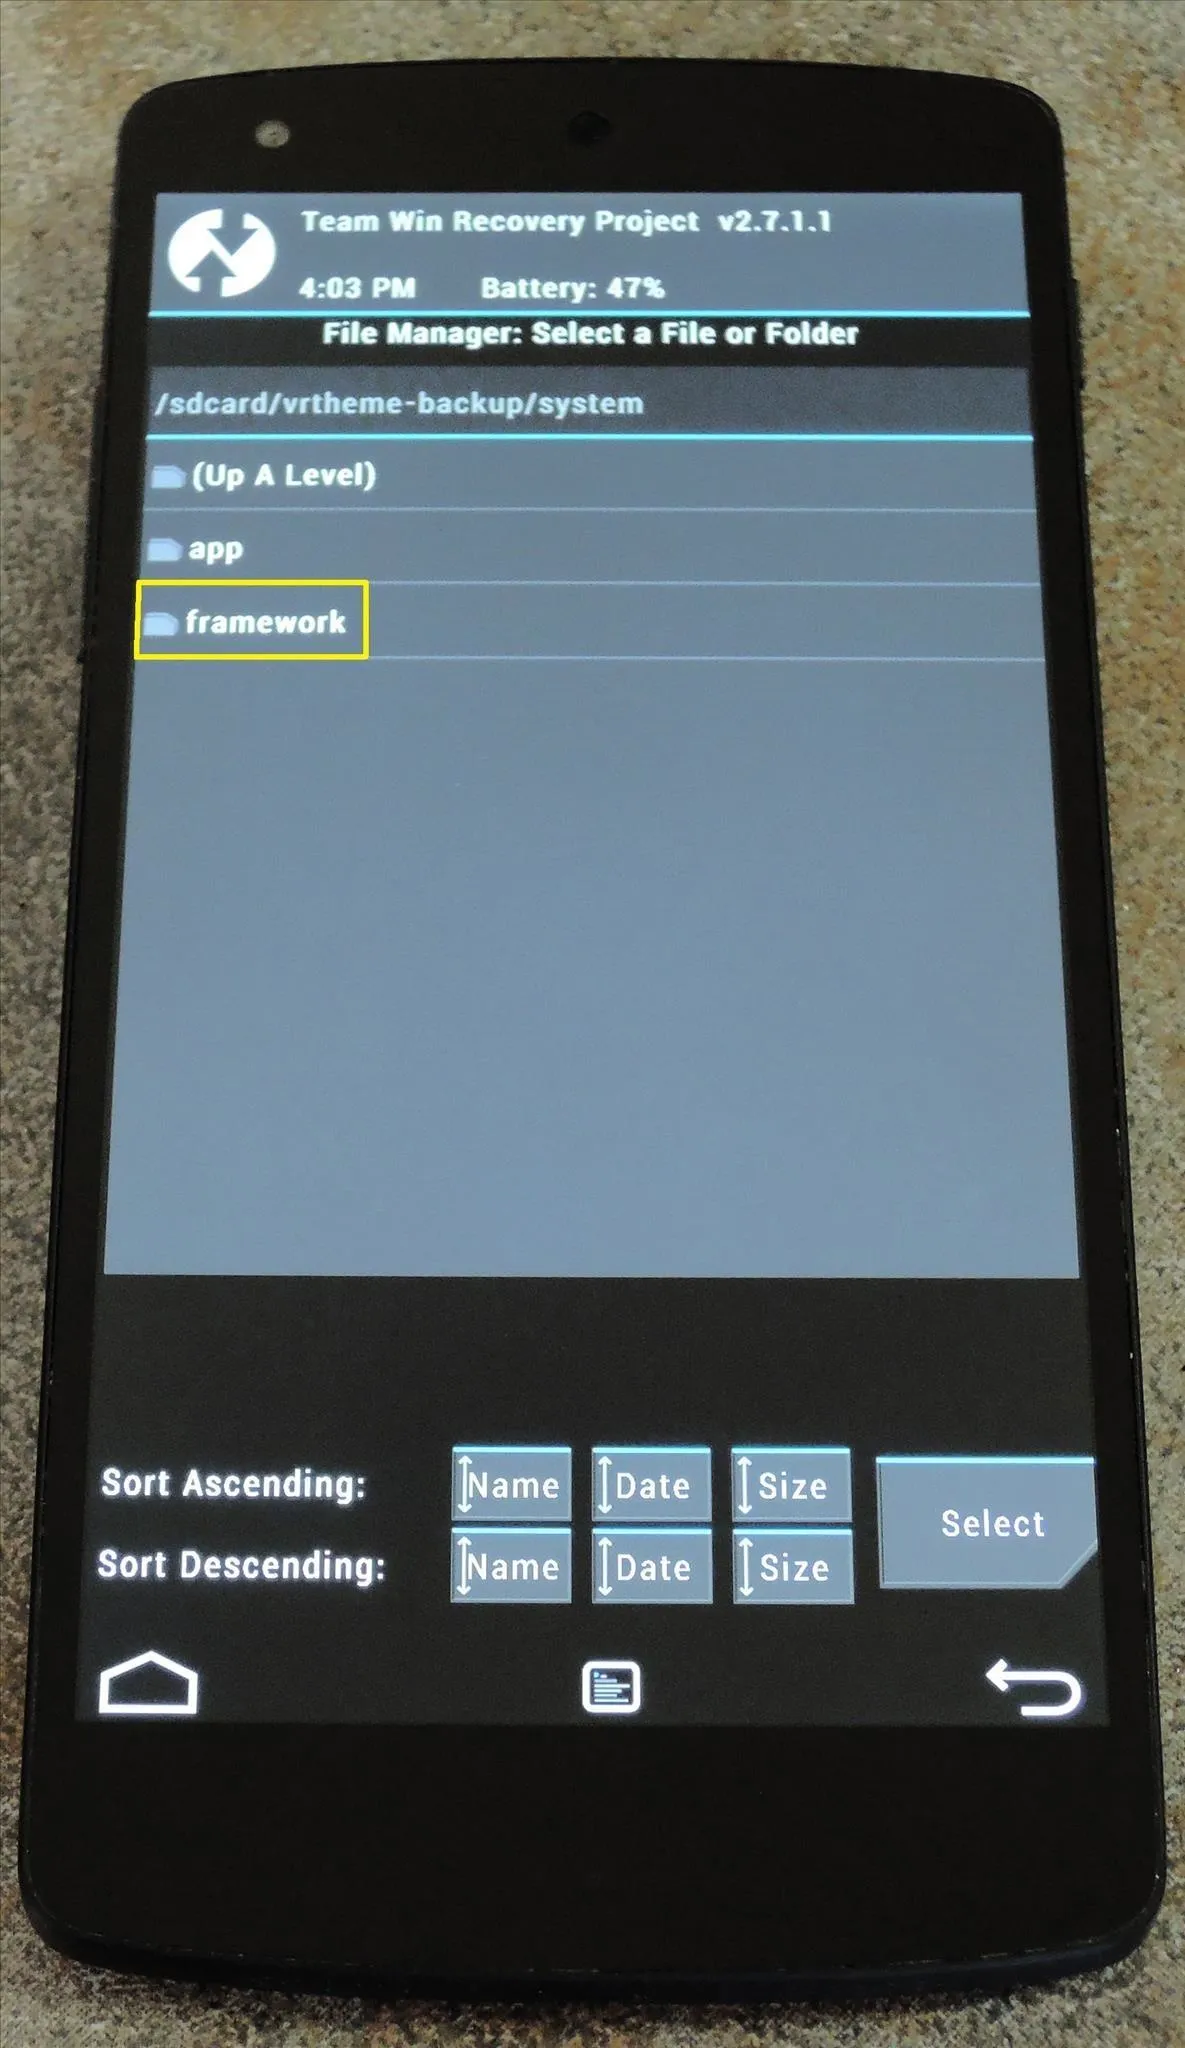


Here you'll find your original framework-res.apk file. Tap it, then select Copy from the following menu.
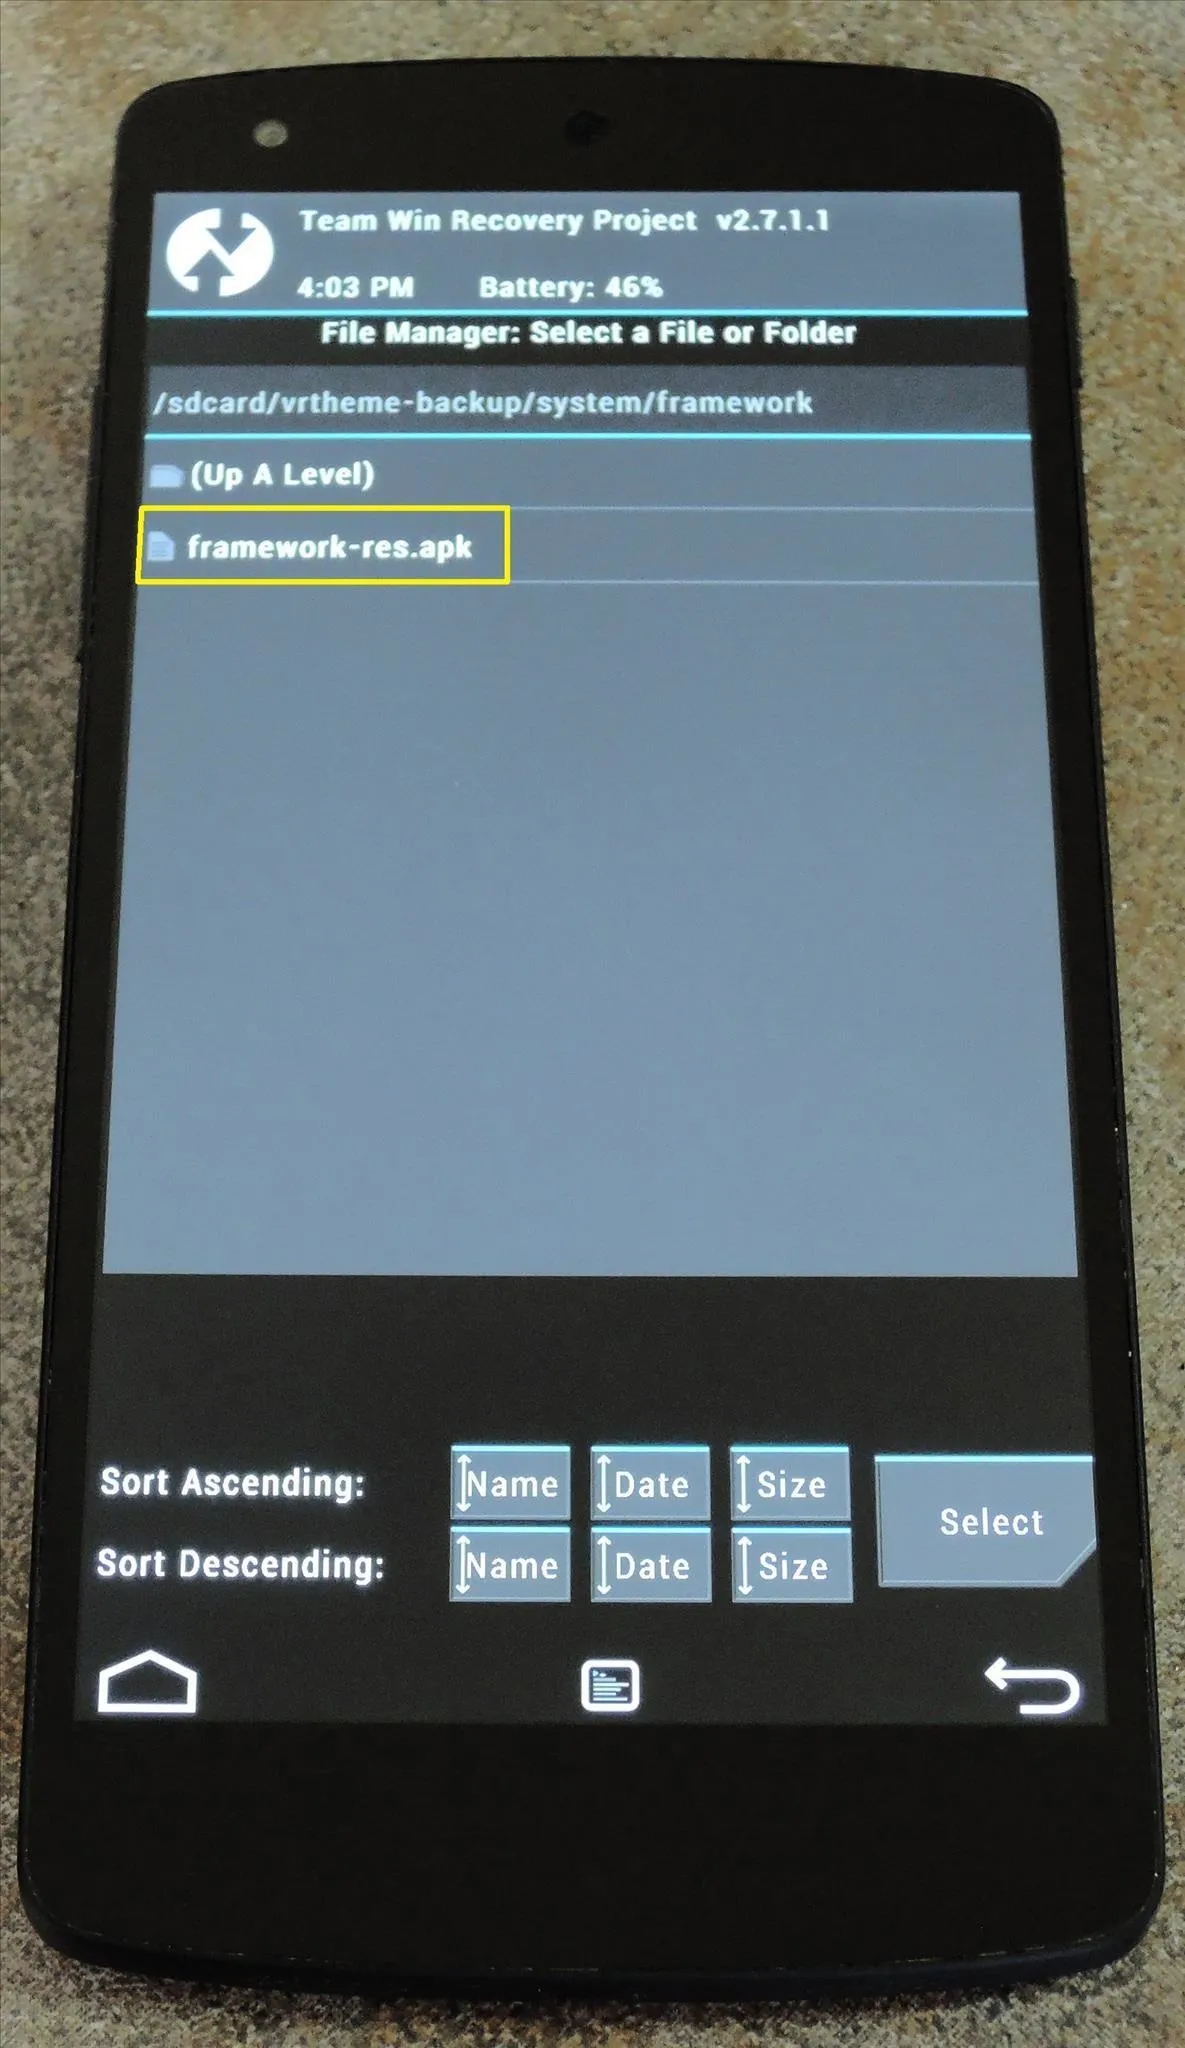
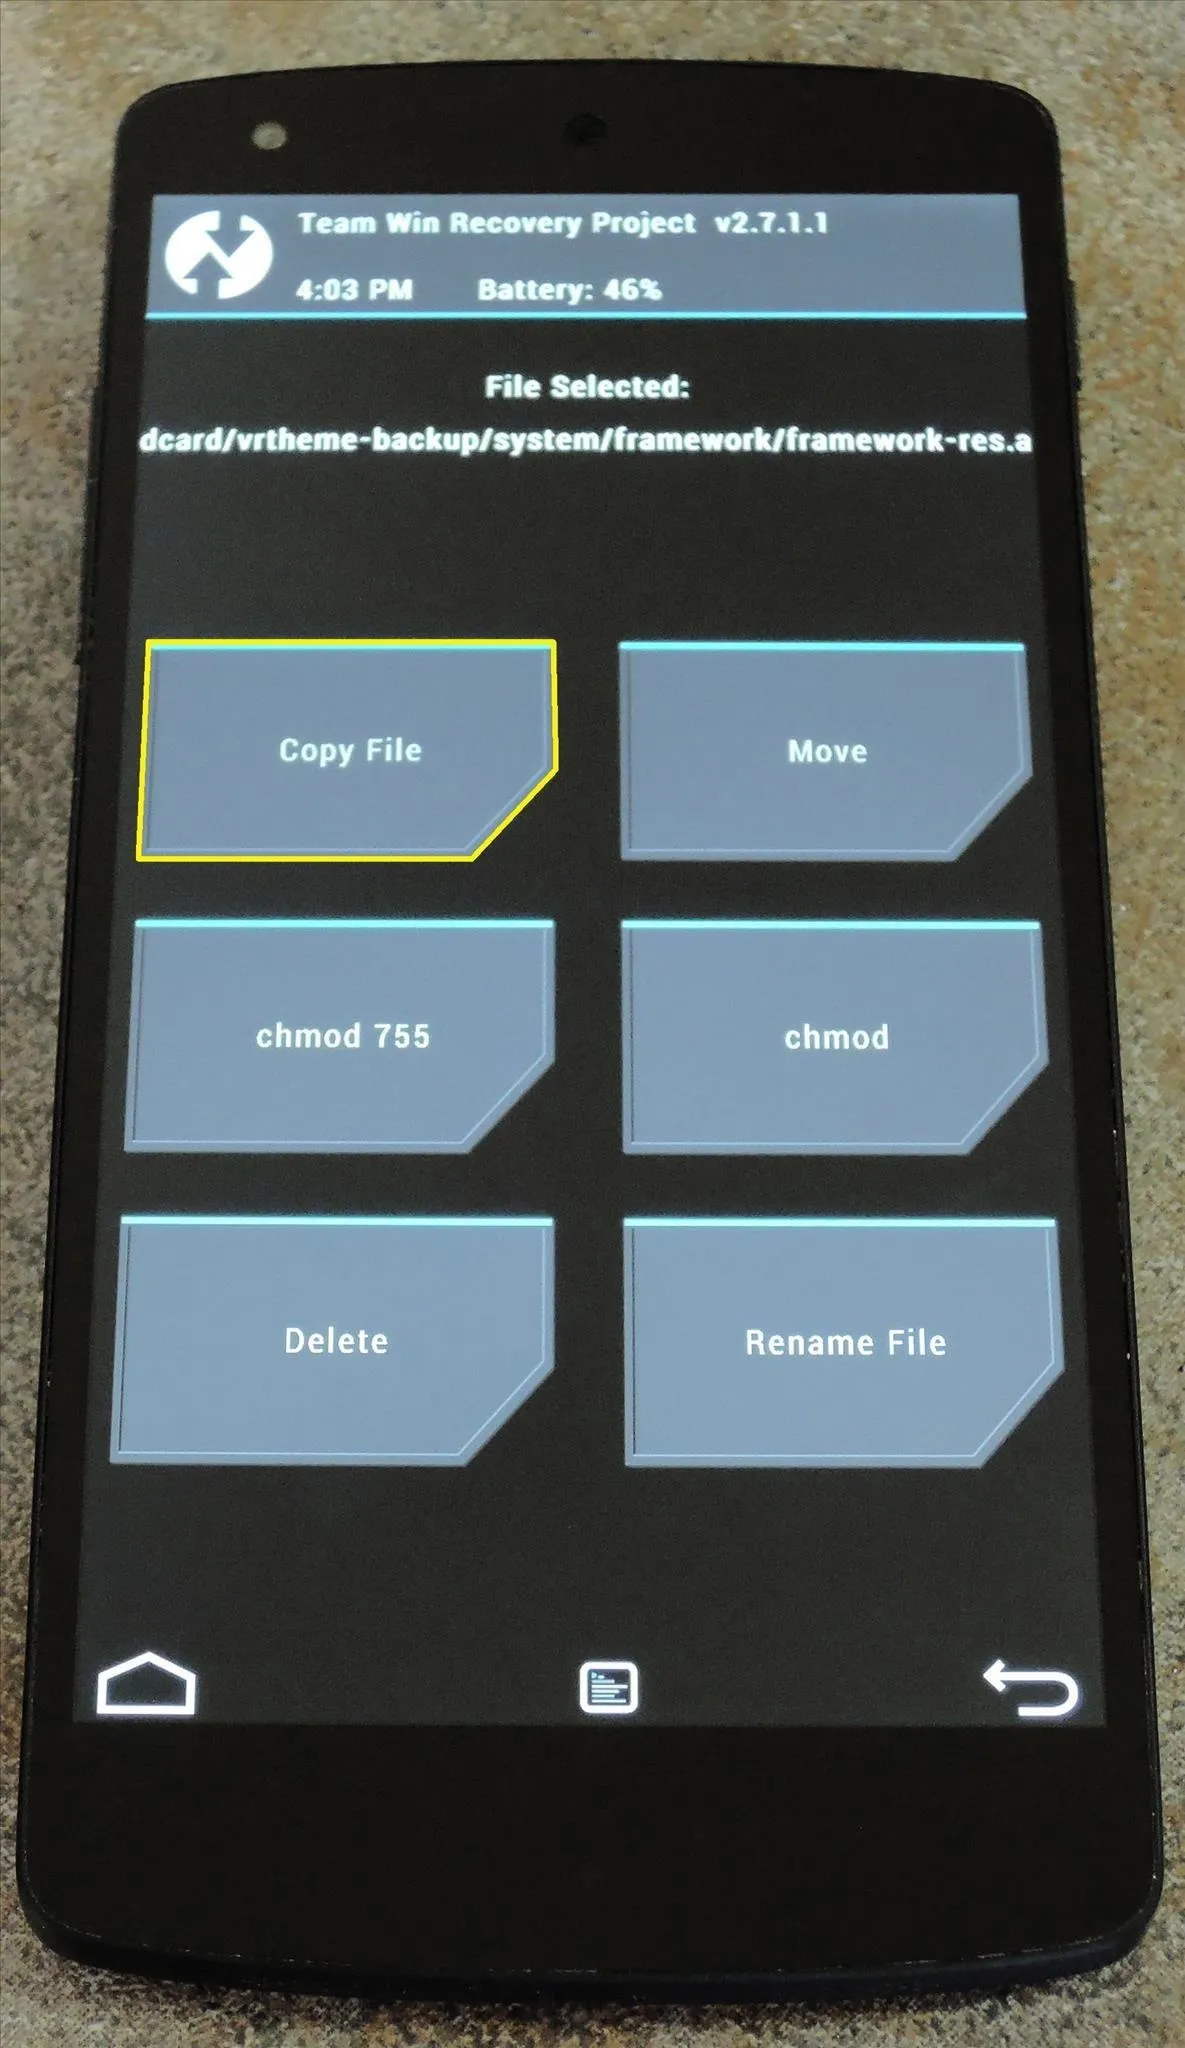


Next, you'll be asked where you want to put this file. Use the file browser to navigate to the system folder, then the framework folder inside of that.
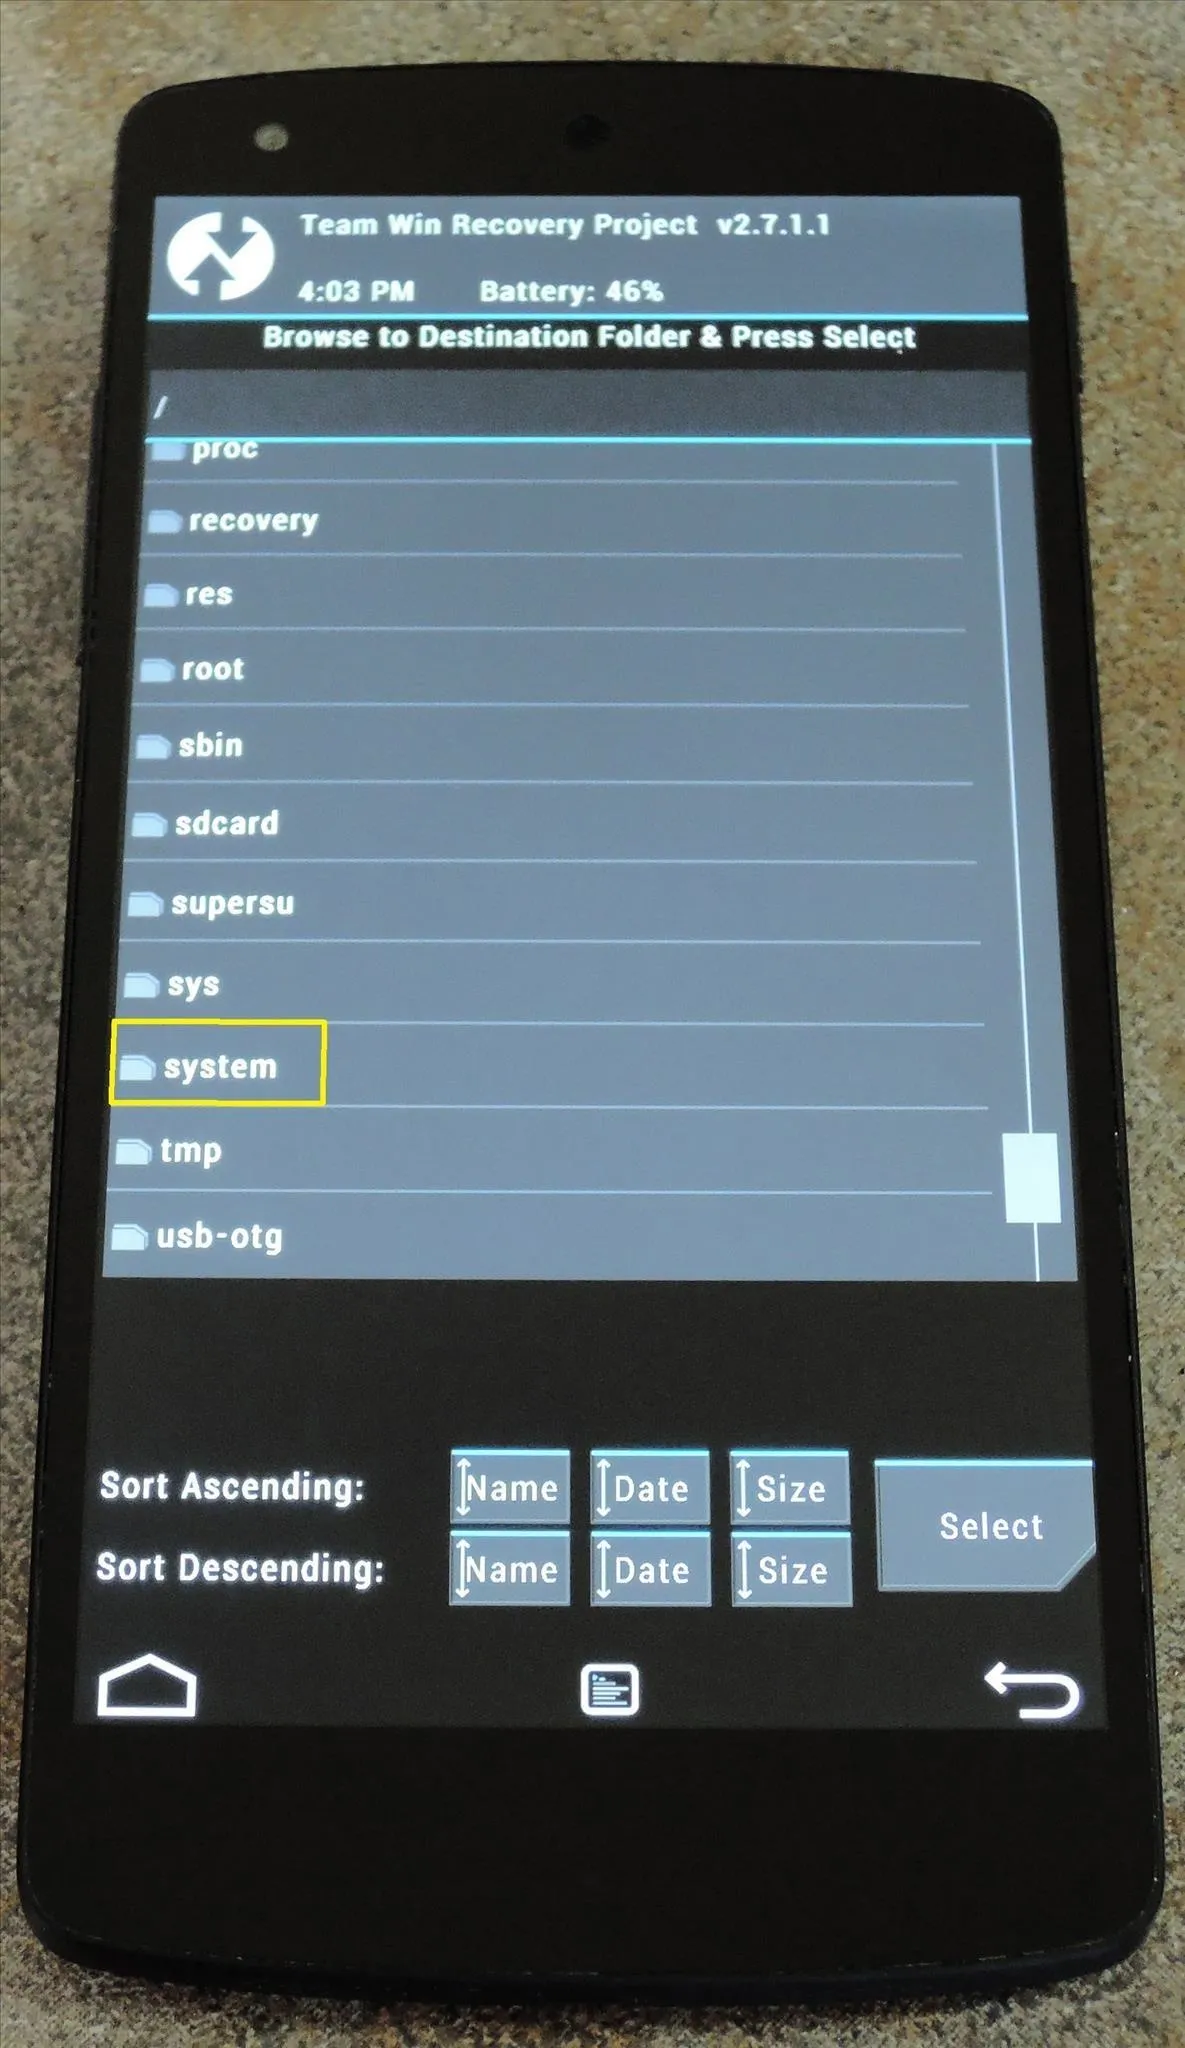
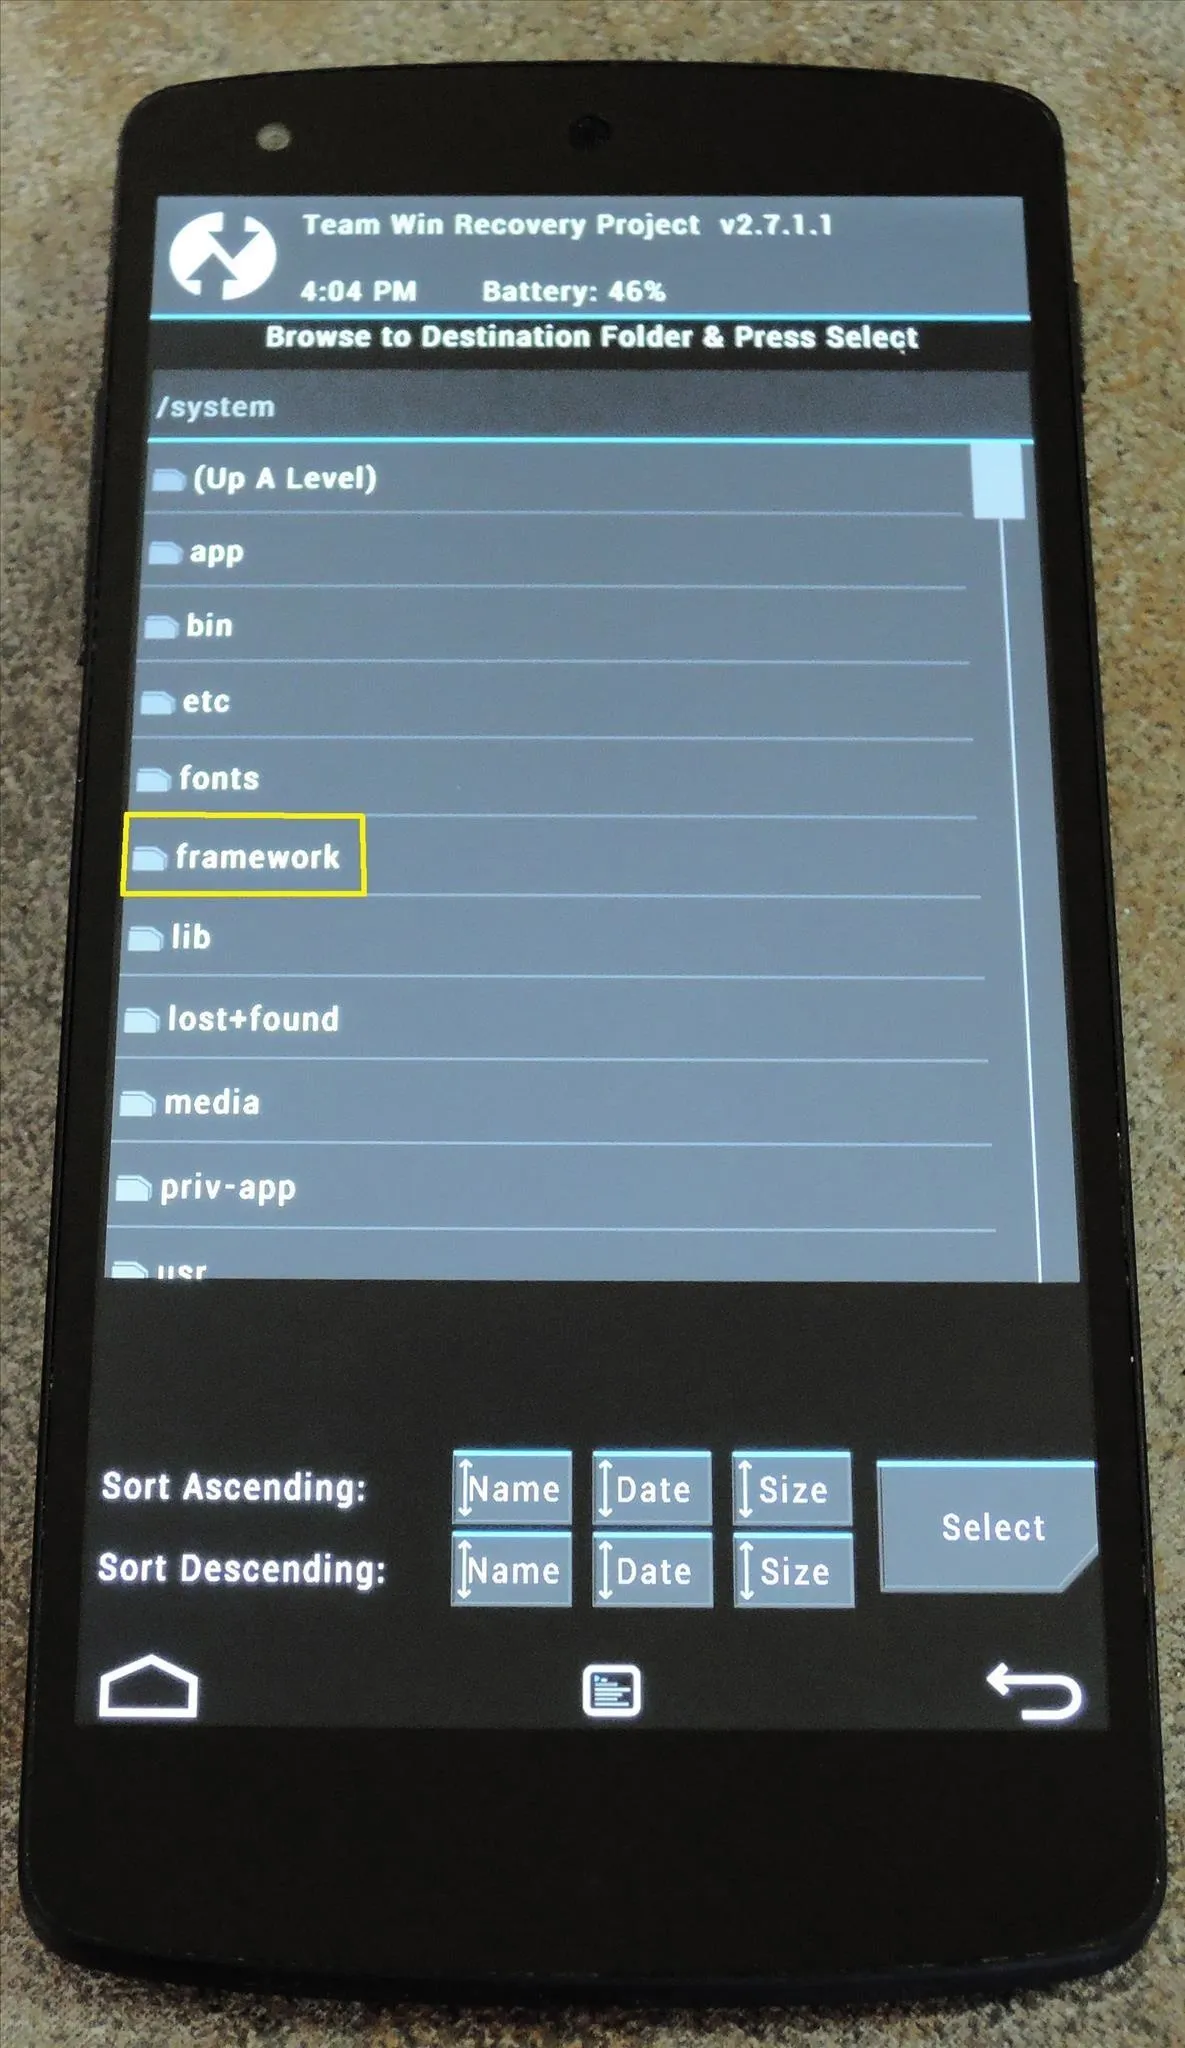


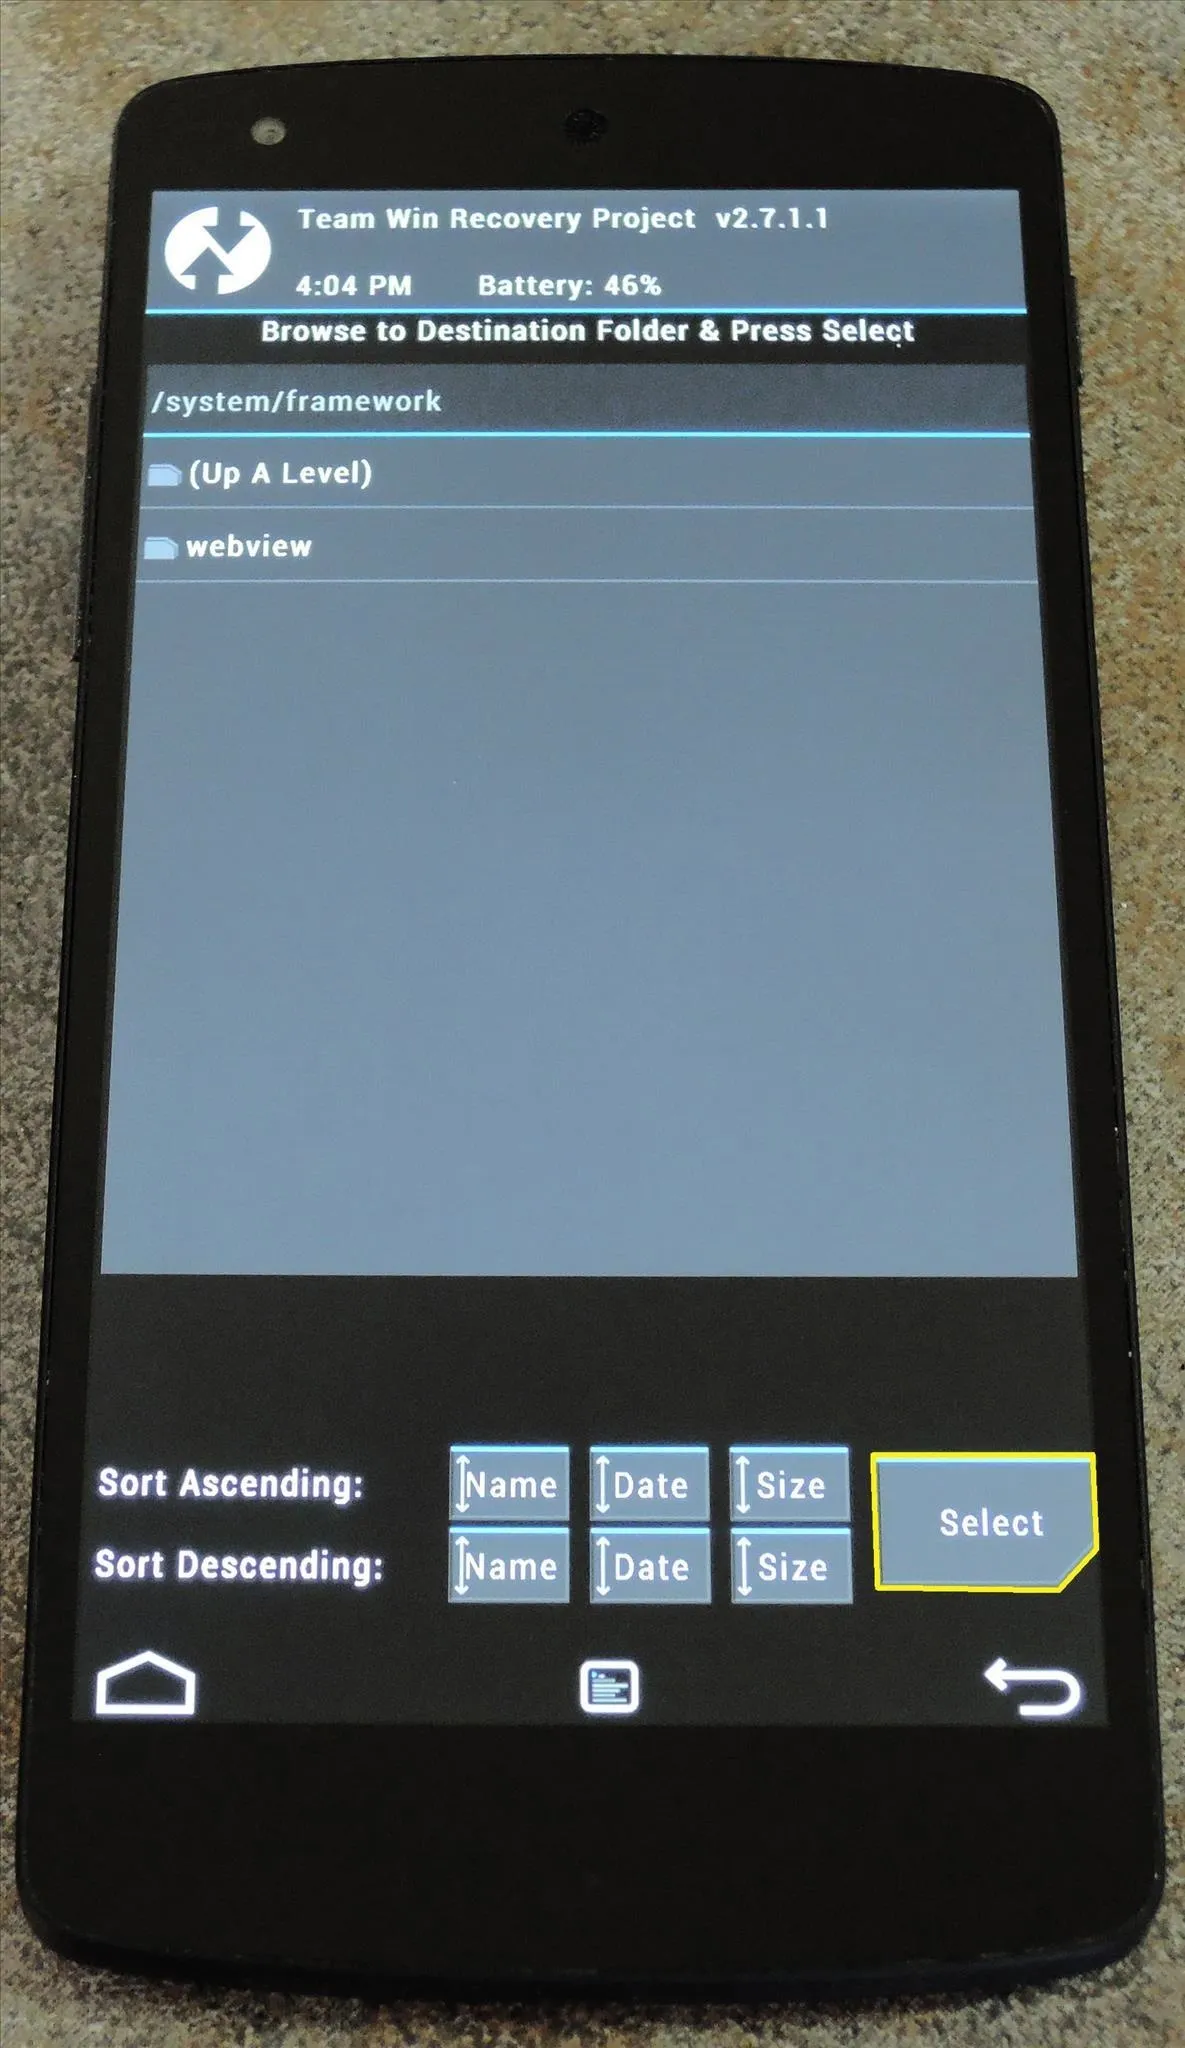
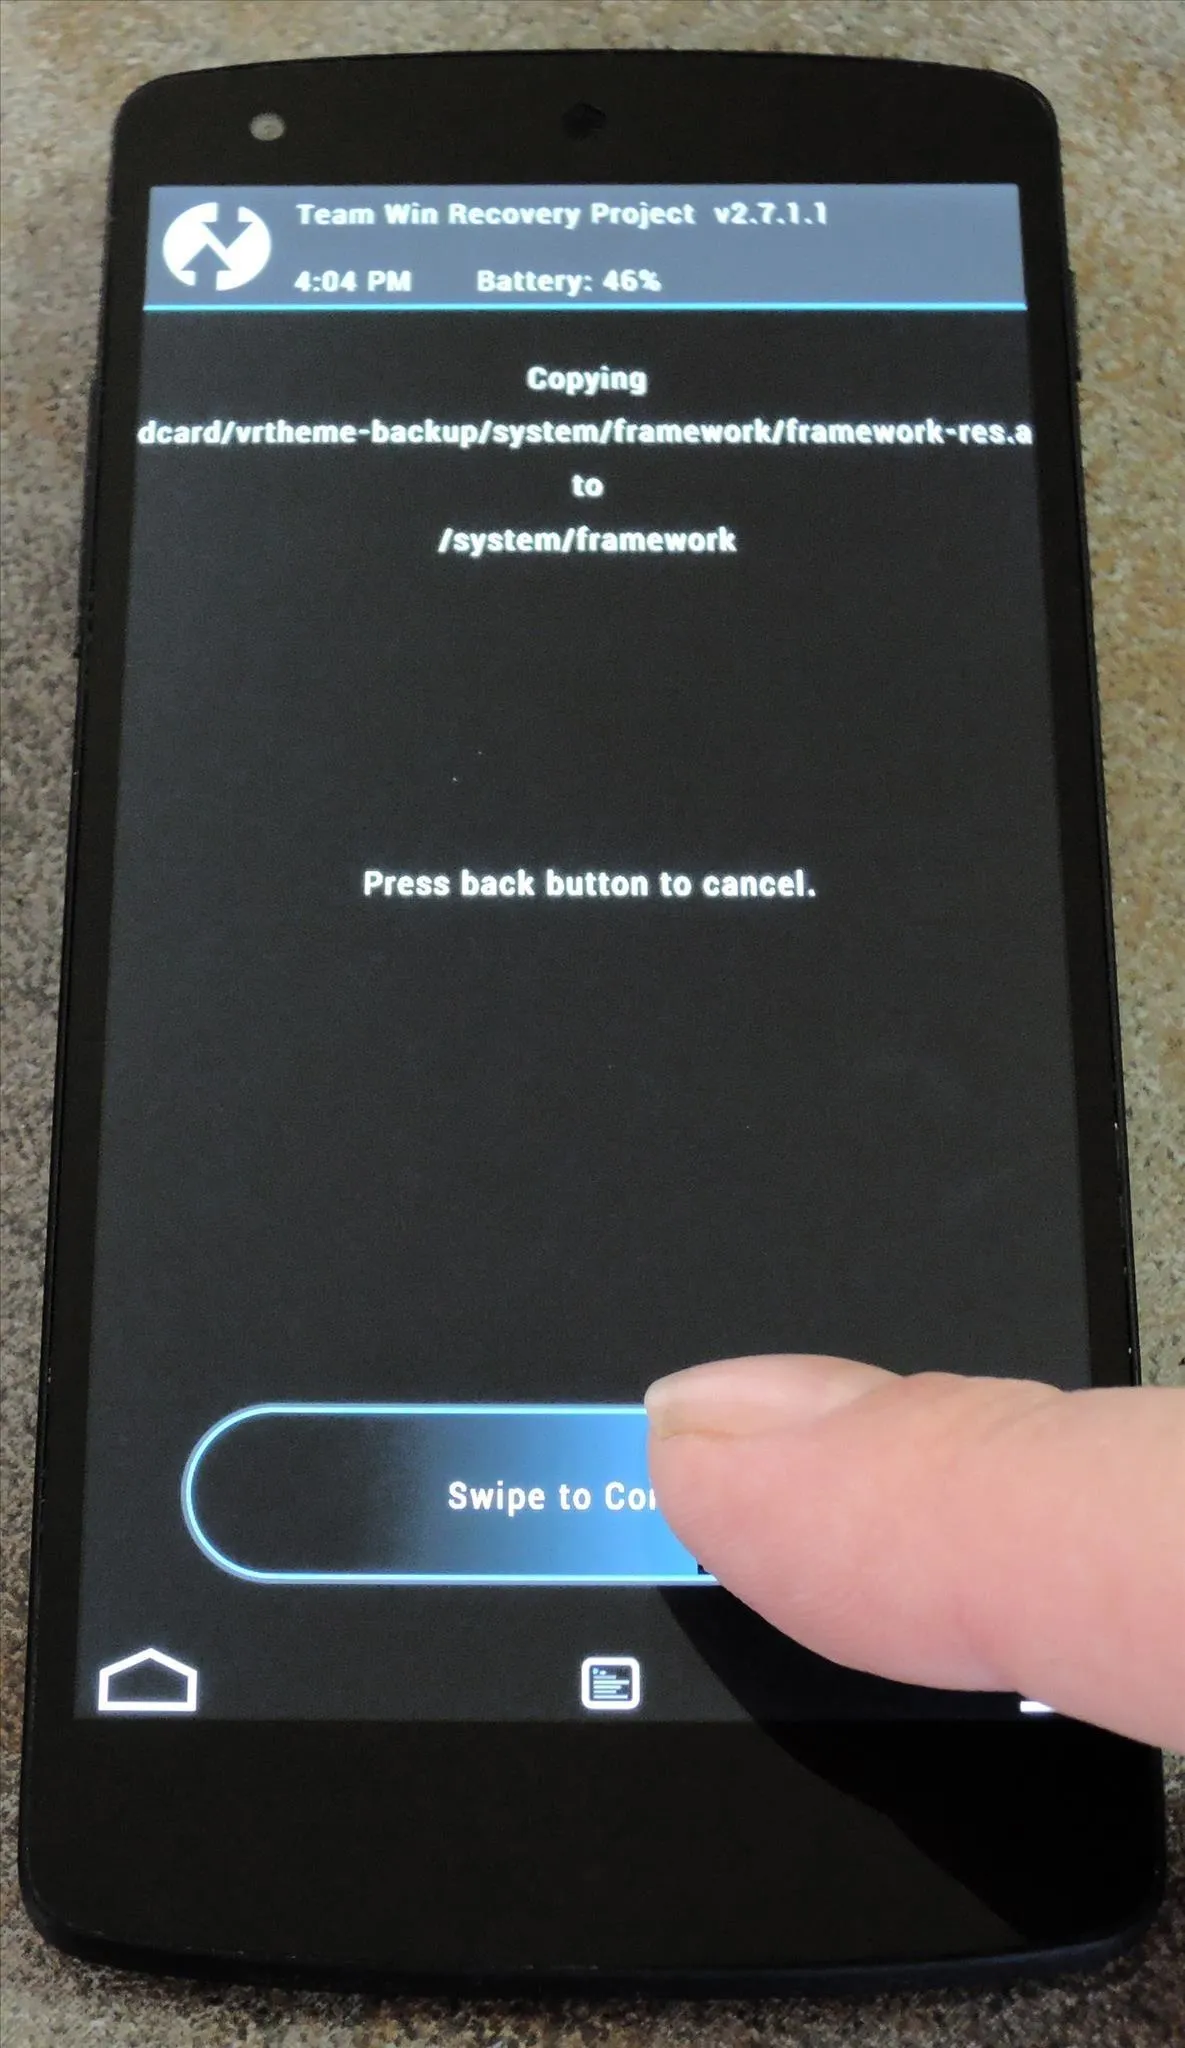
Paste the file into this folder by pressing the Select button near the bottom-right. After that, swipe the slider to confirm your choice.


Fix Permissions
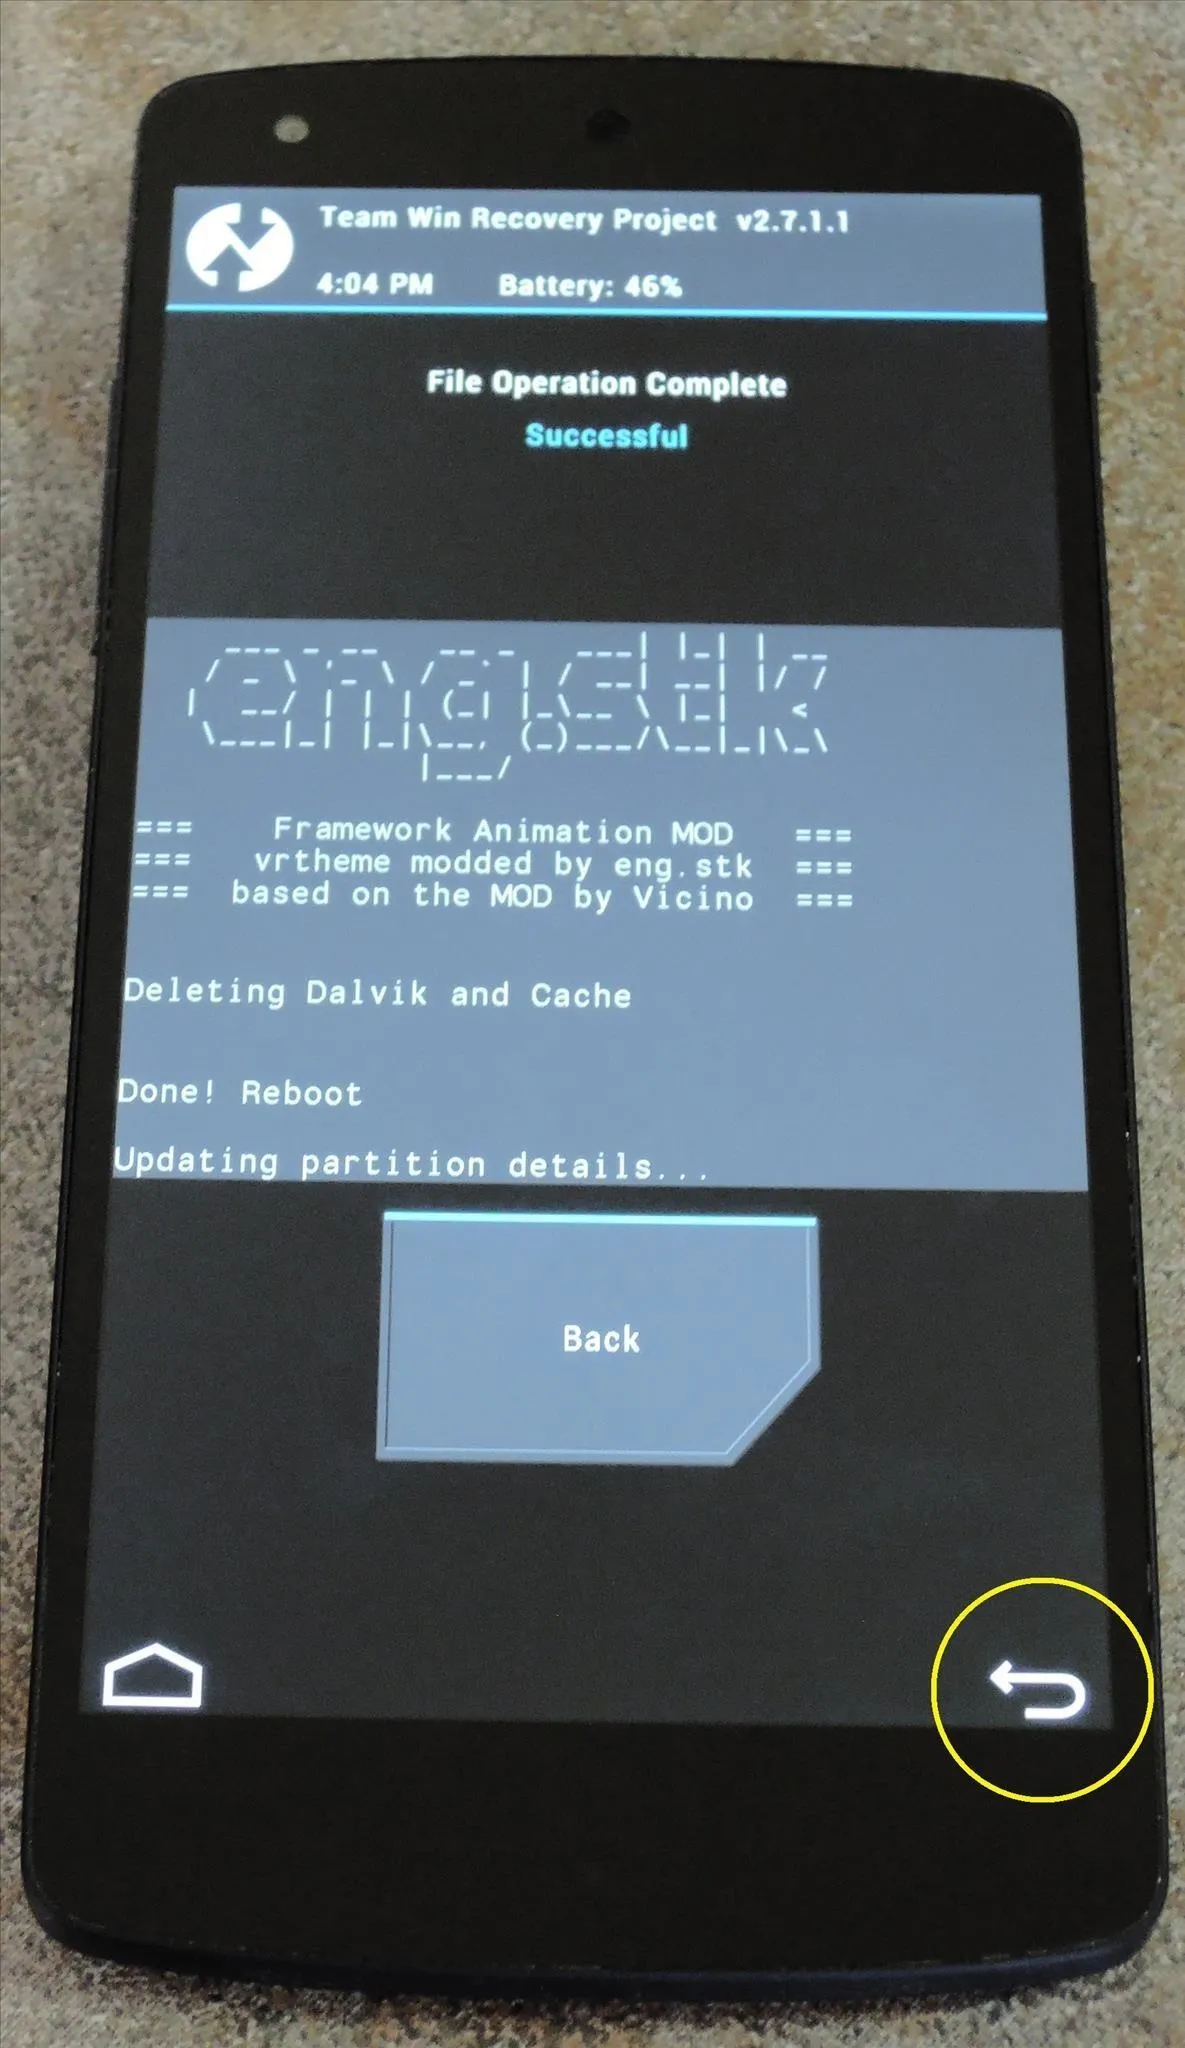
When the file has been successfully copied, tap the Back arrow twice to head back to TWRP's Advanced menu. From here, select Fix Permissions.
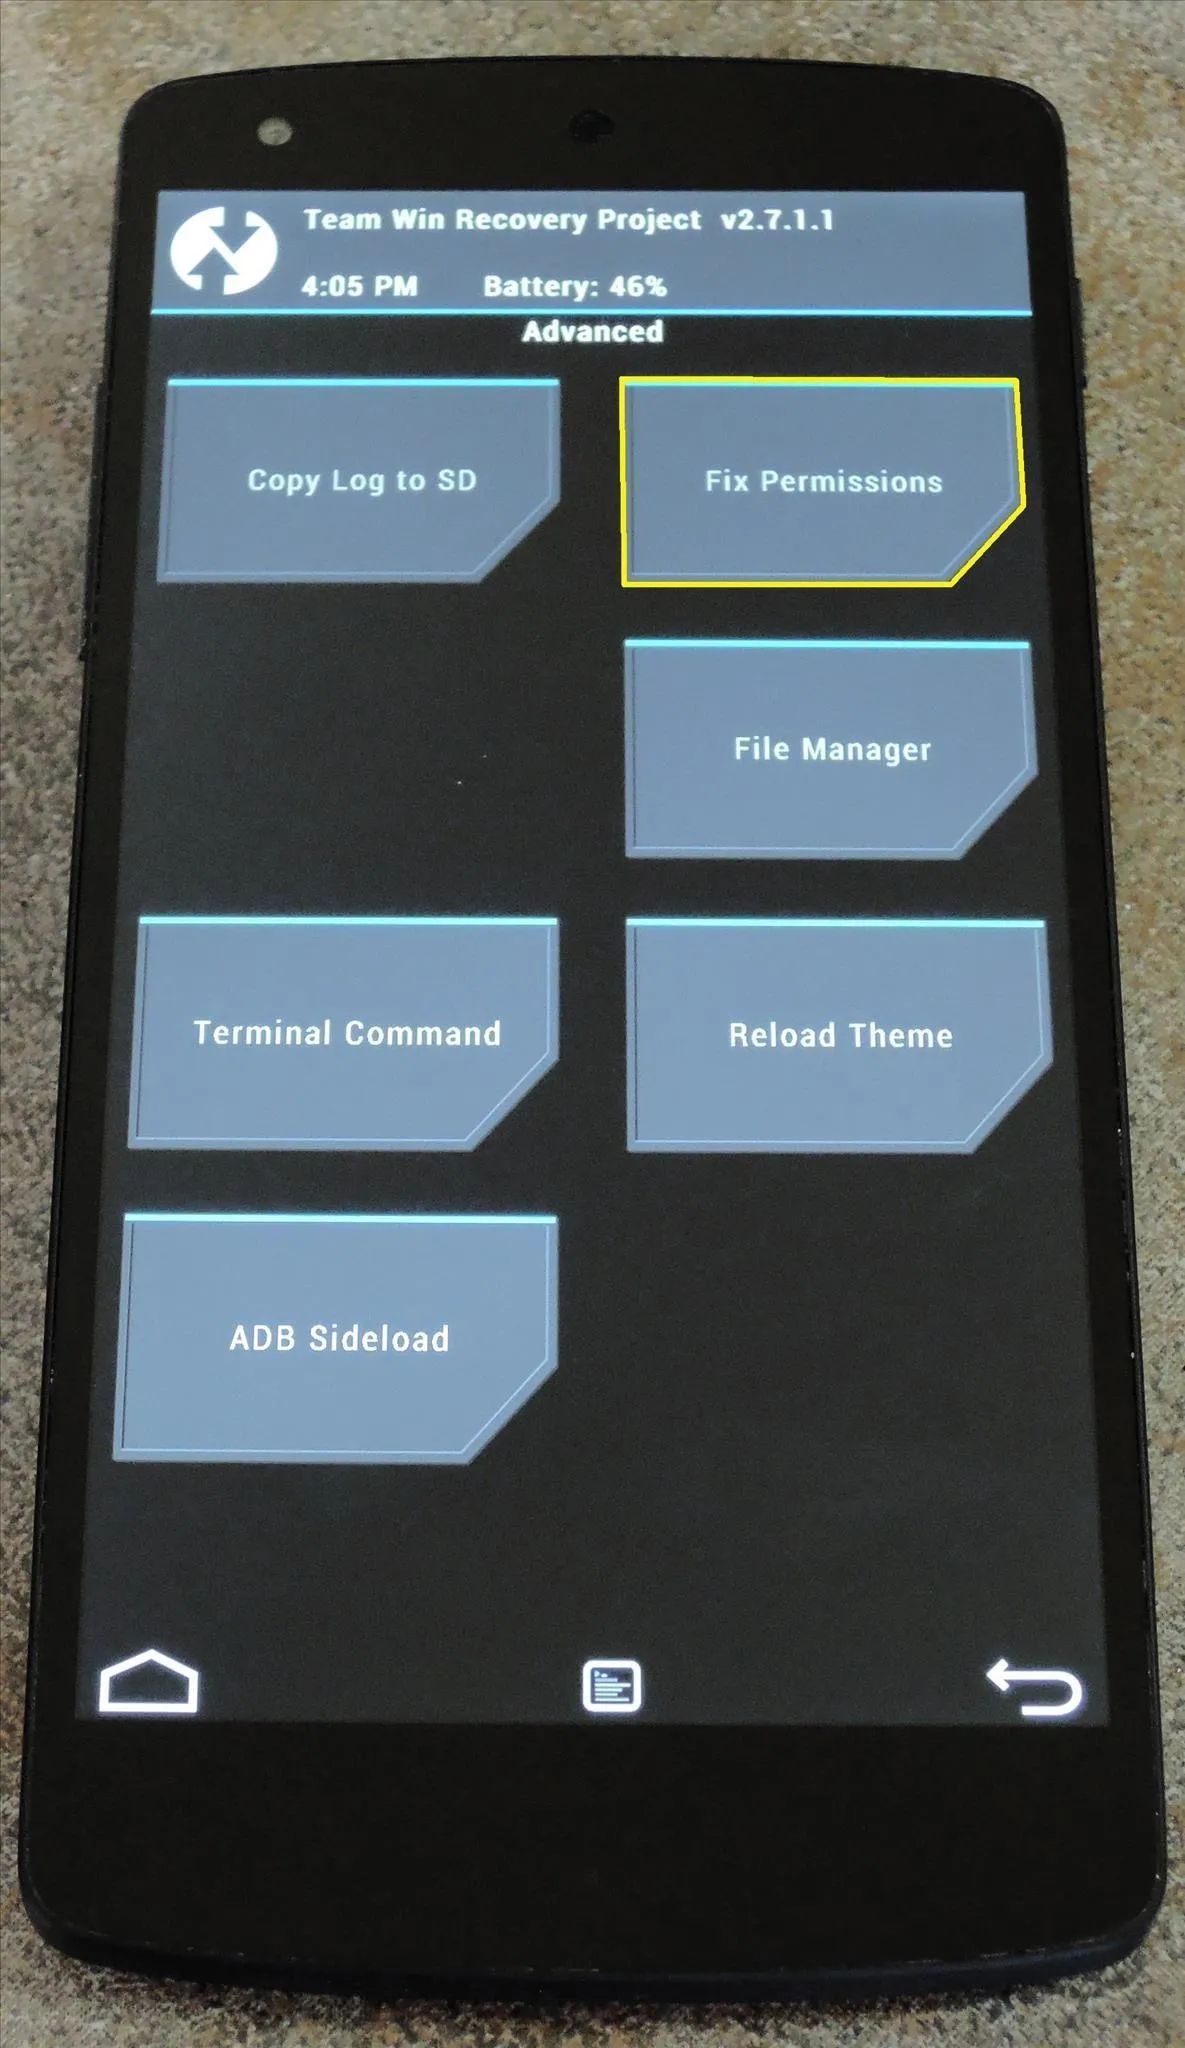


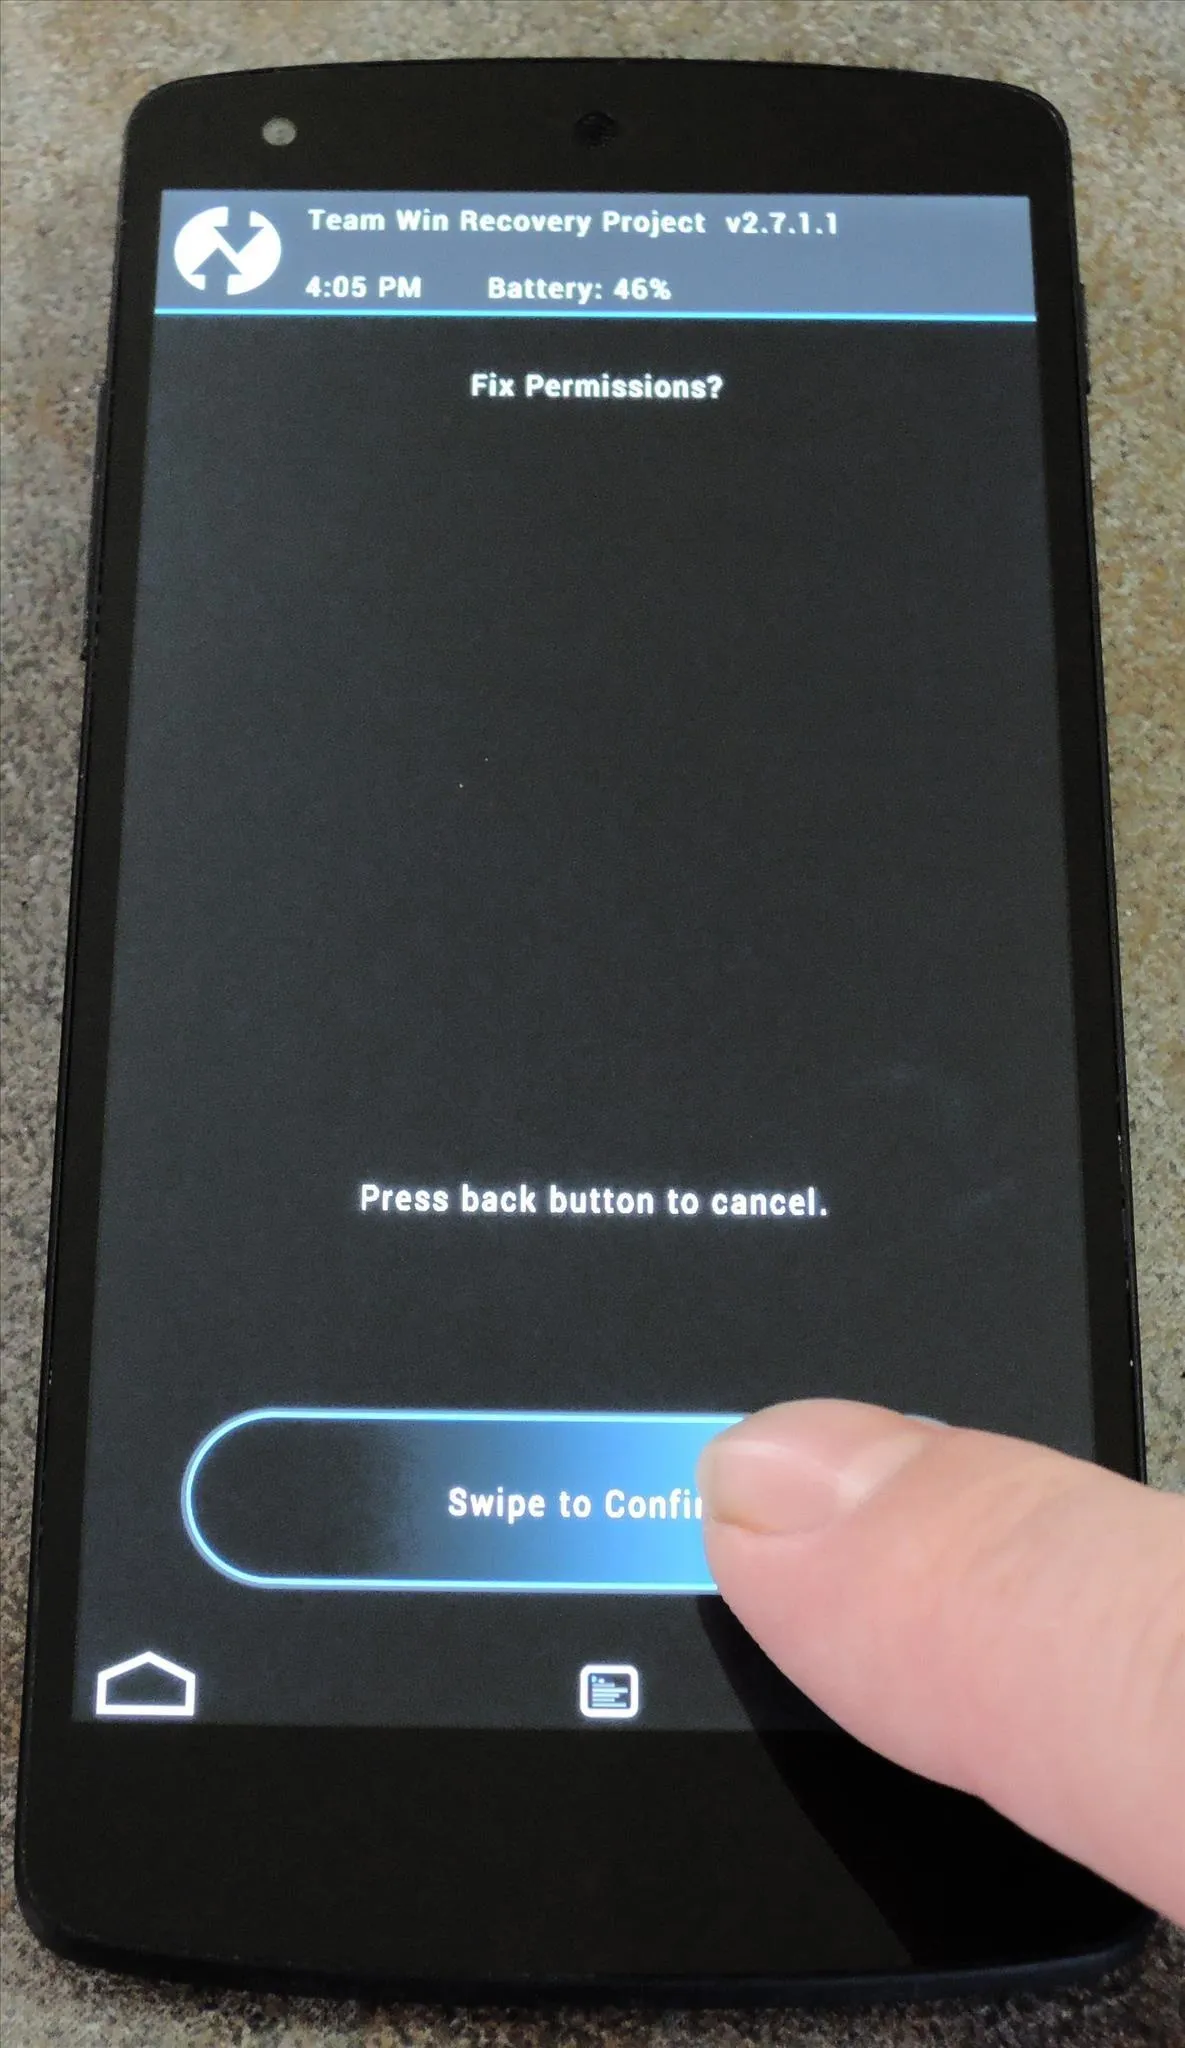
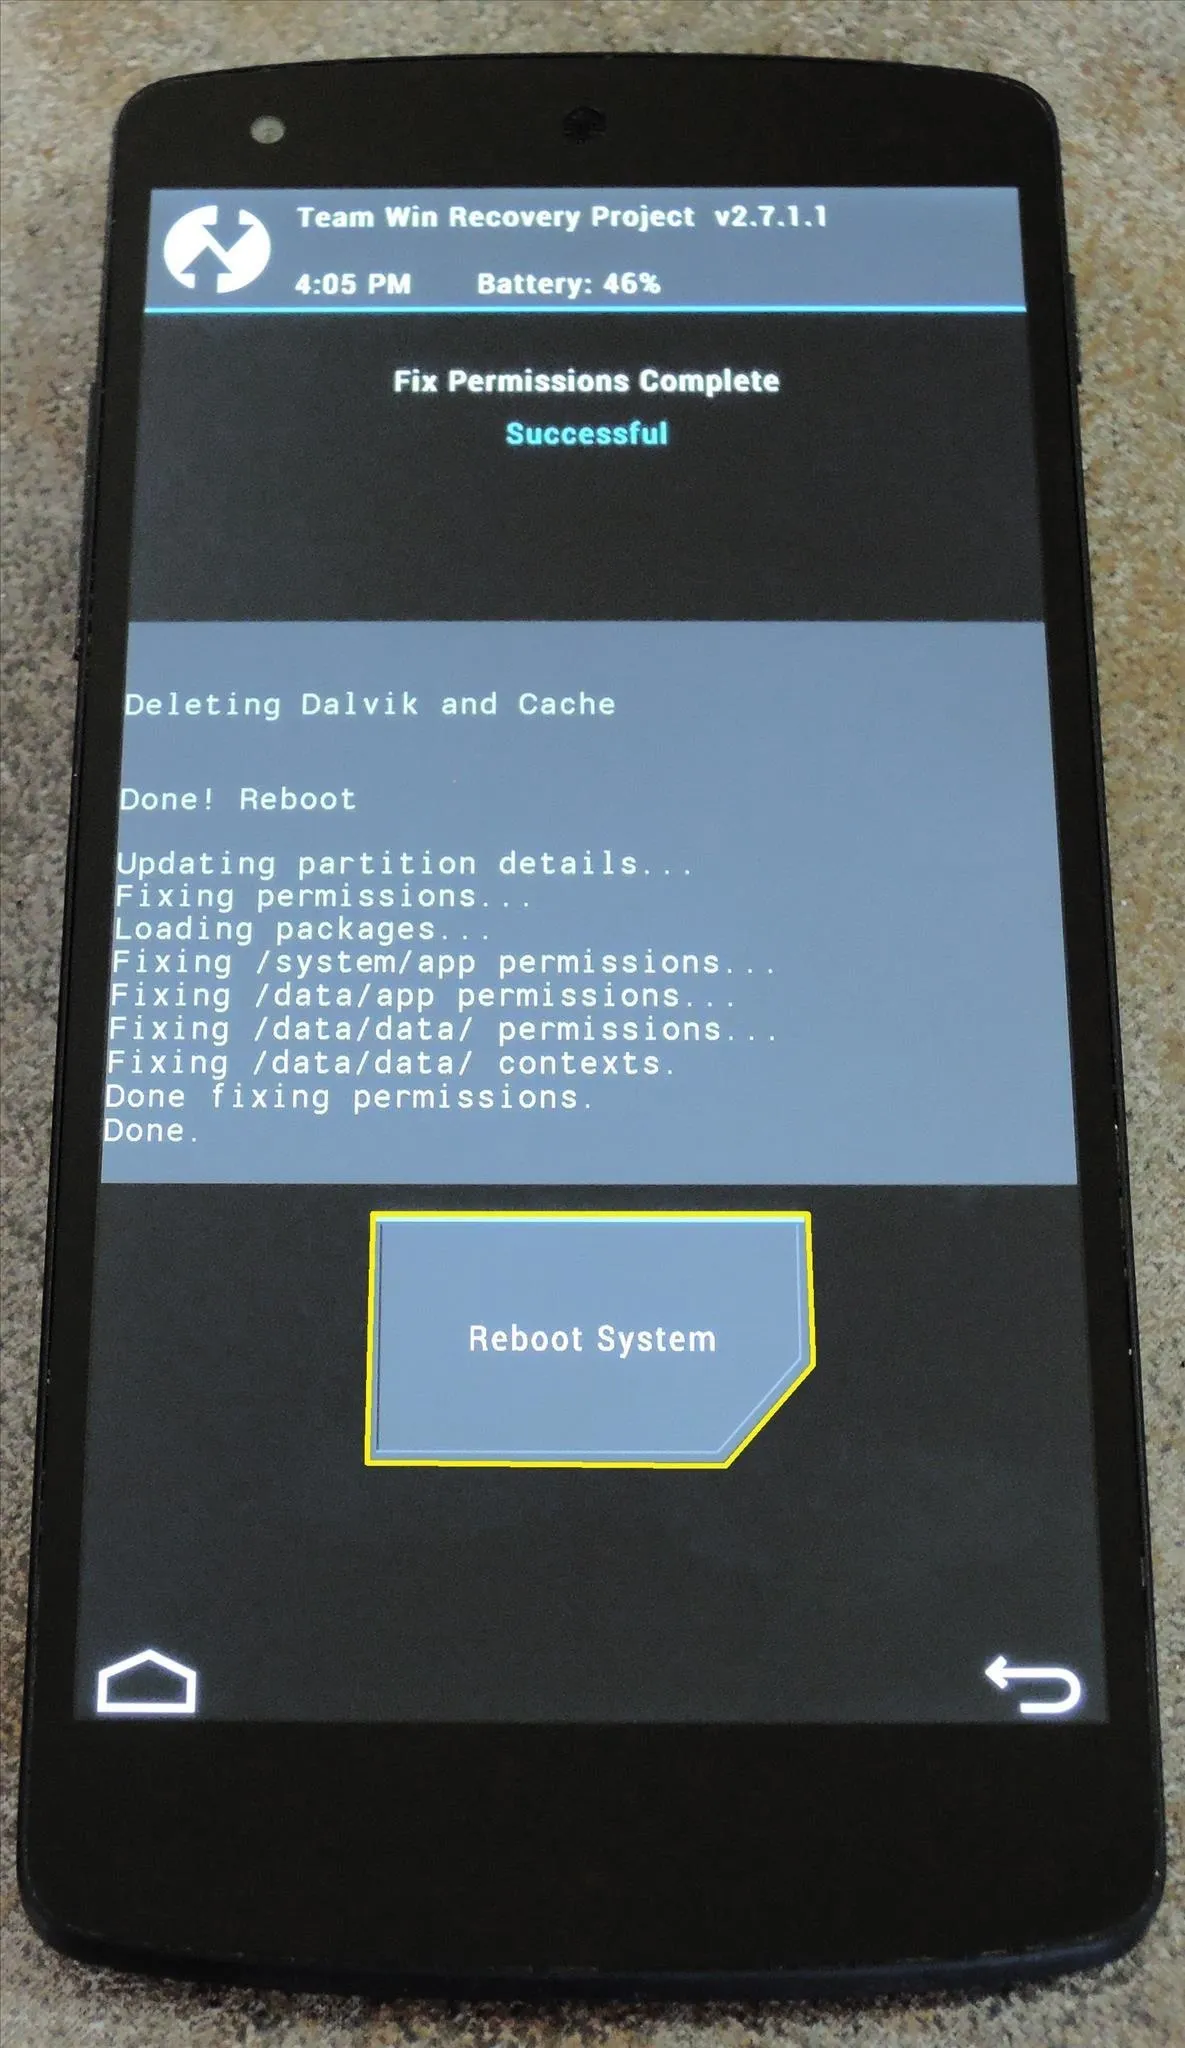
Swipe the slider at the bottom of the next screen to confirm your choice, and when that's finished, tap Reboot System. After you get back up, your original animations will be restored.


The transition animations that Santos has created for us are pretty slick, if I say so myself. What are your opinions? Let us know in the comments section below.










Comments
Be the first, drop a comment!