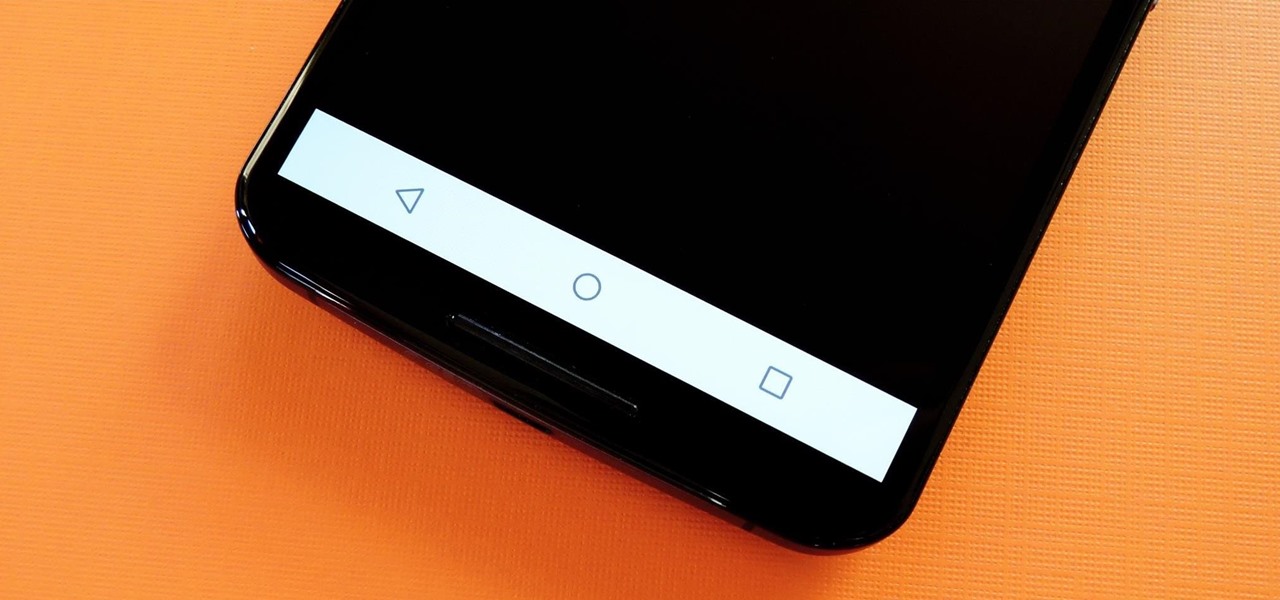

Many Nexus 6 owners, myself included, have already started to experience the dreaded burn-in issues that often come with AMOLED display technology. These displays are different than your typical LCD screen in that each pixel emits its own light instead of using a backlight, so this leaves AMOLED screens more susceptible to issues with dim or unresponsive pixels.
This is particularly true for portions of the screen that display static elements—Android's navigation bar, for instance. While apps that can revive such burned-in pixels have existed in the past, most of these were written for Samsung devices. And since Samsung is the only manufacturer that still uses physical buttons, on-screen buttons that have become burned-in cannot be treated with these apps.
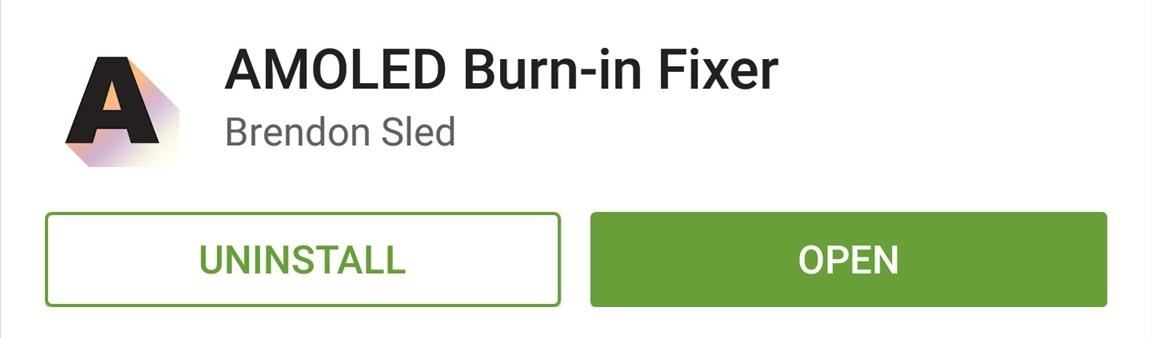
But developer Brendon Sled has a brand new app that can fix all burned-in portions of an AMOLED display since it takes software navigation keys into consideration. It uses Android 5.0's built-in "Invert Colors" function to negate the effects of AMOLED burn-in—and I can personally vouch for its effectiveness as it has cured my own woes.
Step 1: Install AMOLED Burn-in Fixer
Sled's app is called AMOLED Burn-in Fixer, and it's available on the Google Play Store for free. Search it by name to get it installed, or use this link to jump straight to the install page.
Step 2: Test for Burn-In
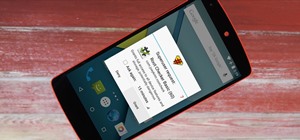
AMOLED Burn-in Fixer offers an easy way to test your device for screen burn issues. From the app's main screen, select the "Test Burn-in" tab, then tap the "Hide UI" button.
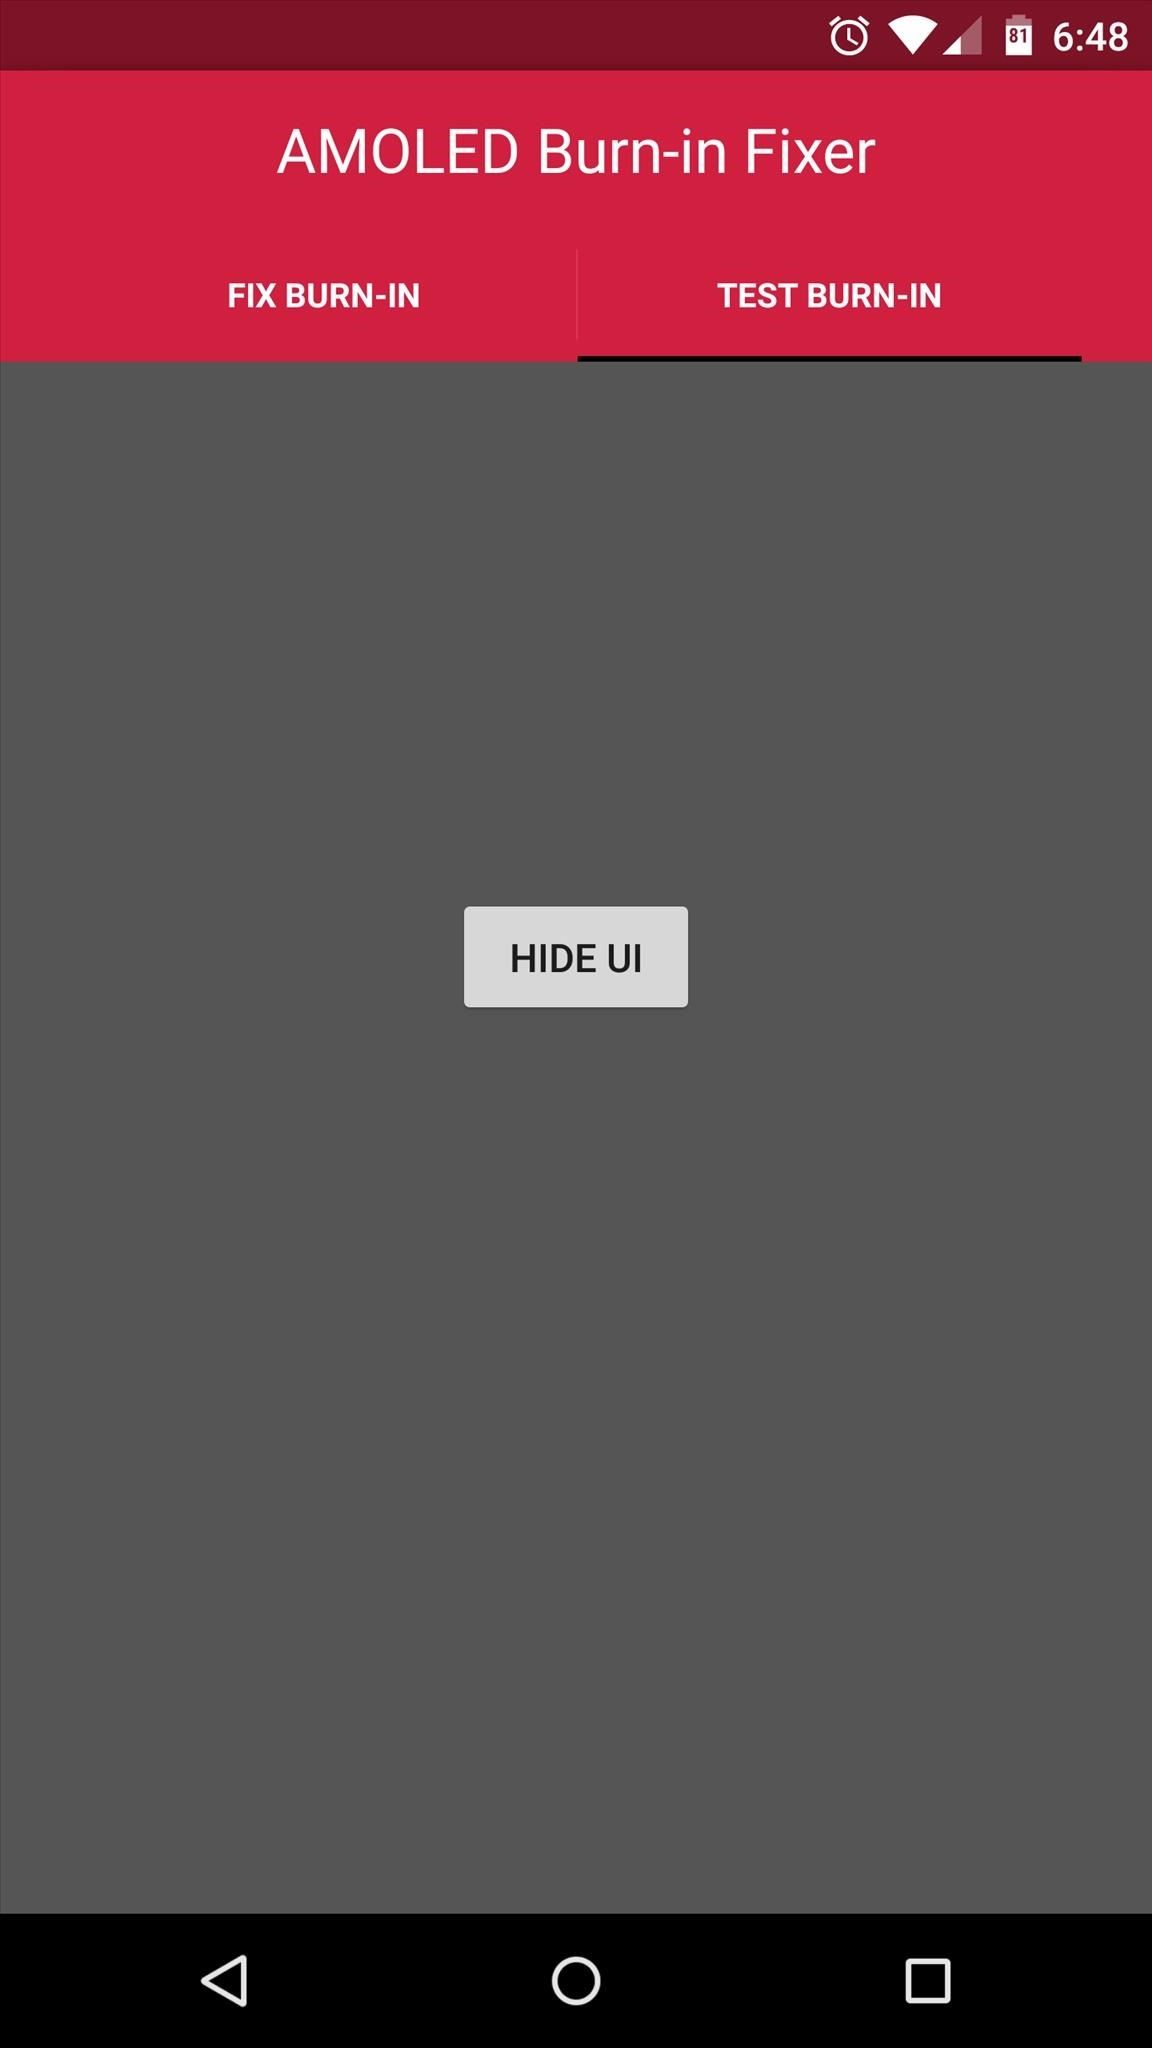

The solid gray background that takes up your entire screen at this point makes it easy to identify burn-in issues. Pay close attention to the navigation and status bar areas, as these are the most susceptible.
Step 3: Fix the Burn-In
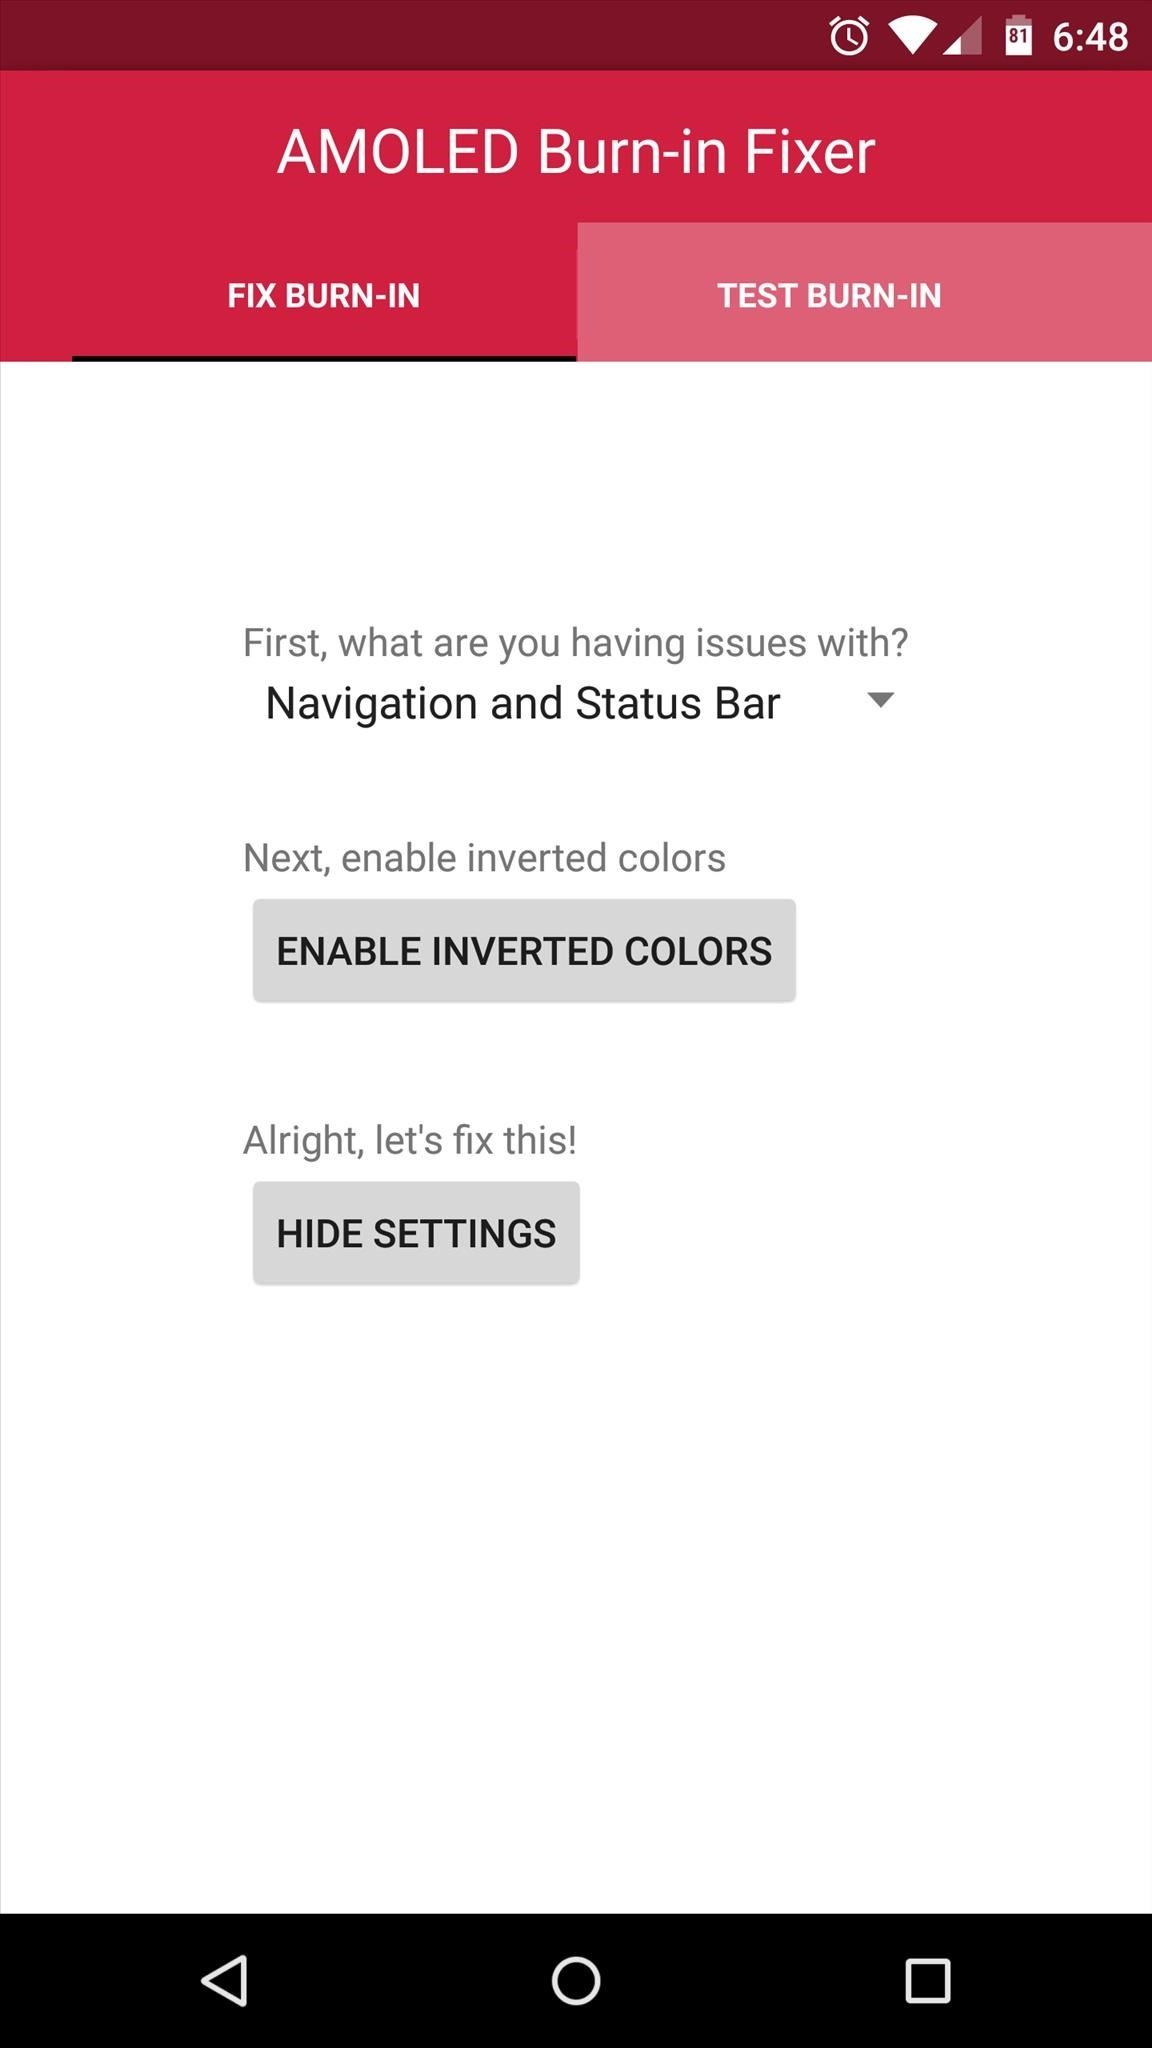
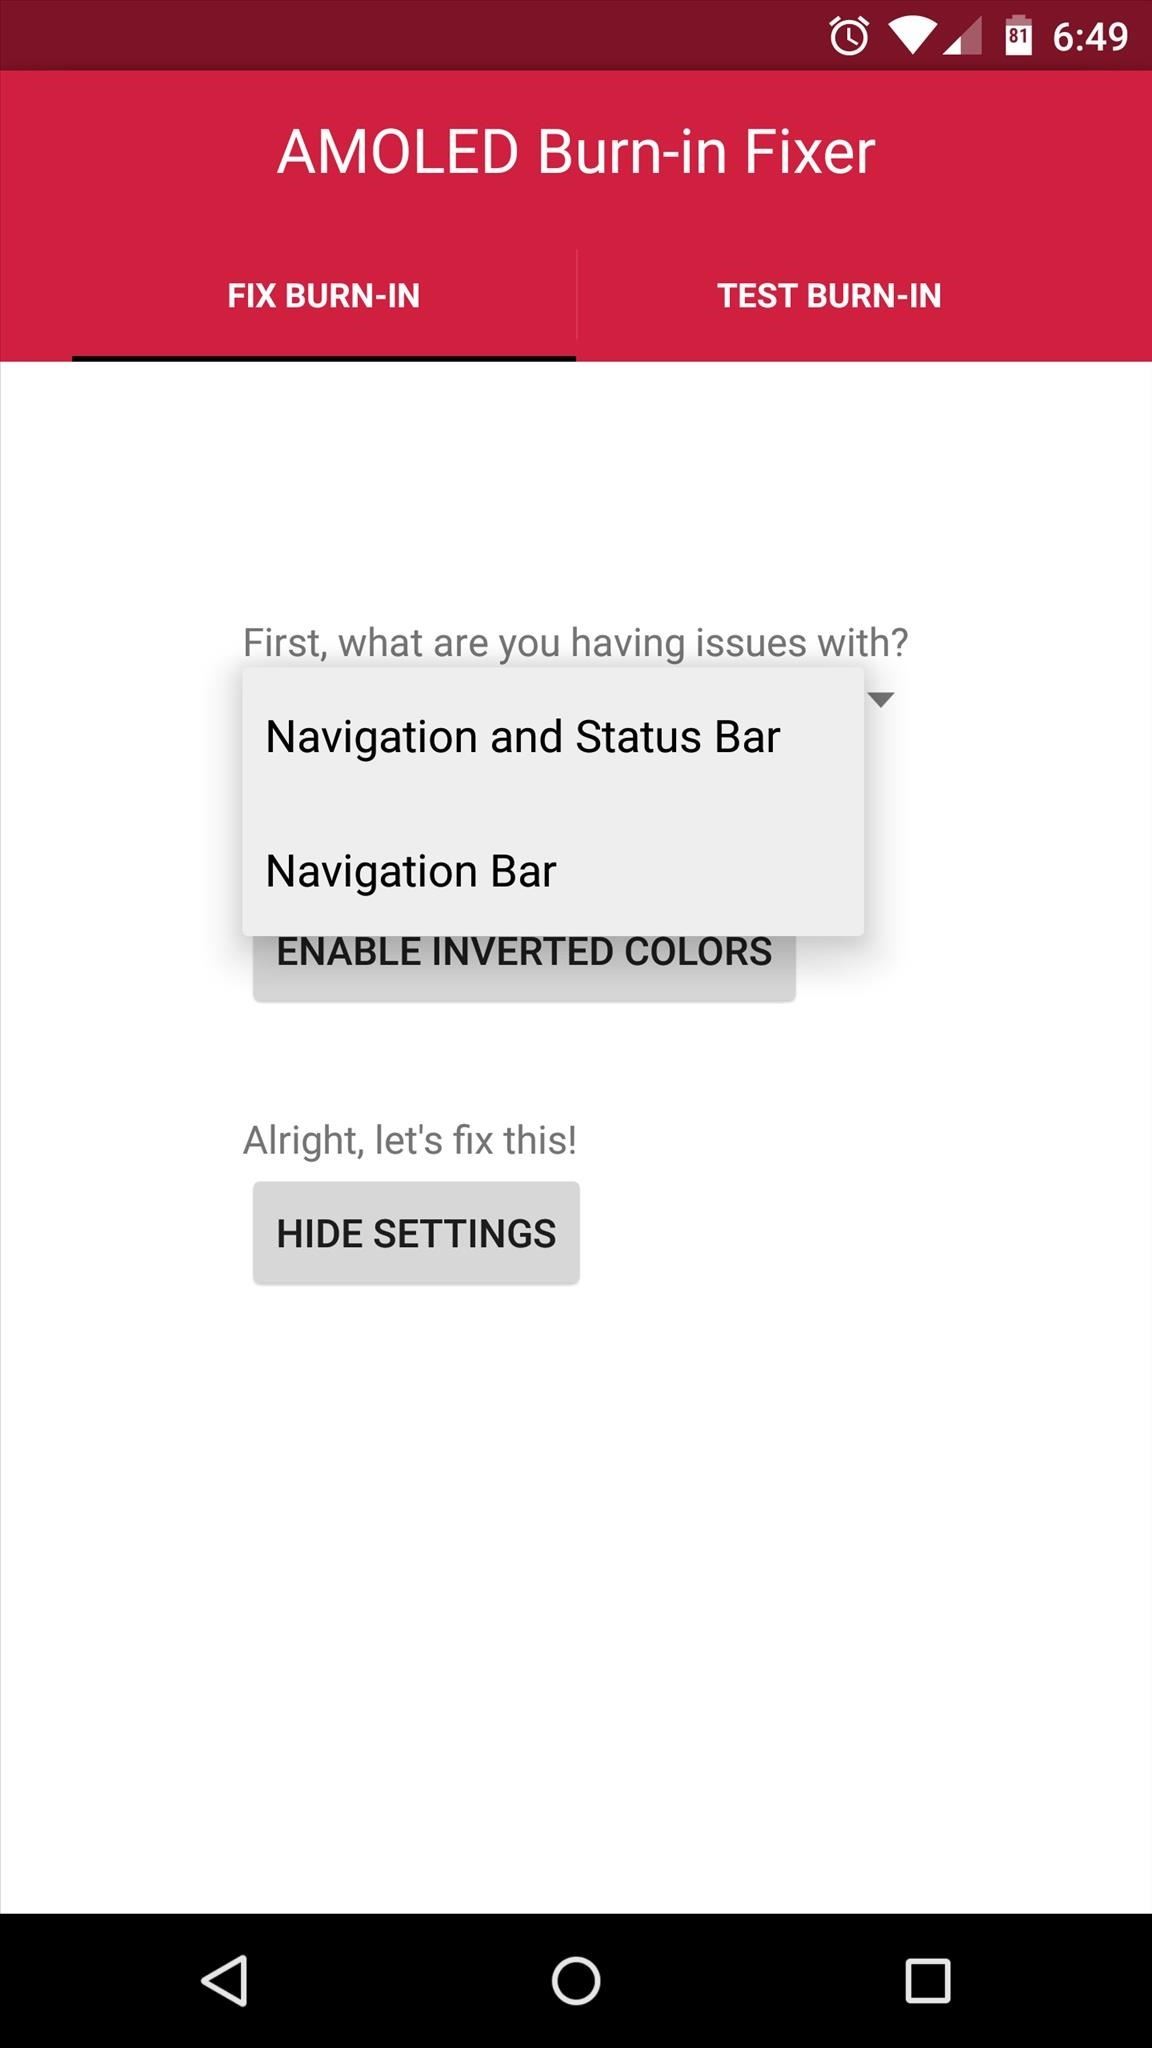
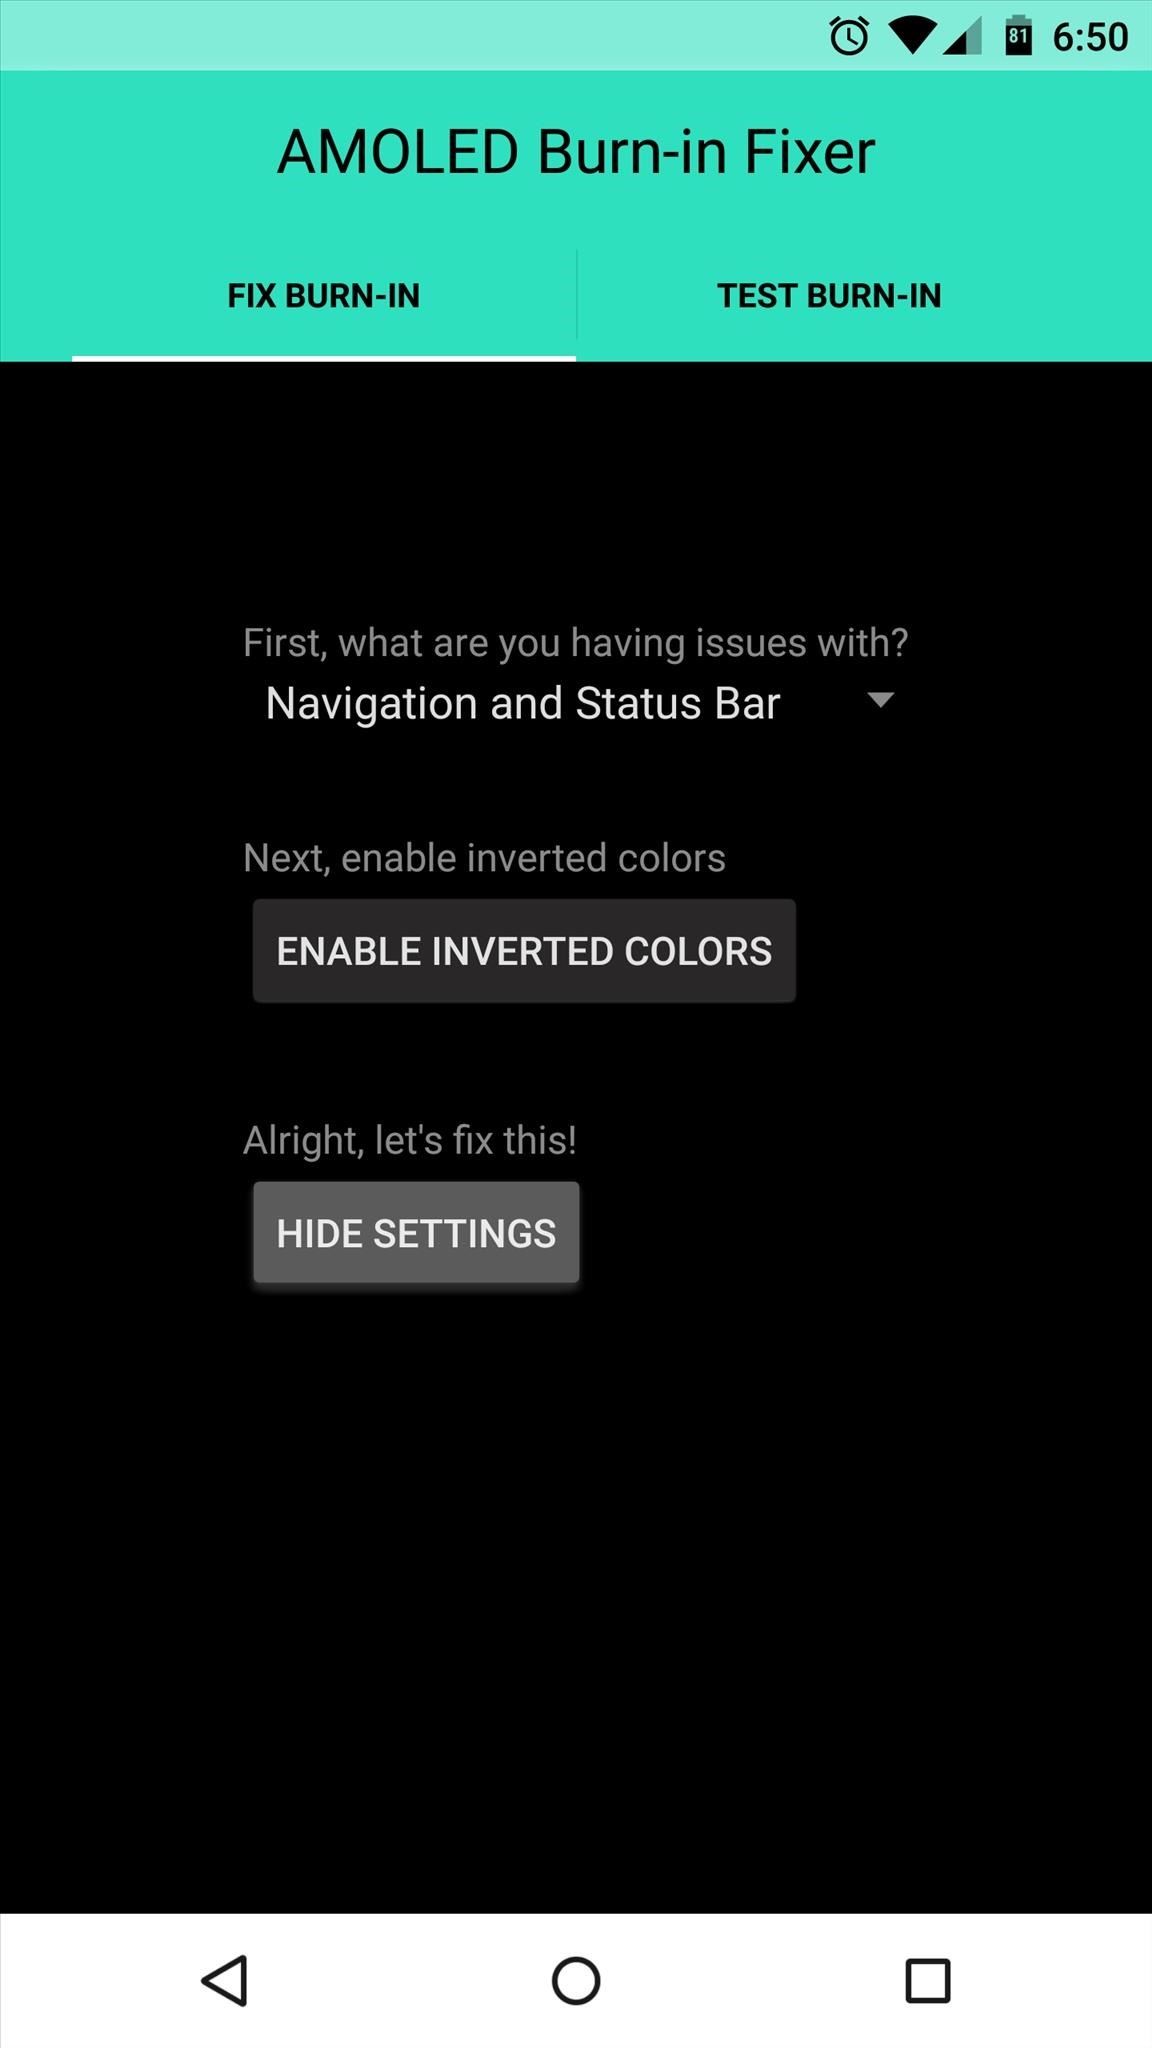
If you do indeed have screen burn-in on your device, head back over to the main tab to fix it. From here, you can let the app know whether you're having issues with burn-in on both the navigation and status bars, or just the navigation bar.
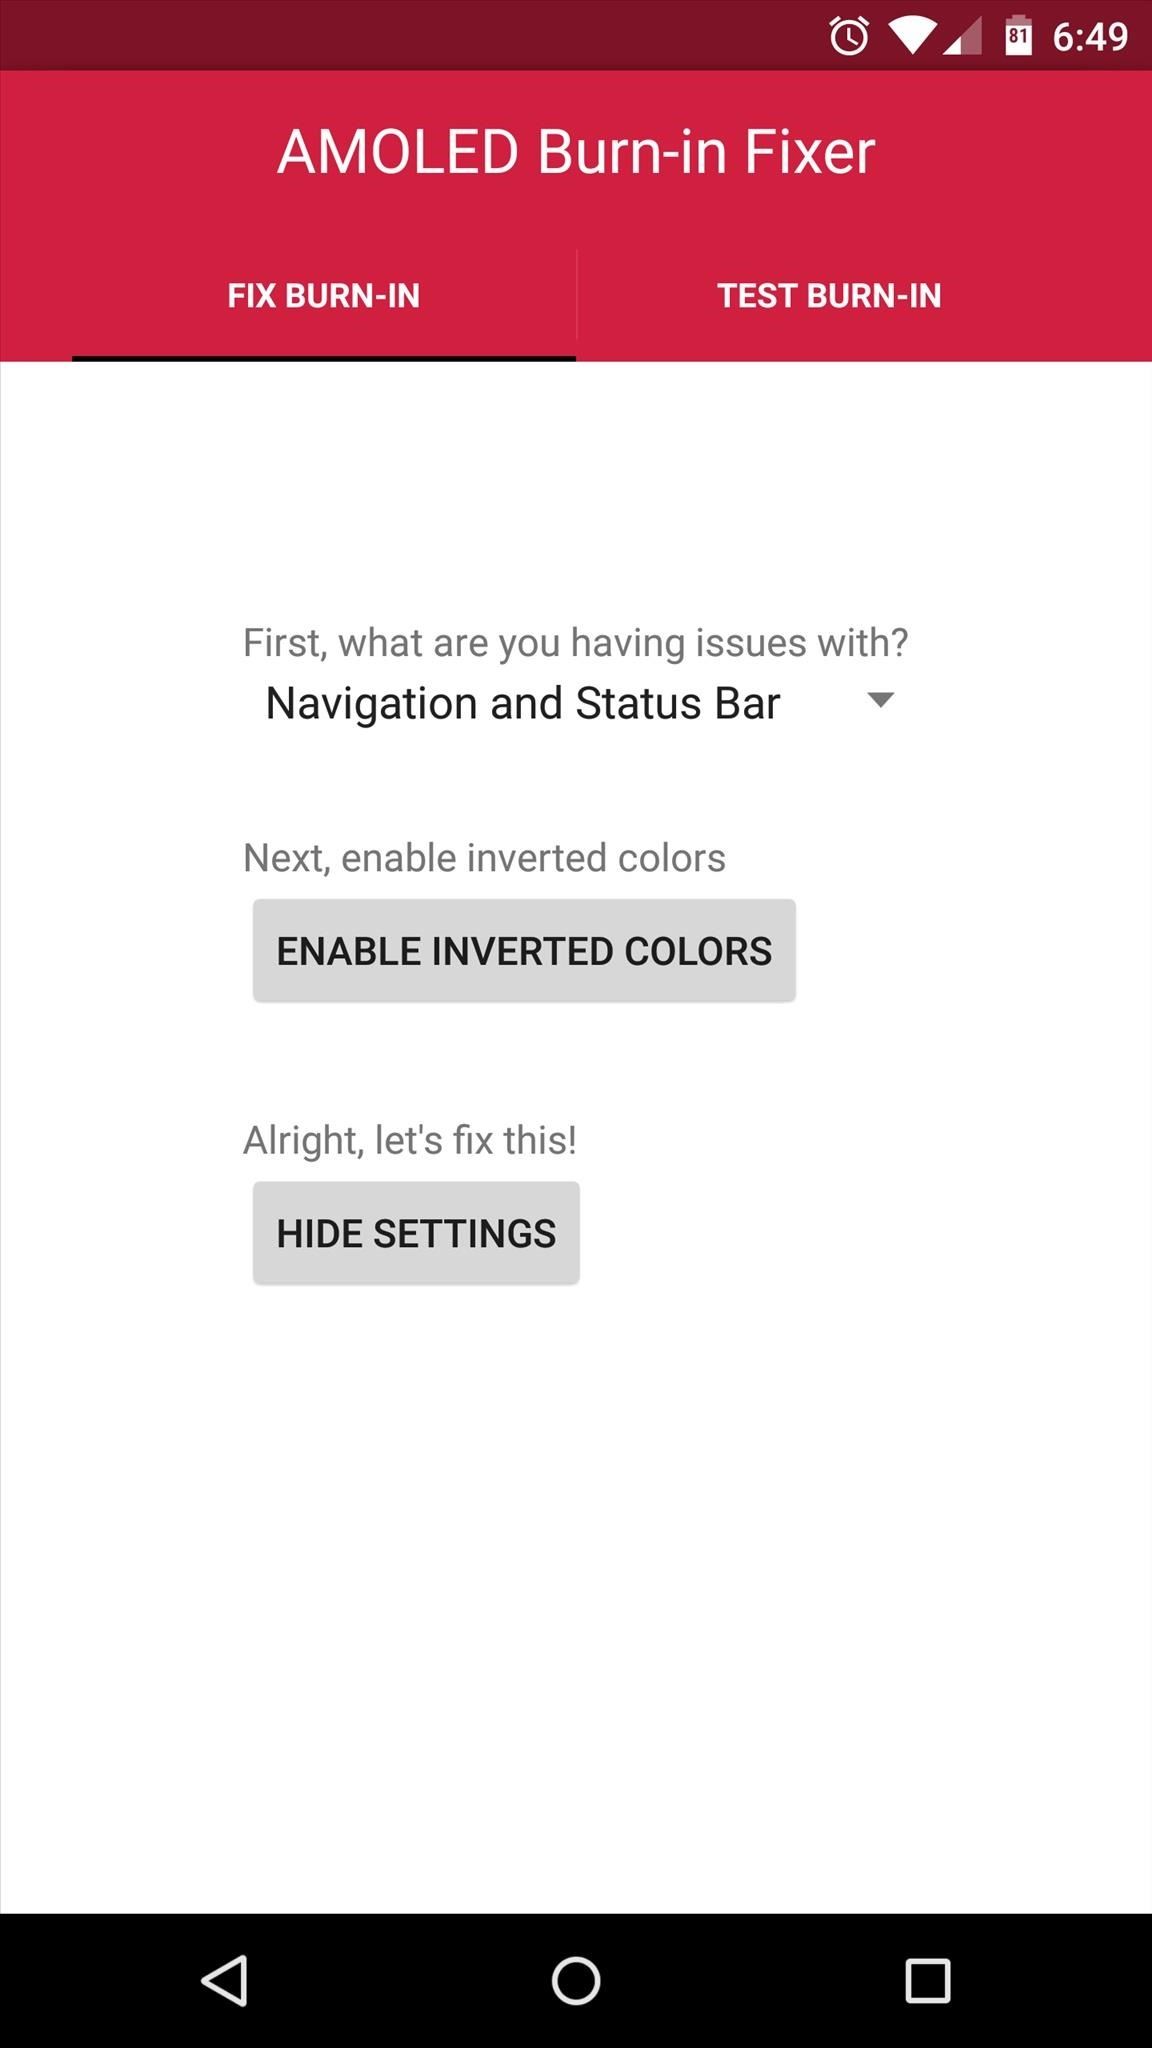
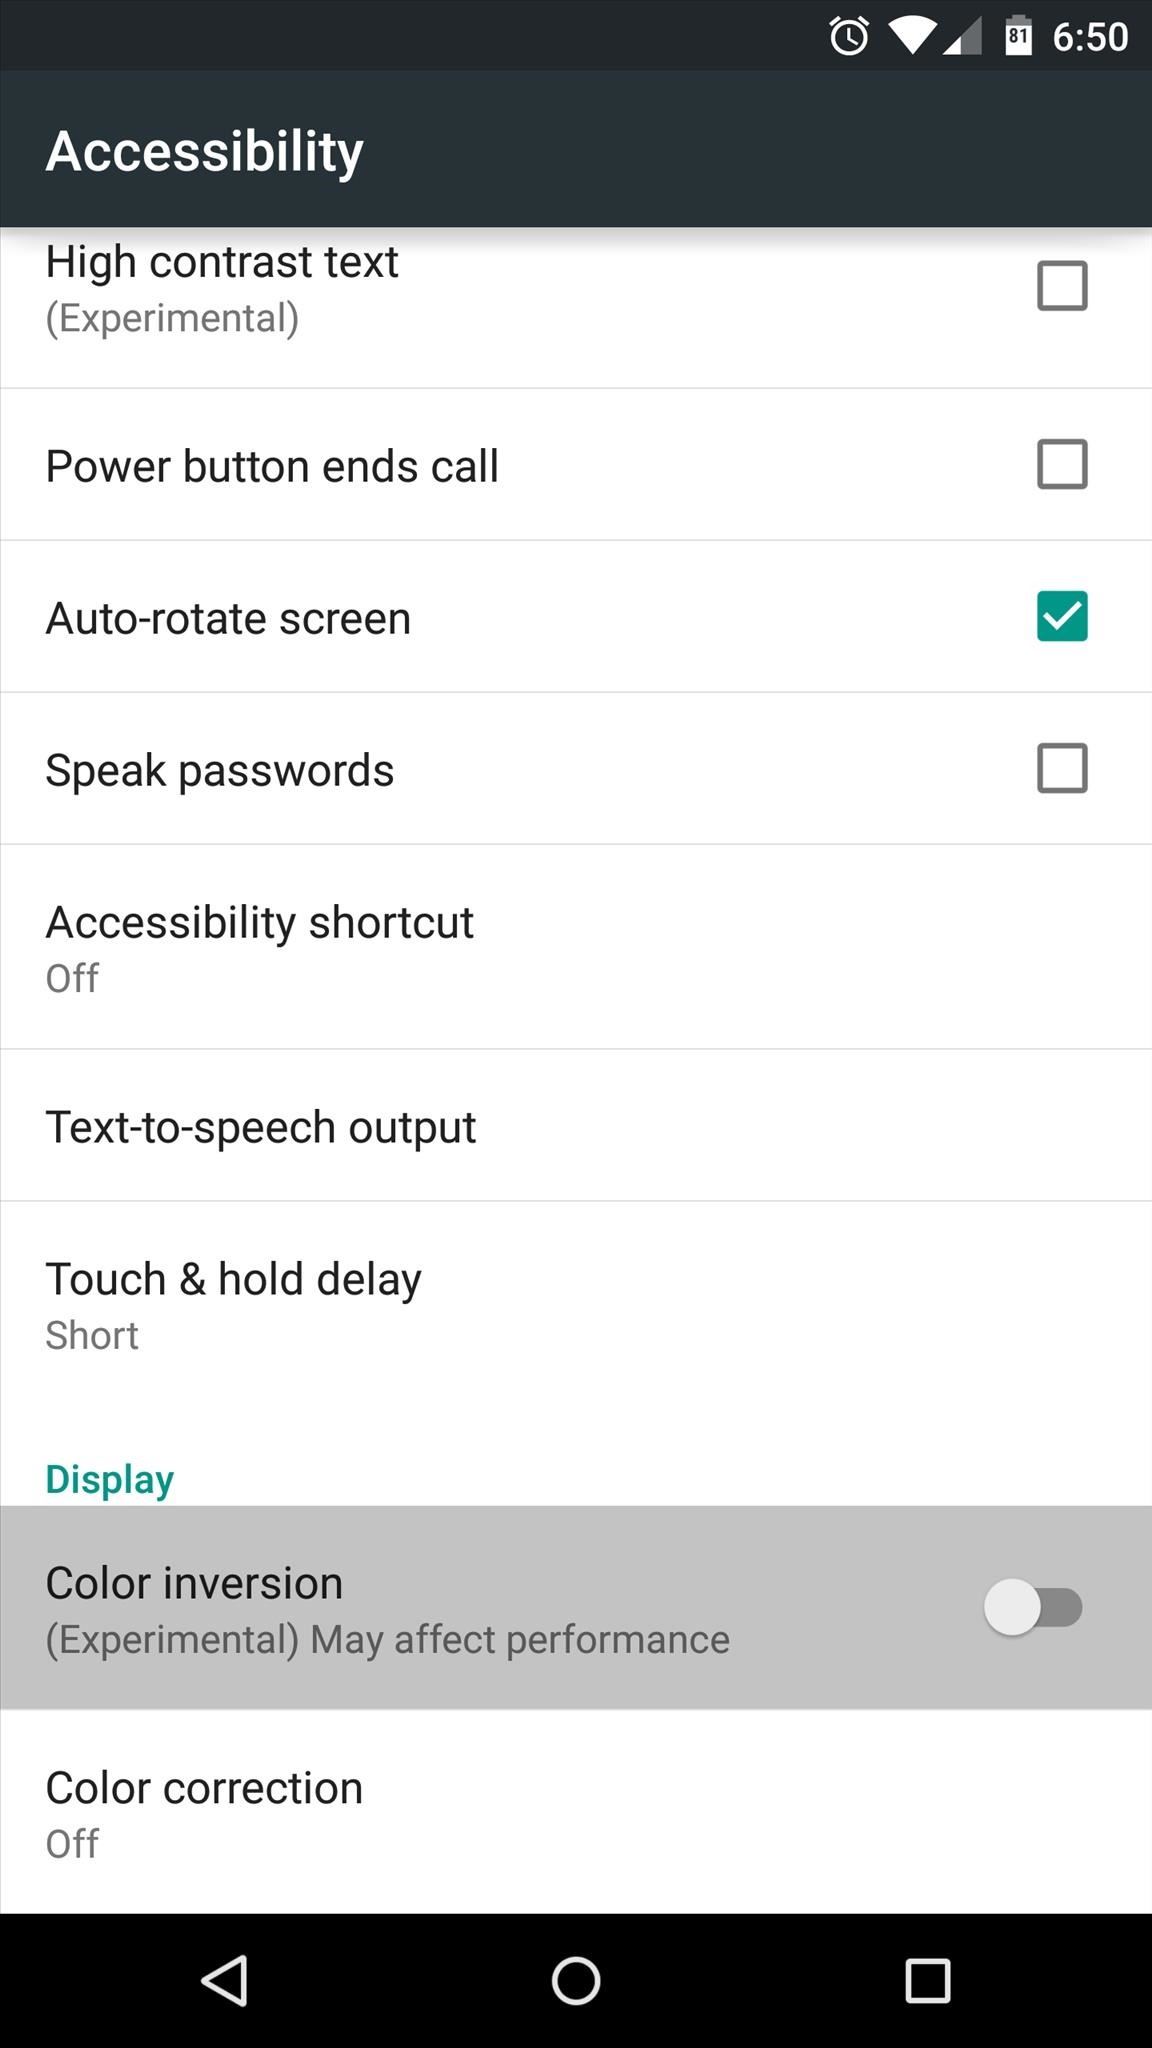
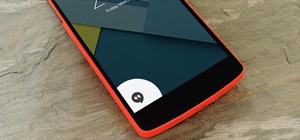
Next, tap the "Enable Inverted Colors" button, and you'll be taken to an Android settings menu. From here, scroll down a bit, then toggle the switch next to "Color inversion."

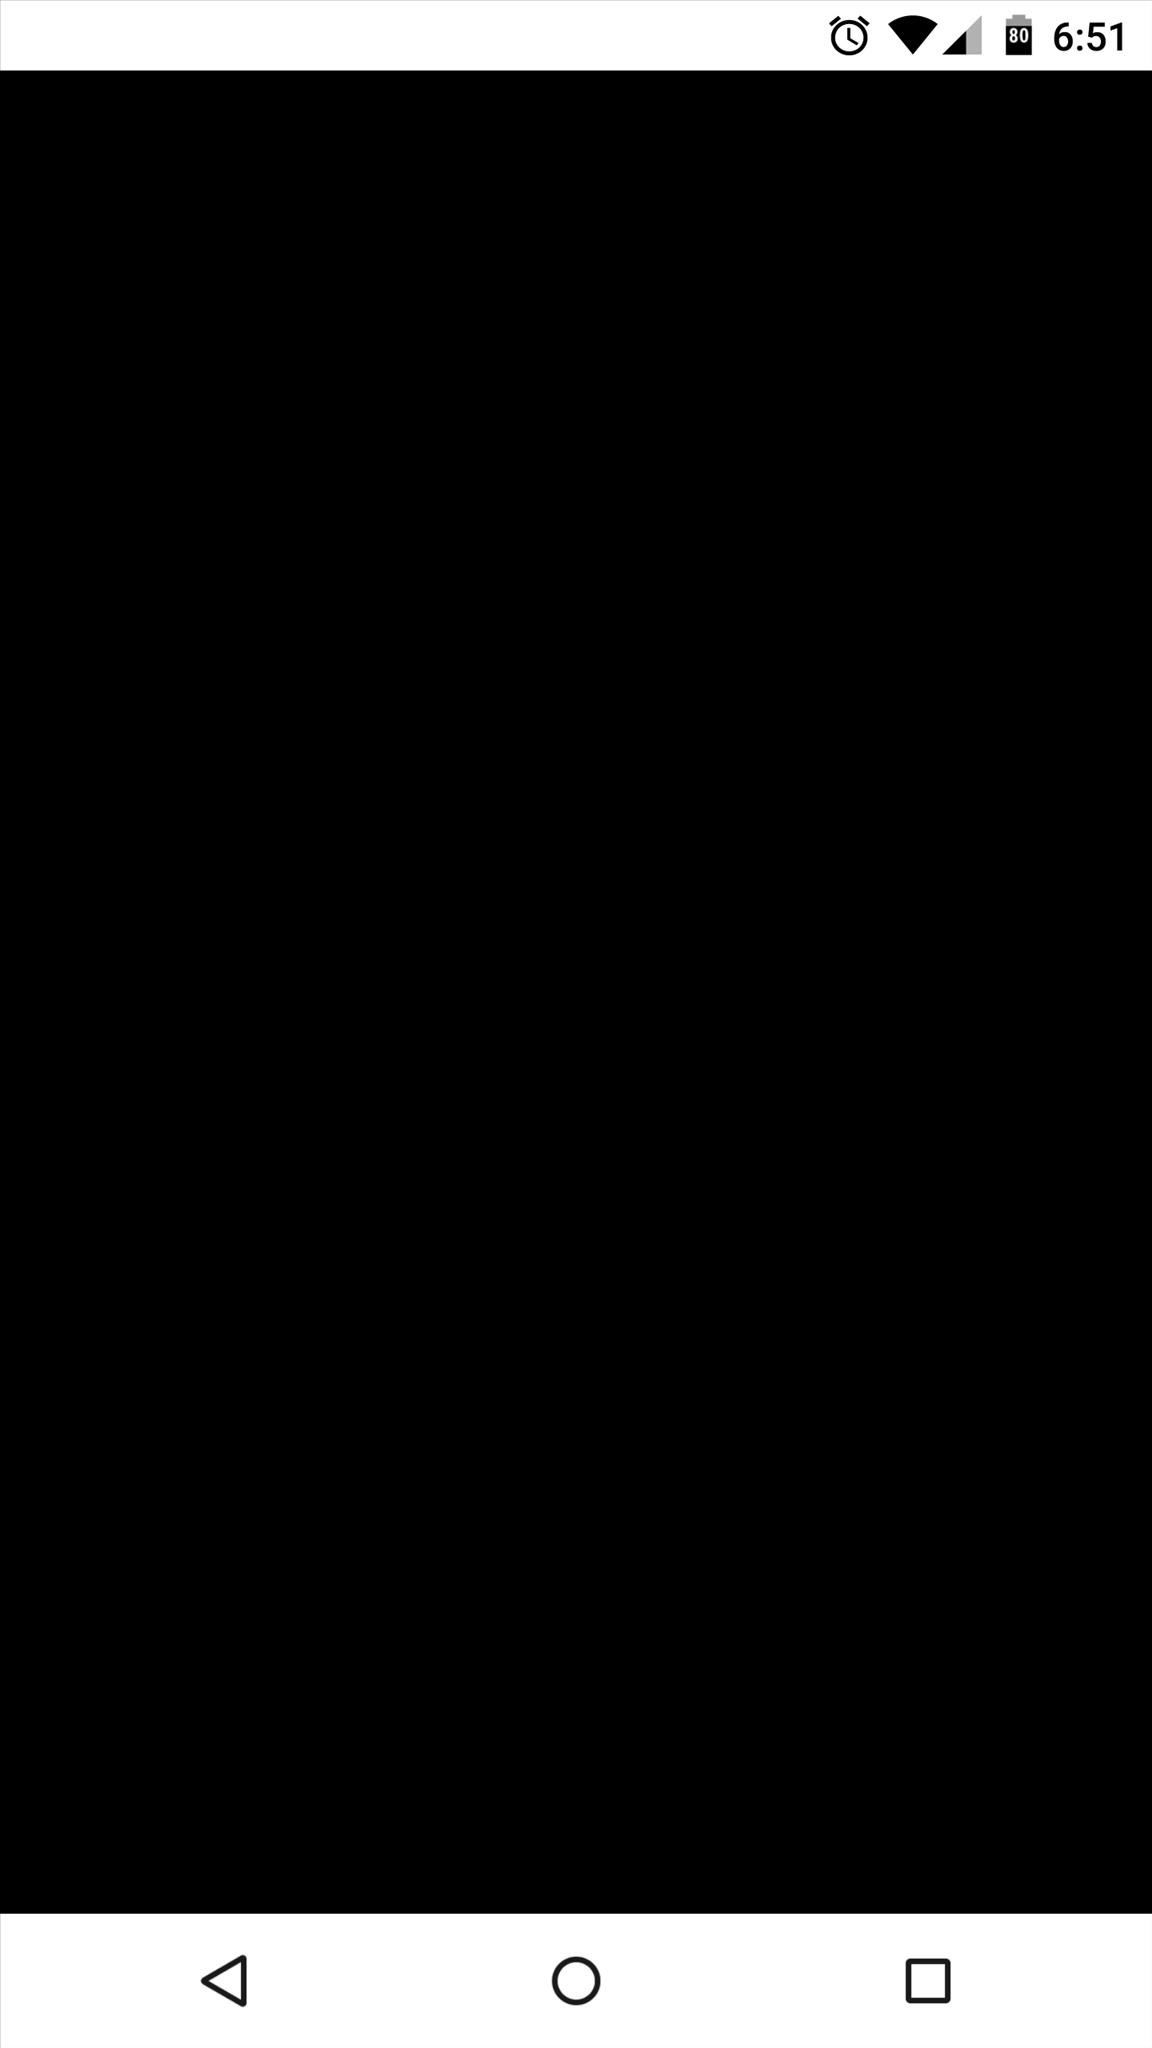
After that, all of the elements on your screen will look like a photo negative. This is how the effects of burn-in will be reversed—by overlaying an inverted version of the burned-in elements.
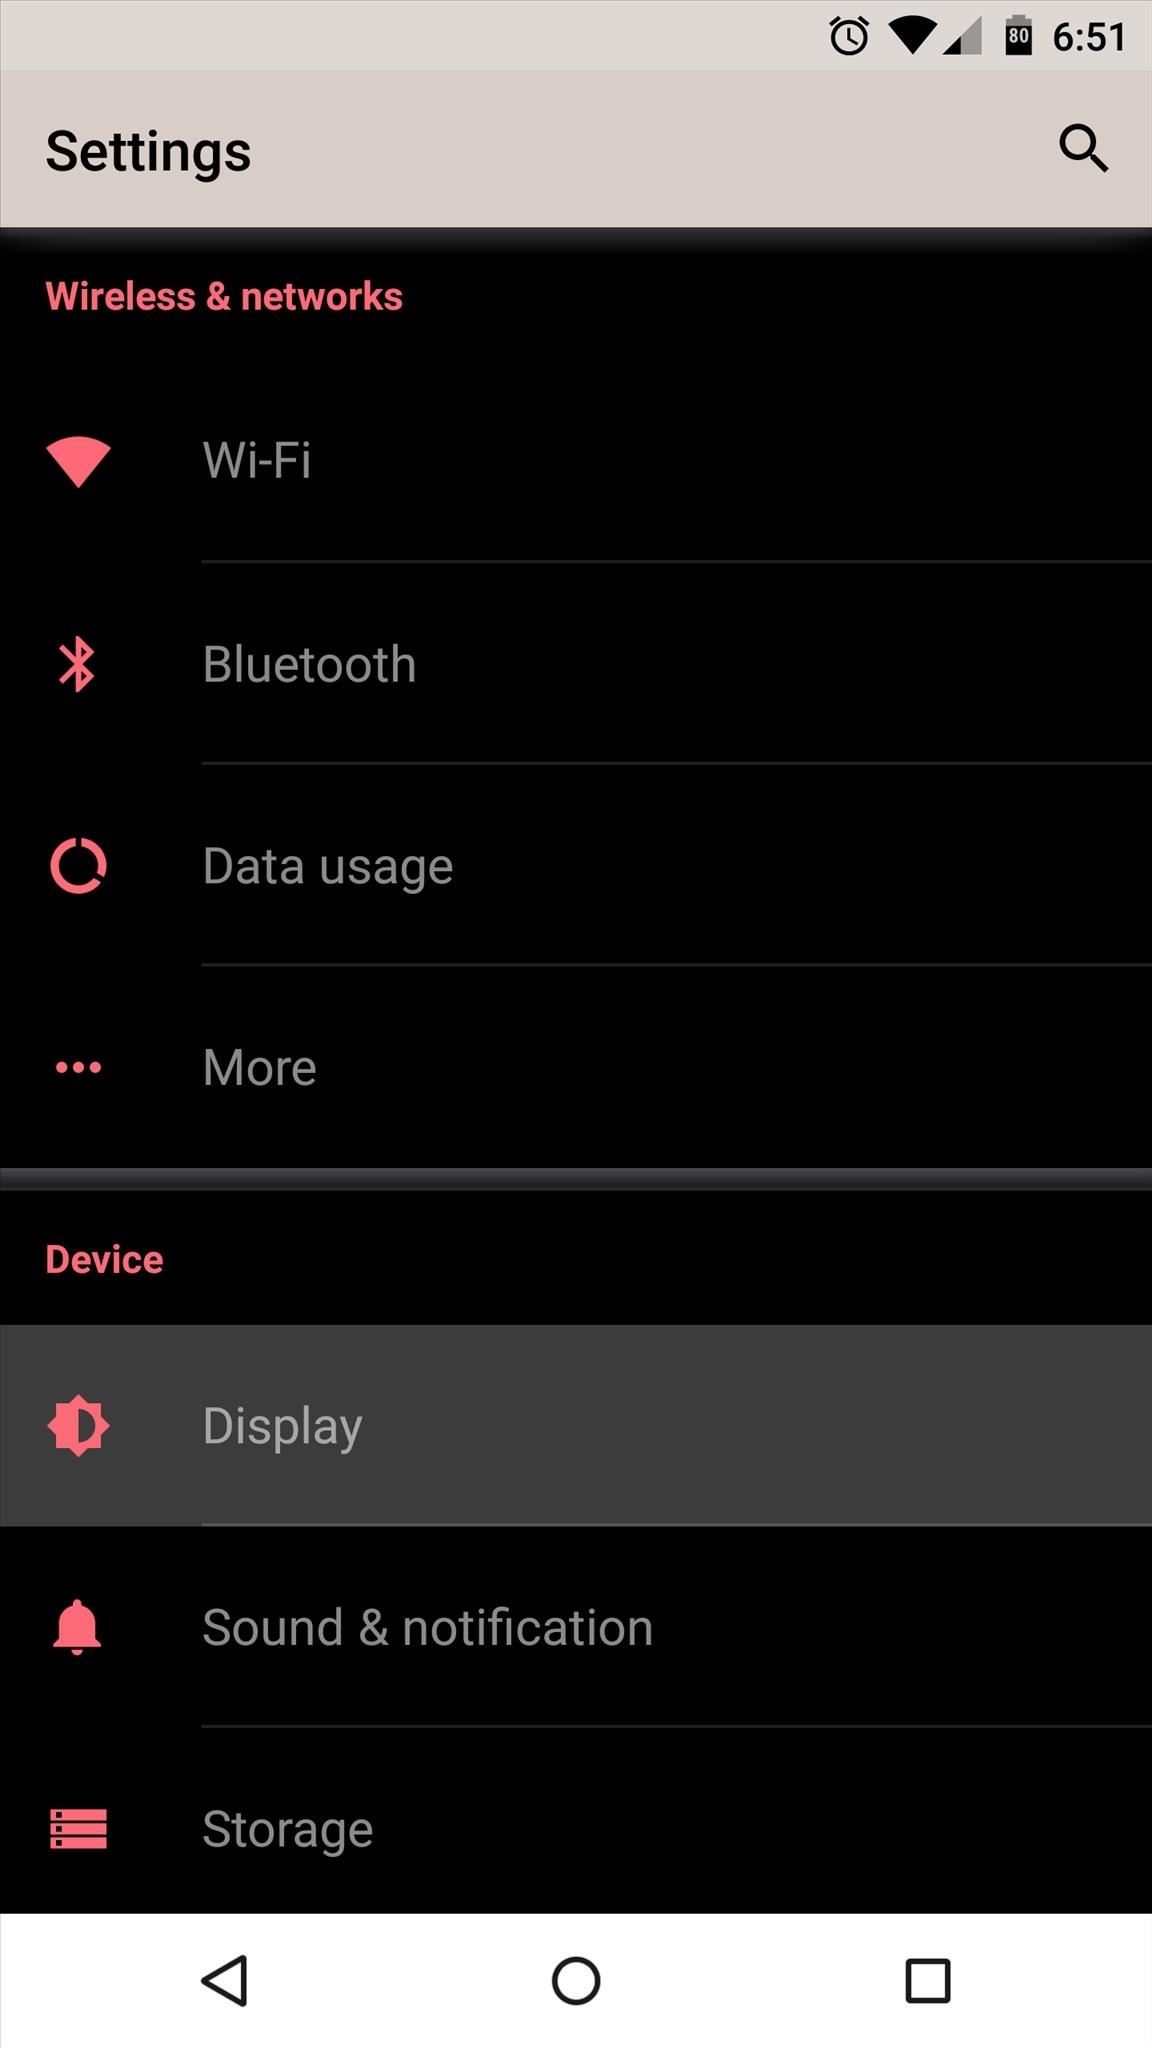
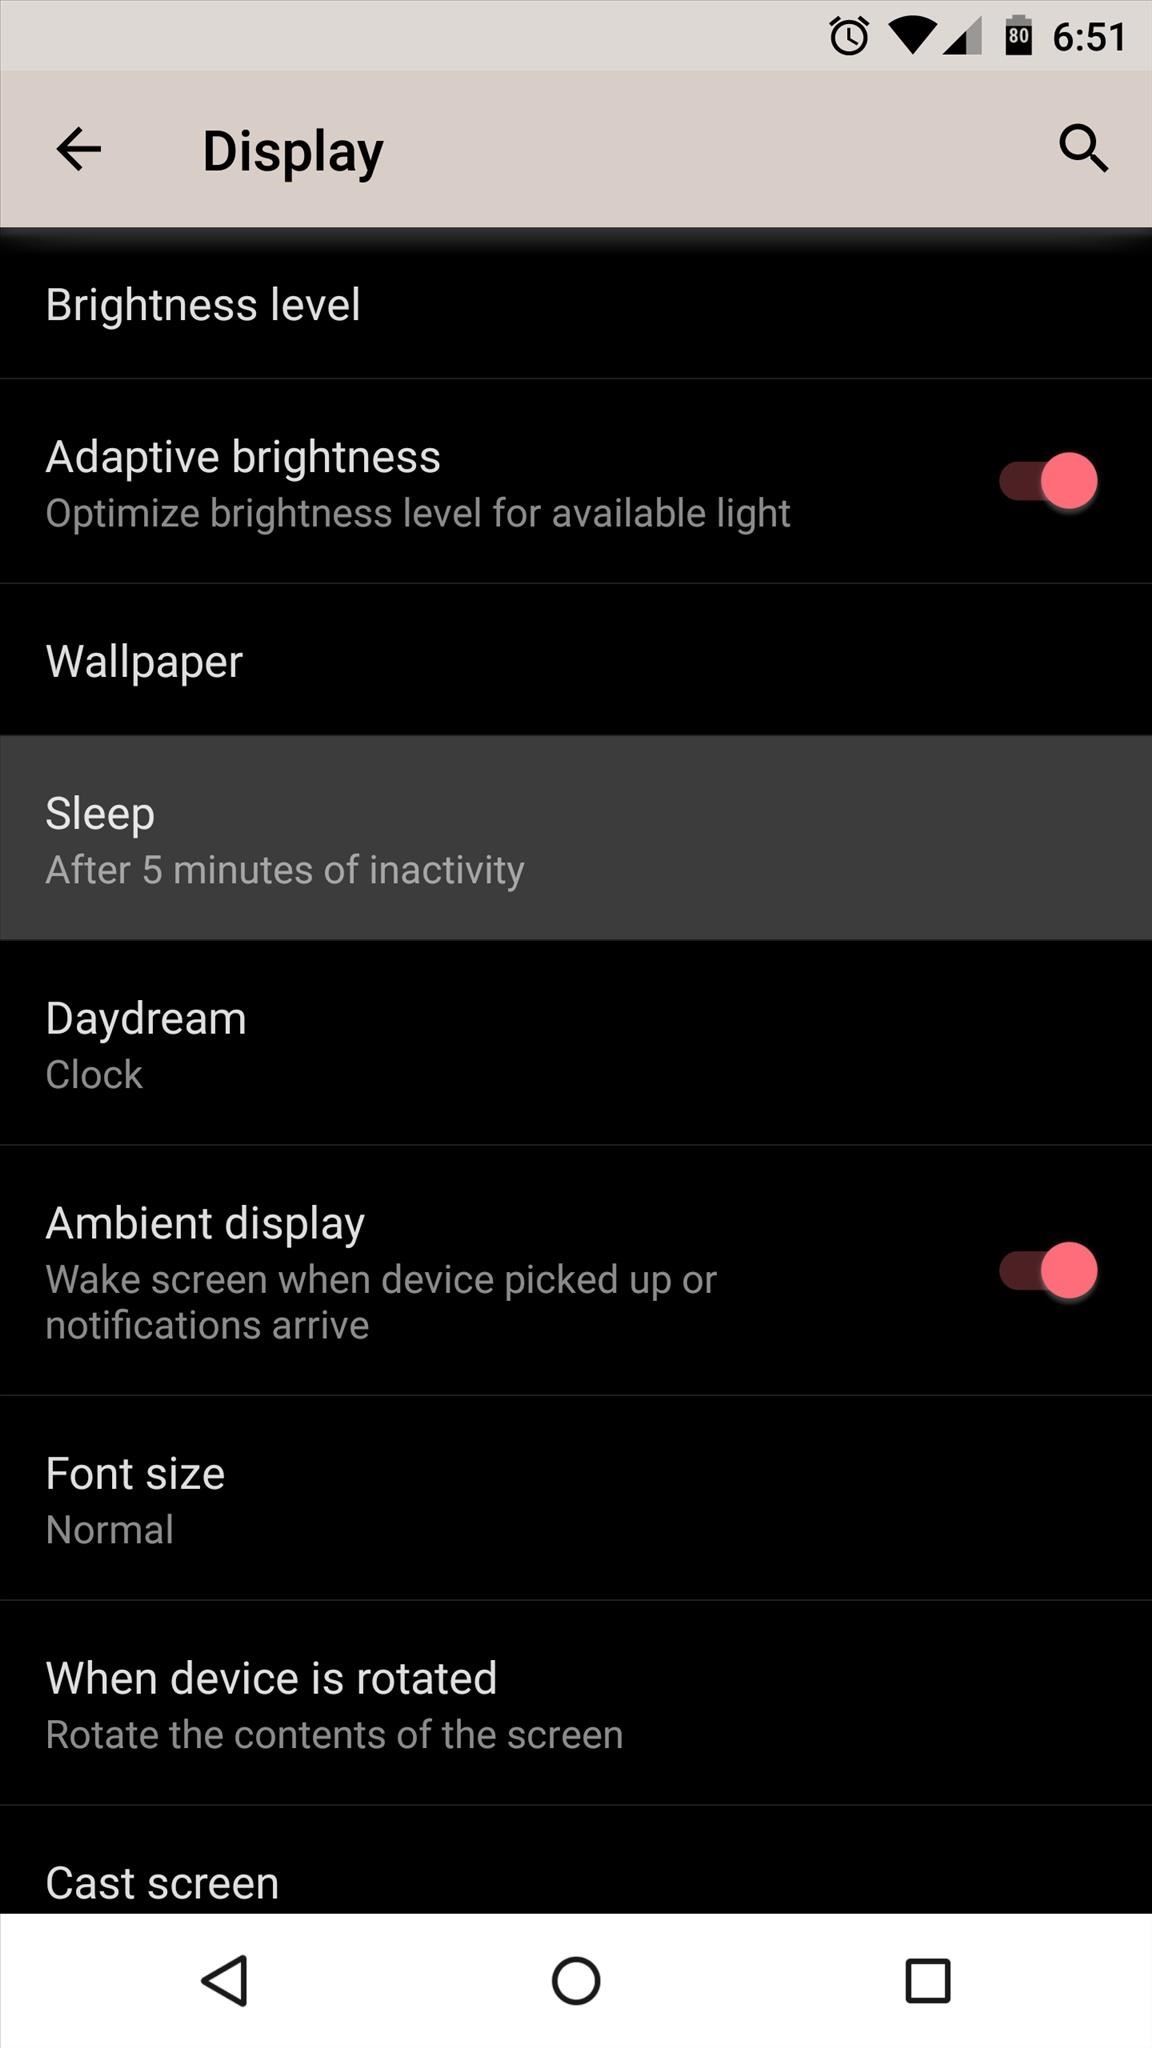
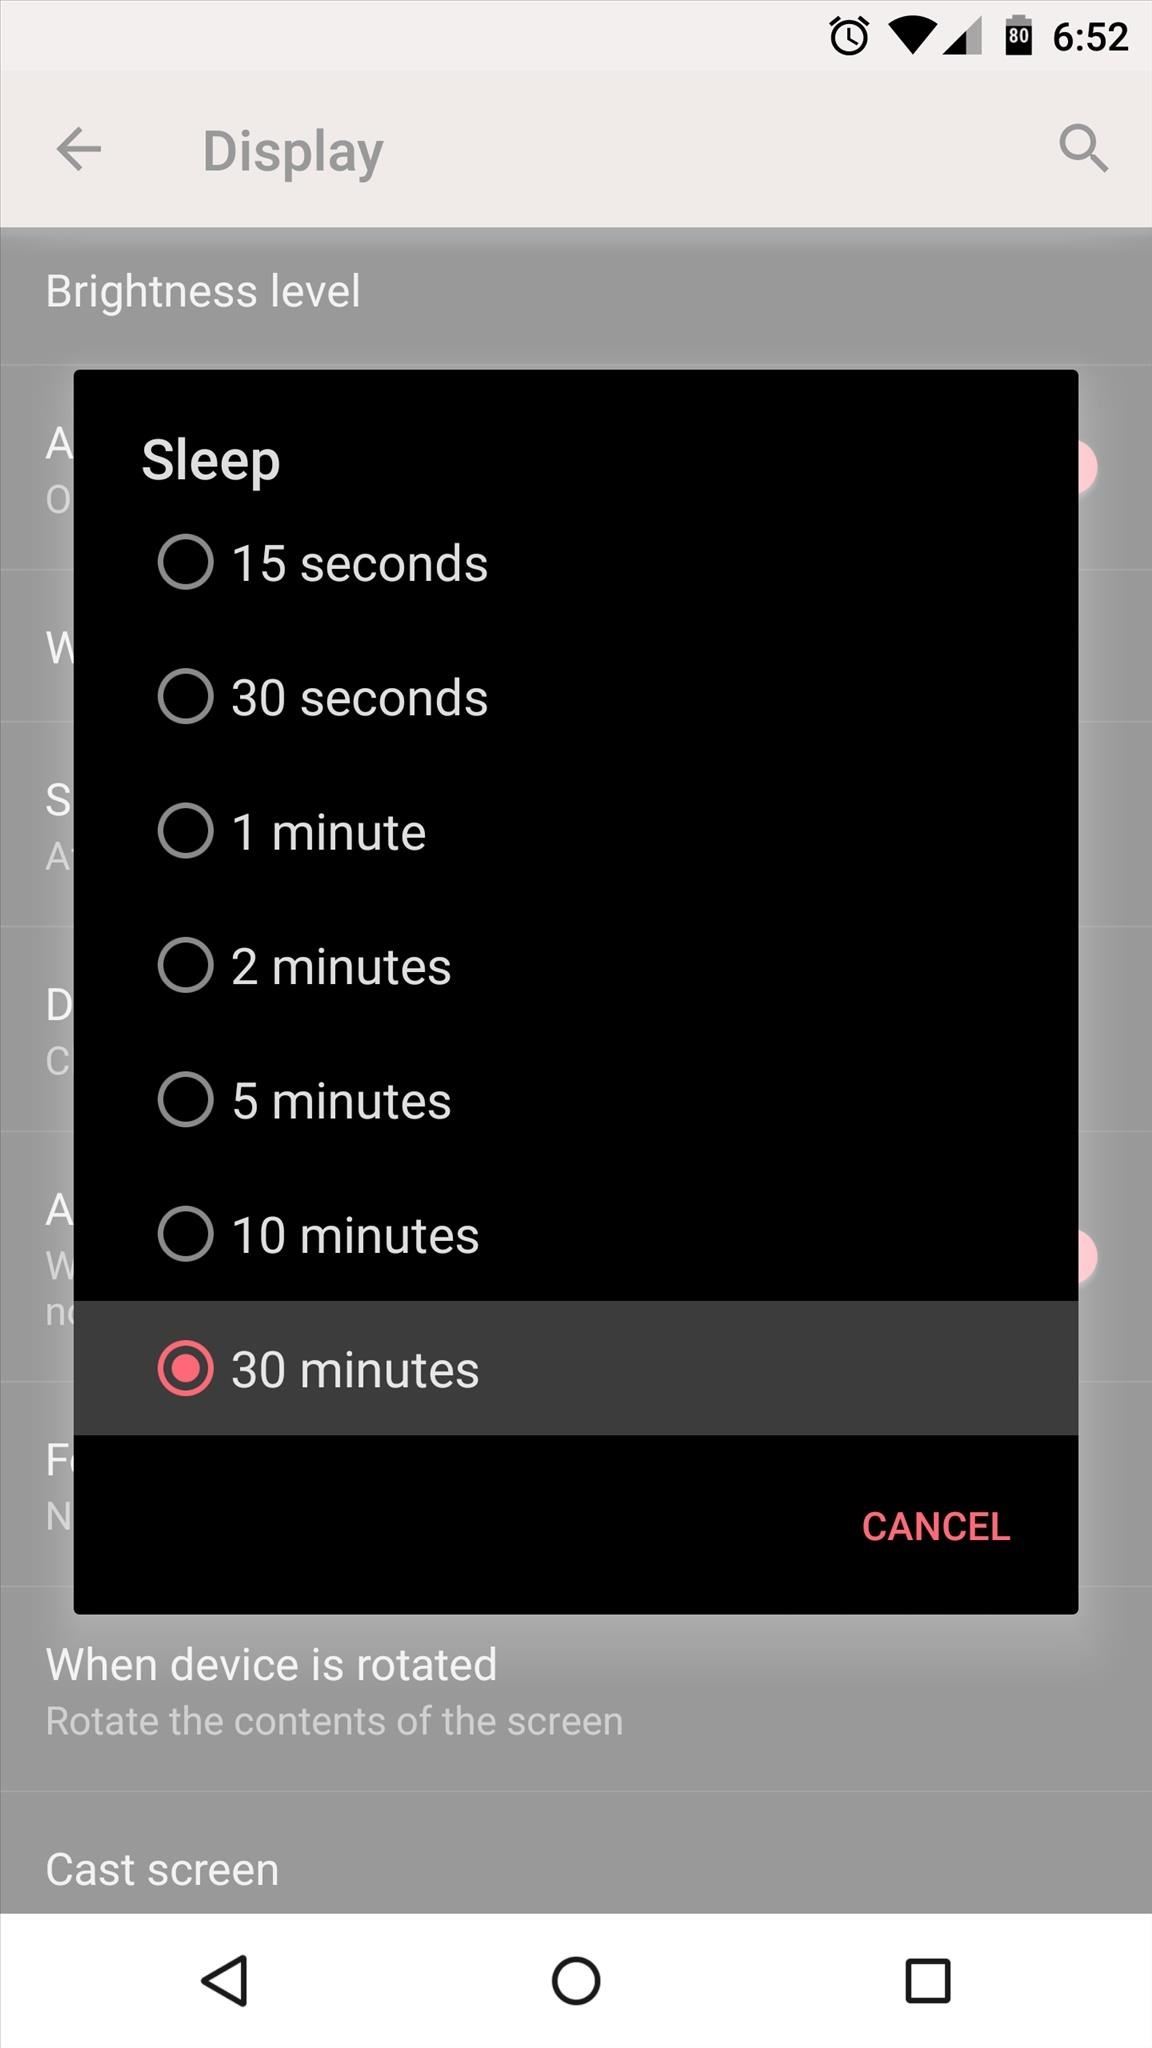
Since this process will take some time, it would be a good idea to adjust your display timeout. Head to "Settings," then "Display," then set the "Sleep" value to 30 minutes.
Back in AMOLED Screen Burn-in Fixer, tap the "Hide Settings" button. At this point, only a negative version of the status bar and navigation bar should be visible.
Since your burn-in issues may be more or less extreme than the next guy, there's no perfect timetable as to how long you should leave this screen visible. I'd suggest disabling the inverted colors after 5 minutes, then using the "Test Burn-in" feature to see how much progress has been made.
For me, it took about 30 minutes of displaying the inverted screen to get rid of my burn-in issues—but it worked like a charm! How long did it take to get rid of your screen burn-in? Let us know in the comment section below, or drop us a line on Facebook, Google+, or Twitter.
Just updated your iPhone? You'll find new emoji, enhanced security, podcast transcripts, Apple Cash virtual numbers, and other useful features. There are even new additions hidden within Safari. Find out what's new and changed on your iPhone with the iOS 17.4 update.


Be the First to Comment
Share Your Thoughts