

When you enter the softModder realm by rooting your Nexus 5, you open up an exciting world of possibilities and deep customizations for your device. Among other things, it gives you the ability to flash custom ROMs which, individually, act as entirely different operating systems that can vastly alter your user experience.
While flashing a ROM is relatively easy, switching back and forth between multiple ROMs can be a pain. Sure, you can always create backups (nandroids) to restore to, but creating those take time.
Today, I'm going to show you an easy method that will allow you to load multiple ROMs onto your device and easily boot into different ones at your own leisure. This way you can keep your main ROM while checking out and experimenting with others!
Before continuing, make sure you root your Nexus 5 (it's very easy). You'll also need to have a custom recovery installed.
Step 1: Install MultiROM Manager
MultiROM Manager is the app we're going to be using for this softMod, and it's free on Google Play.

Step 2: Install MultiROM, Recovery, & Kernel
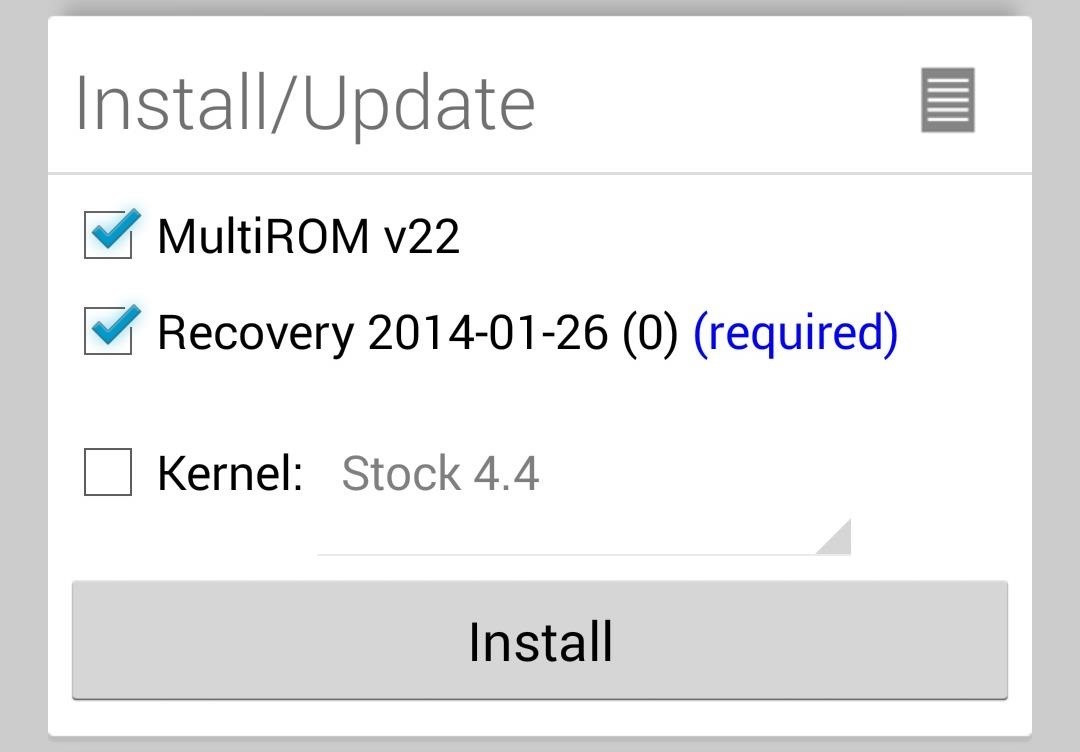
Launch the MultiROM Manager and check all three boxes under the Install /Update card—MultiROM v22, Recovery 2014-01-26 (0), and Kernel. Now hit the Install button and your system will install each package and reboot.
Your device will now boot into MultiROM. If you do nothing, your Nexus will automatically reboot within a few seconds. If you tap the screen, you can select a ROM to boot, but for now you won't have any because we haven't downloaded any yet.
Step 3: Add ROMs to MultiROM
At this point, any ROM you download to your phone's internal storage can be added to MultiROM and switched to when you initially turn on your device.
For example, I used GooManager, a great tool to find and download ROMs, to get AOKP as a .zip file to my phone's internal storage. For more info on using GooManager and the AOKP ROM, check out my previous guide on installing custom ROMs.
With some ROMs on your Nexus, just reboot into recovery mode by turning off the device, holding the Volume down and Power buttons at the same time, then selecting "recovery" with the Volume keys and making the selection with the Power button.
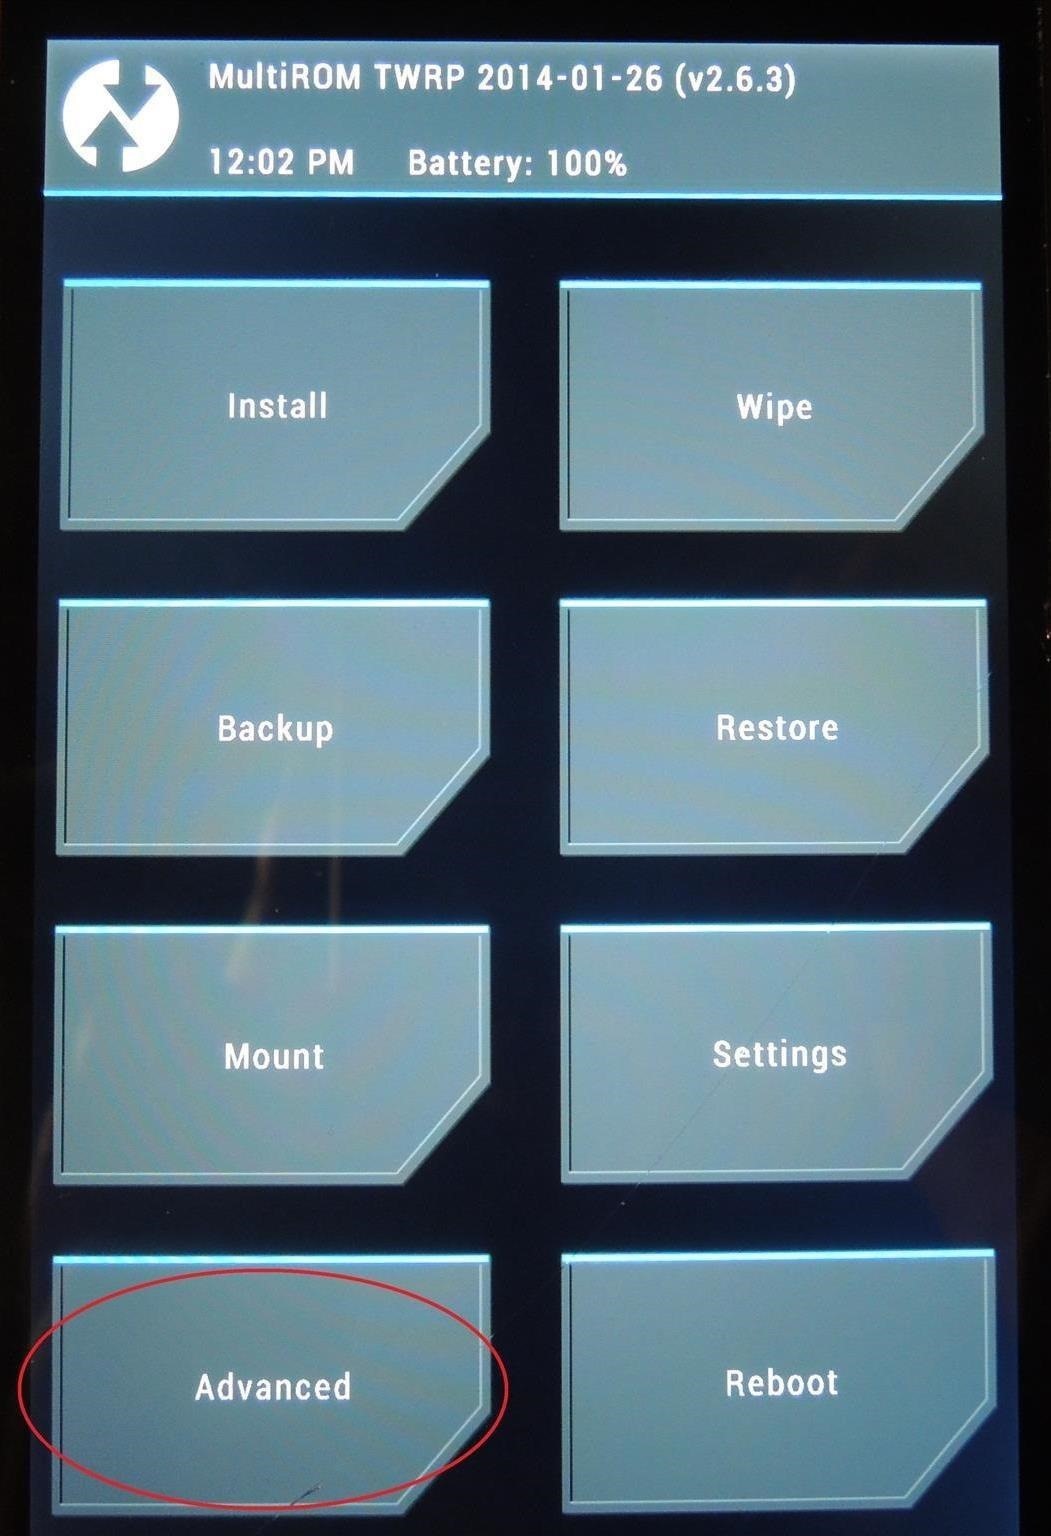
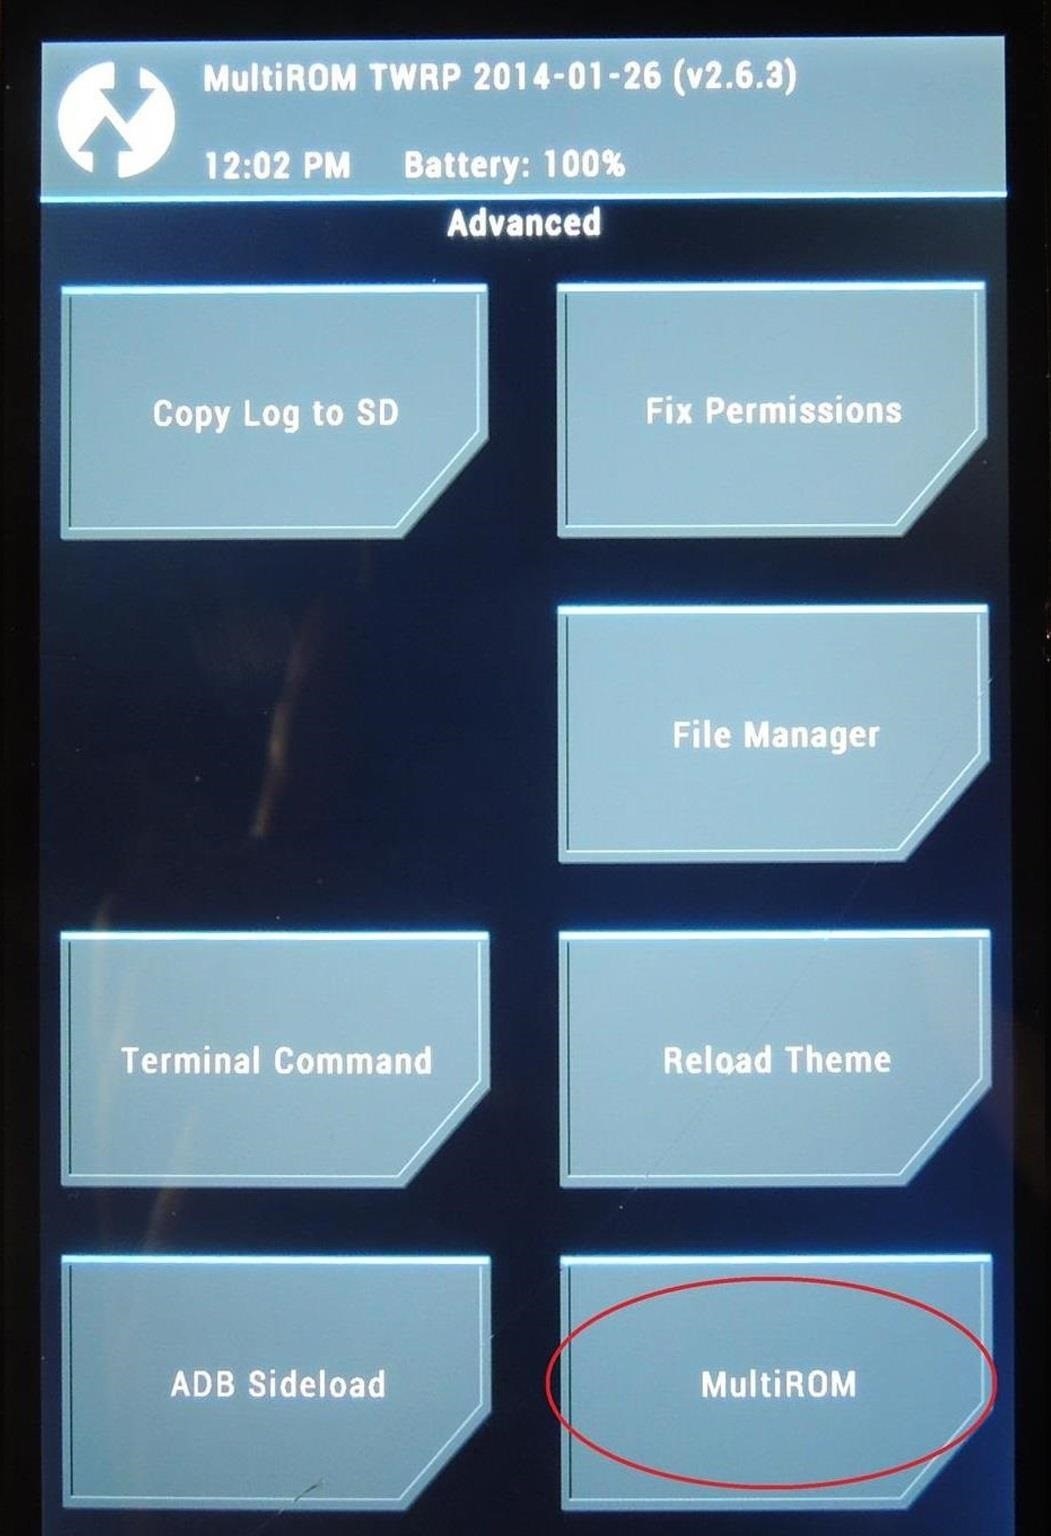
Once in recovery, tap Advanced, then MultiROM, then Add ROM.
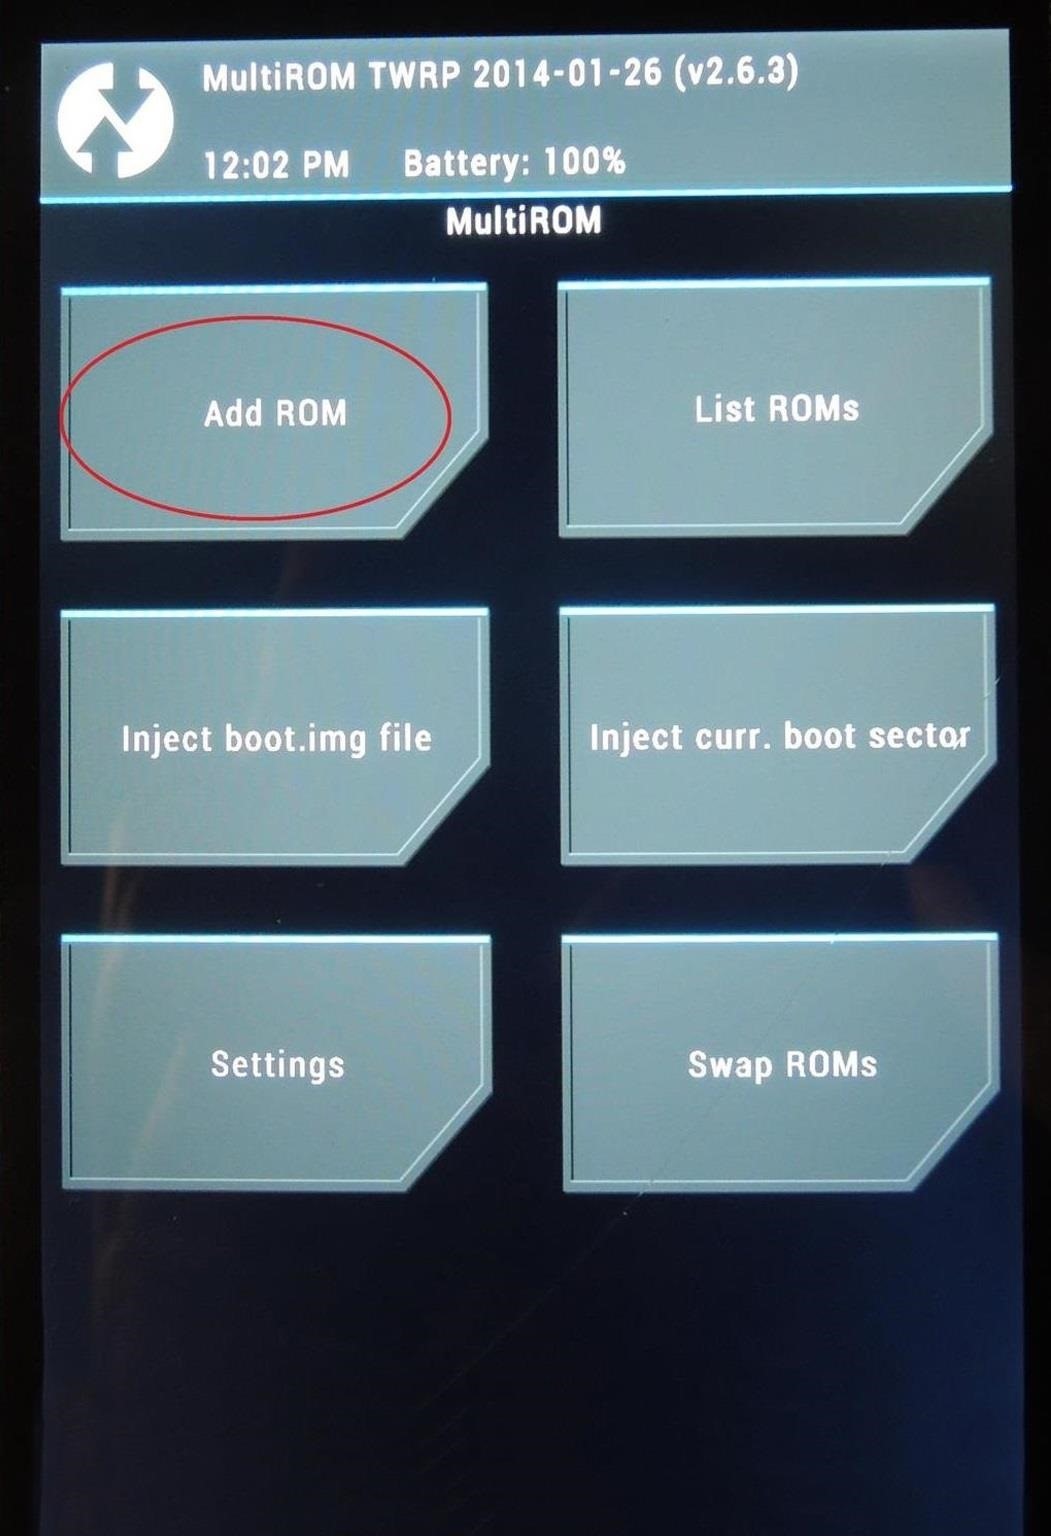
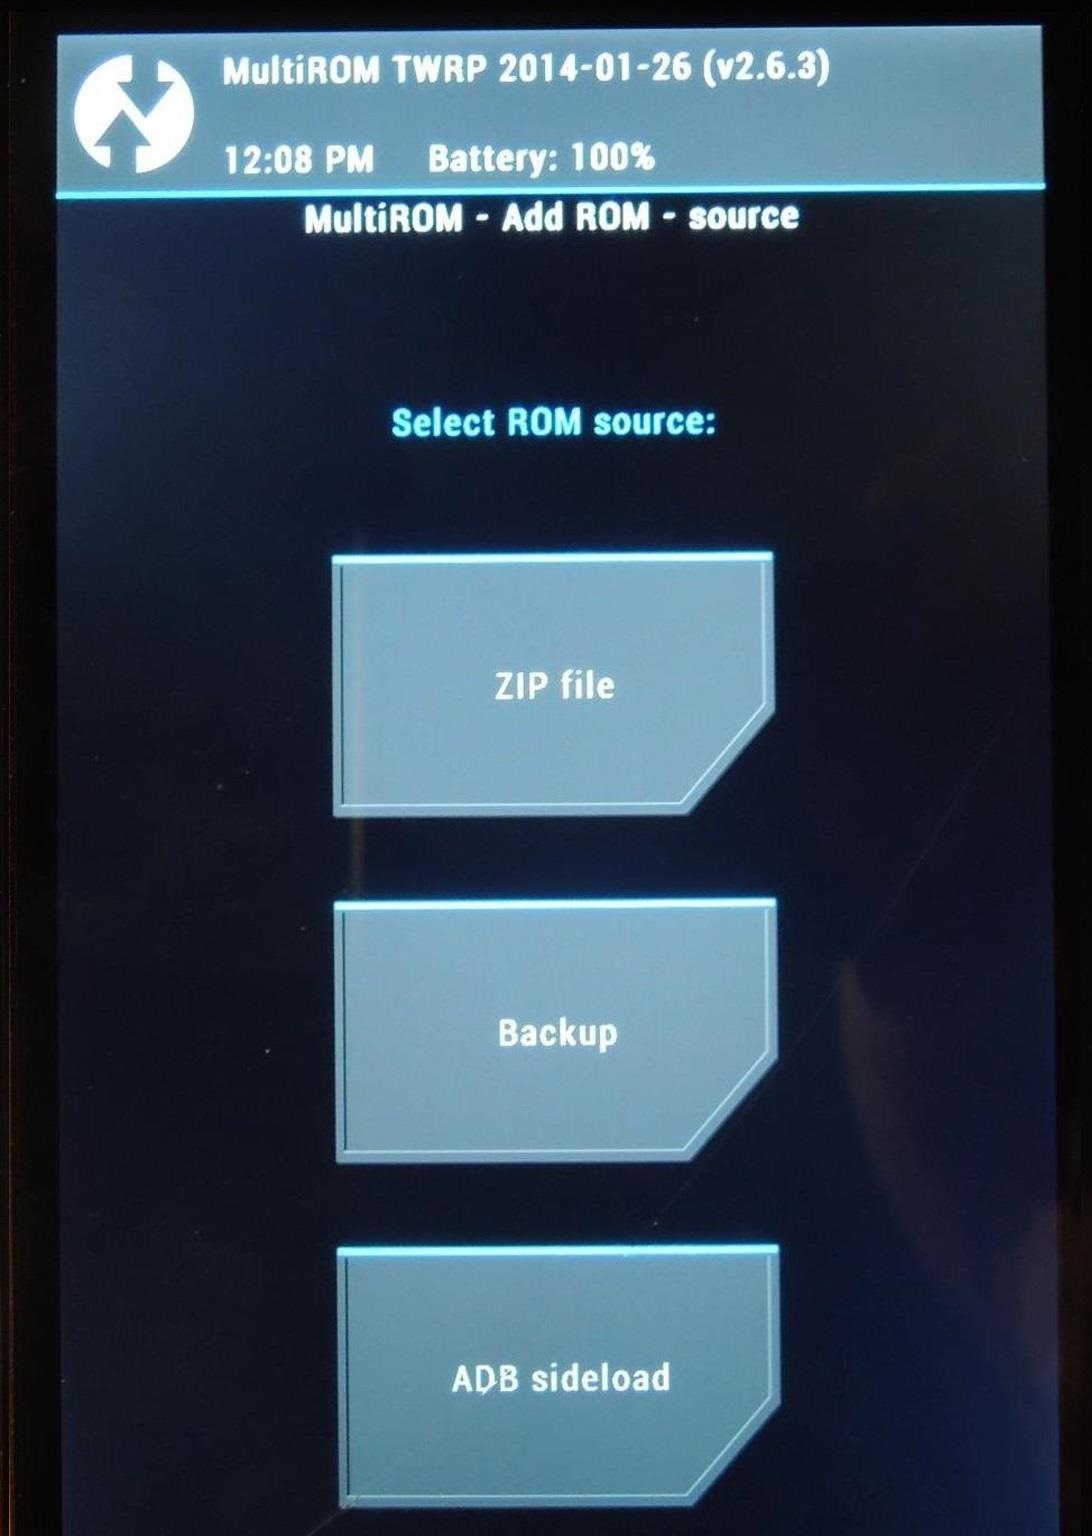
In the next menu, select Android for ROM, unless you're using Ubuntu (you would know if you were). Then select Don't share to keep ROMs separate from one another, enabling you to switch back and forth between them. Now just hit Next and tap ZIP file.
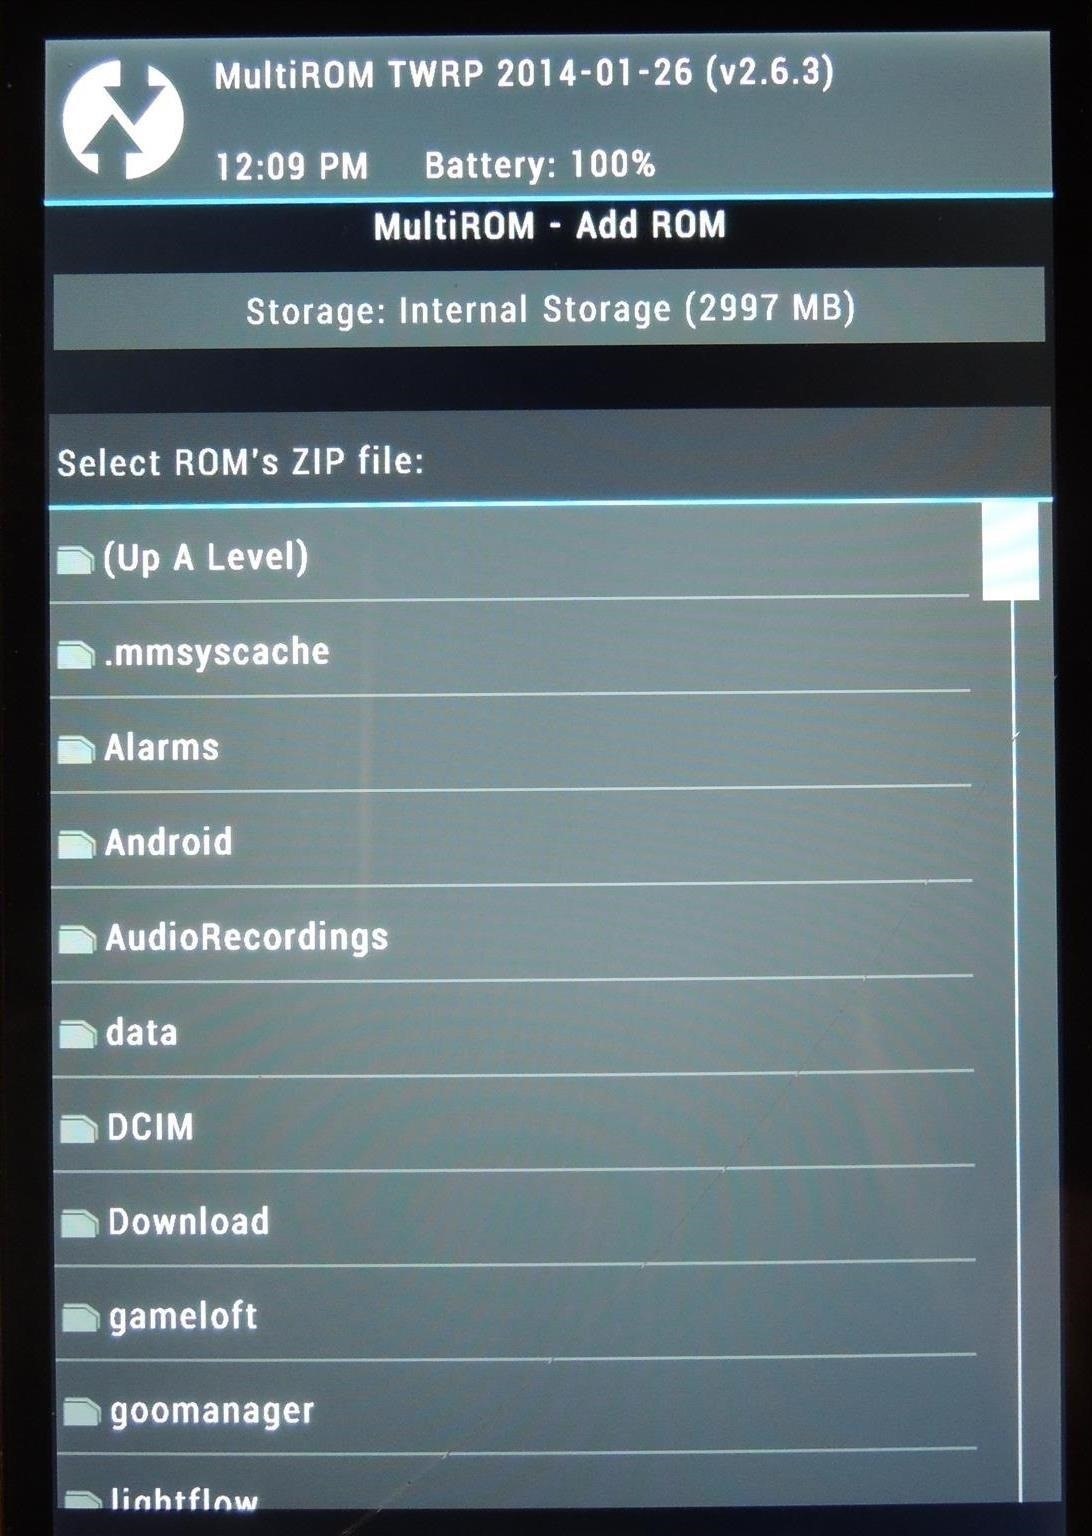
Assuming you used the GooManager method, you'll find the ROM under the goomanager folder. Select the ROM, in this example AOKP, then swipe the arrow to install and tap Reboot to finish the process.
Step 4: Switch Between Your ROMs
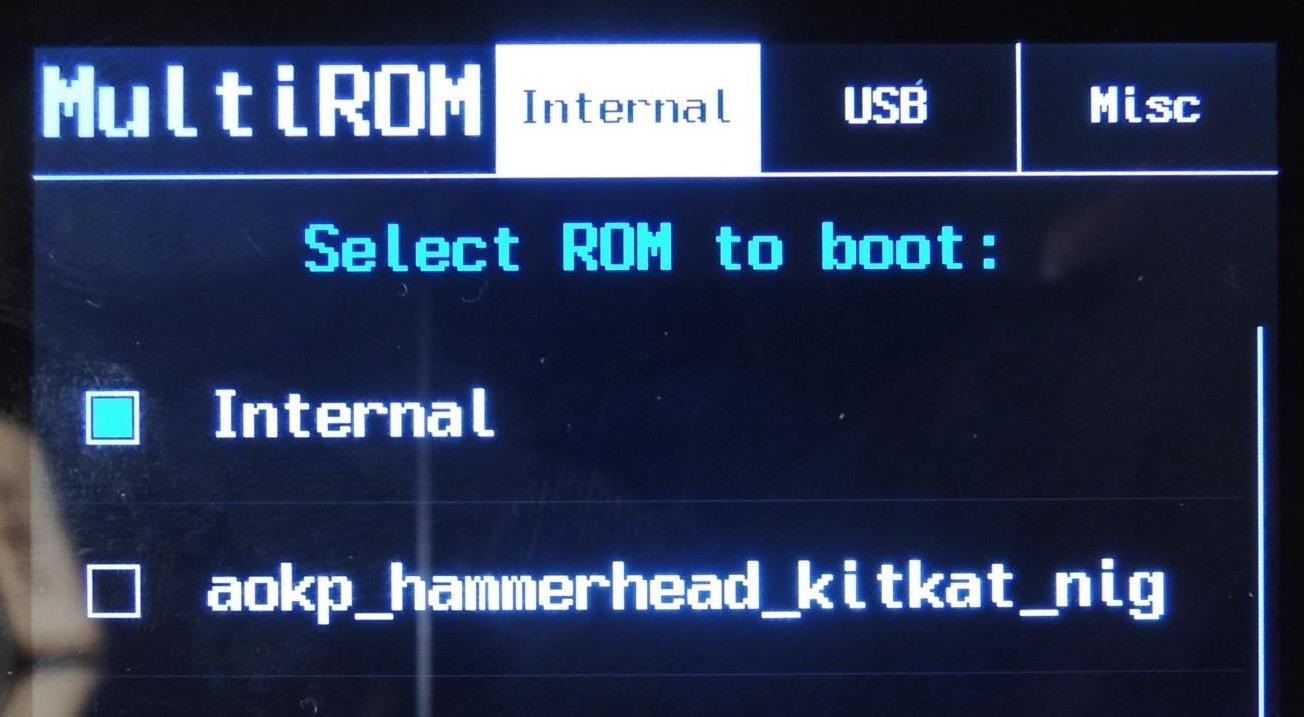
When your device boots, you'll now see your newly installed ROM as an option to boot in to. Simply tap the screen, select the ROM, then Boot. If you don't like the ROM or are having issues, no problem—just reboot your phone, then select Internal to go back to your stock setup or original ROM.
With MultiROM, you're only limited by how many ROMs you can fit on your phone's internal storage, so don't be afraid to experiment! Add different ROMs to MultiROM with the confidence that you can always boot back into your main daily-driver ROM with no issues.
This method gives you the freedom to explore what Android can do for you, hassle free.
Just updated your iPhone? You'll find new emoji, enhanced security, podcast transcripts, Apple Cash virtual numbers, and other useful features. There are even new additions hidden within Safari. Find out what's new and changed on your iPhone with the iOS 17.4 update.


1 Comment
What if we want to go back to a single ROM how will we remove the multirom option every time during boot
Share Your Thoughts