

With Android devices, there are two main ways to modify the actual operating system on a deep level—root and custom recovery. Some users may prefer the ease of use that root brings, since it operates while Android is running and can utilize apps to make any modifications. Others, however, may prefer to remain unrooted and simply use custom recovery to make modifications, since it's generally the more secure route and comes with the added bonus of being able to create full system backups.
Most custom recovery installation methods require that your device is already rooted, but a built-in Android feature called Fastboot will actually allow you to install a custom recovery even if you're not rooted. You'll need a computer to use this method, and you'll have to unlock your device's bootloader, which in turn will wipe all of your data. Beyond that, though, the process is relatively simple, and I'll cover it all in detail below.
Back Up Your Data
Before you begin, be sure to back up any data that you'd like to keep, since part of this process involves unlocking your bootloader, which in turn will completely wipe your device. Apps, contacts, and other similar information will be restored when you log back into your Google account, but anything that isn't backed up to the cloud should be transferred to a separate storage device for safekeeping.
Step 1: Install ADB & Fastboot on Your Computer
First things first, you'll need to install Android Debug Bridge (ADB) and Fastboot on your computer to send a few commands over to your Nexus device. This process can vary greatly depending on your computer's operating system, so we've covered all of the methods with a separate tutorial here. Once you've installed the software, go ahead and connect your Nexus to your computer with a USB data cable.
Step 2: Download TWRP Recovery
Next up, using your computer, click one of the links below to download TWRP recovery for your Nexus device:
- TWRP for Nexus 5
- TWRP for 2013 Nexus 7 (Wi-Fi)
- TWRP for 2013 Nexus 7 (3G)
- TWRP for Nexus 6
- TWRP for Nexus 9
From here, rename the TWRP file you just downloaded to "recovery.img" in order to simplify things. If there is no file extension listed (.img), simply rename the file to "recovery" and move on.
After that, copy the file and paste it into the "platform-tools" folder inside of your ADB and Fastboot installation directory. Windows users that followed the guide in Step 1 can skip this step and simply leave the recovery.img file in their download folder instead.
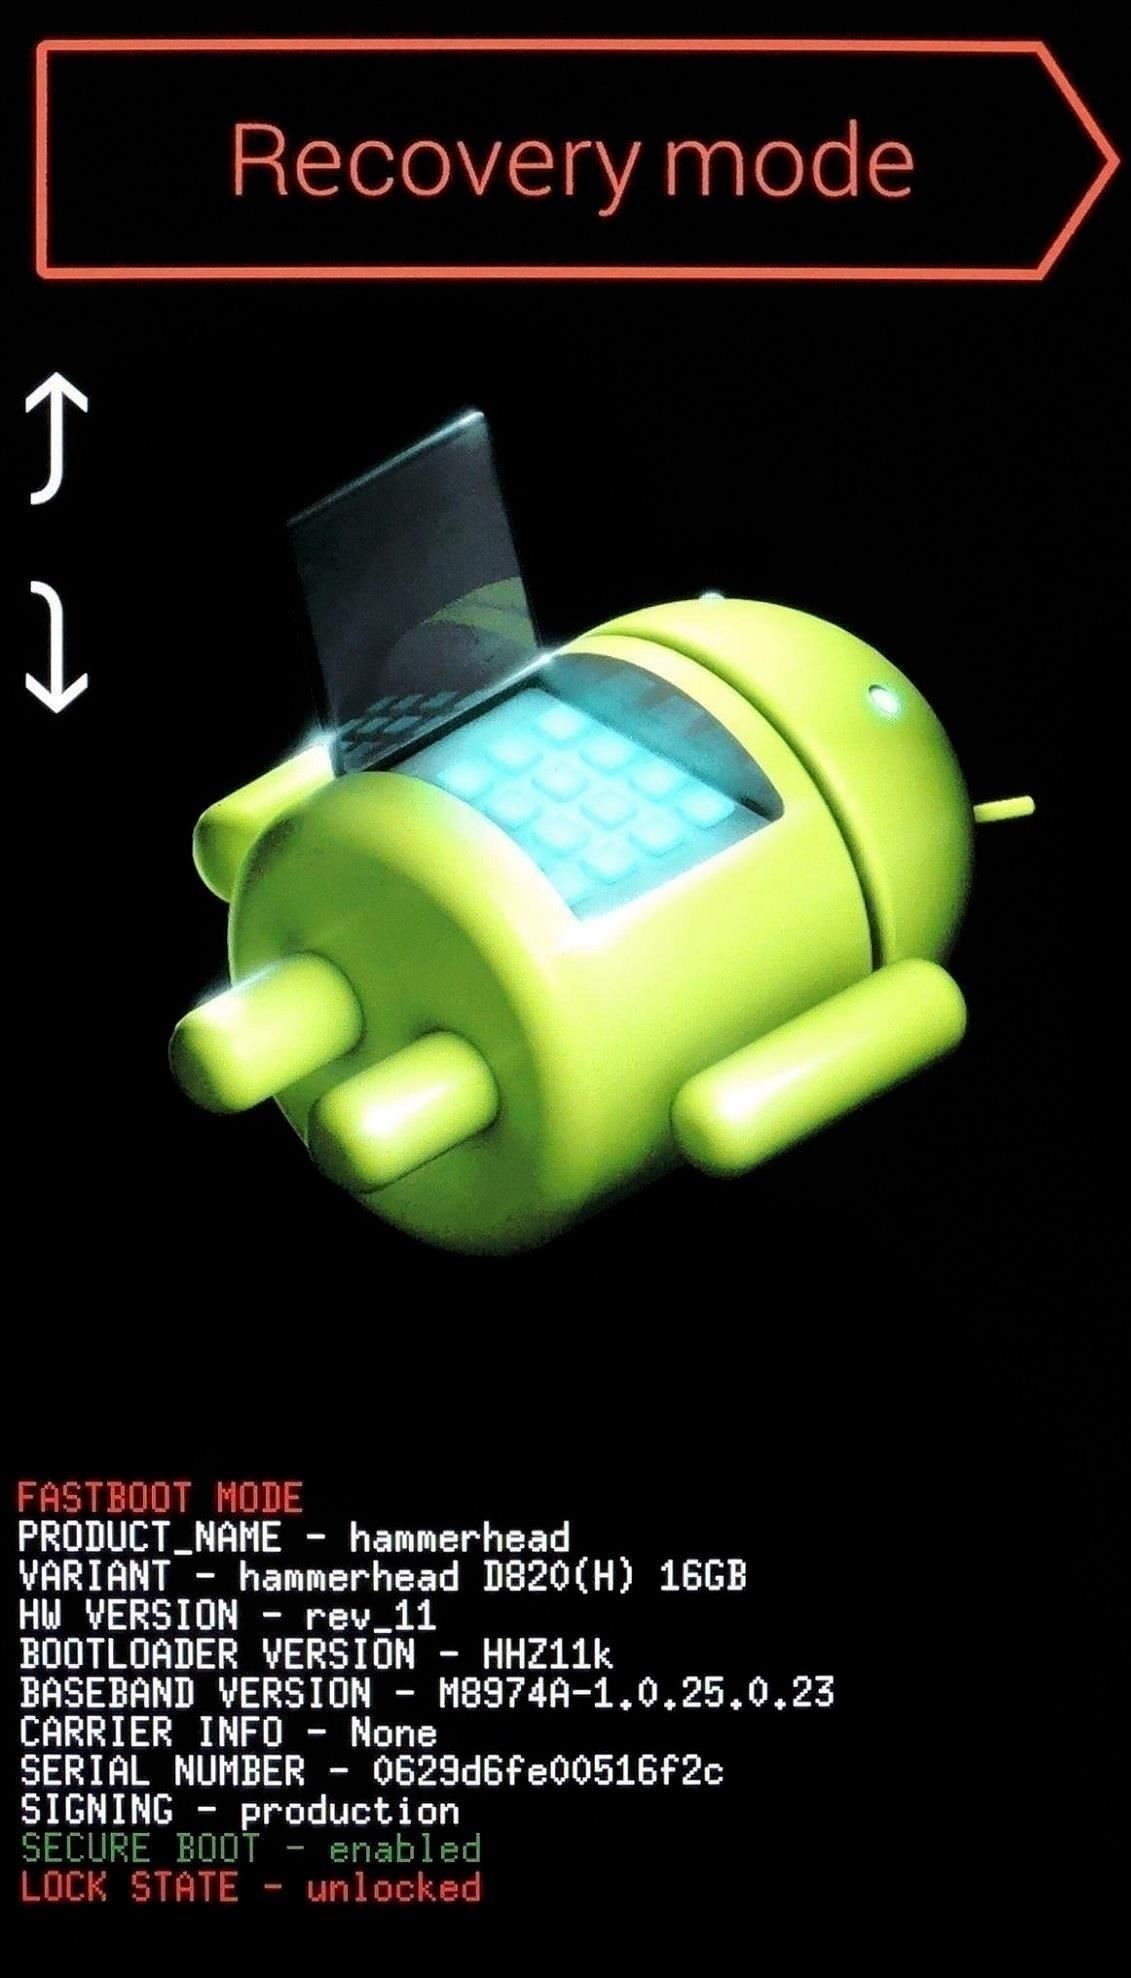
Step 3: Put Your Nexus into Bootloader Mode
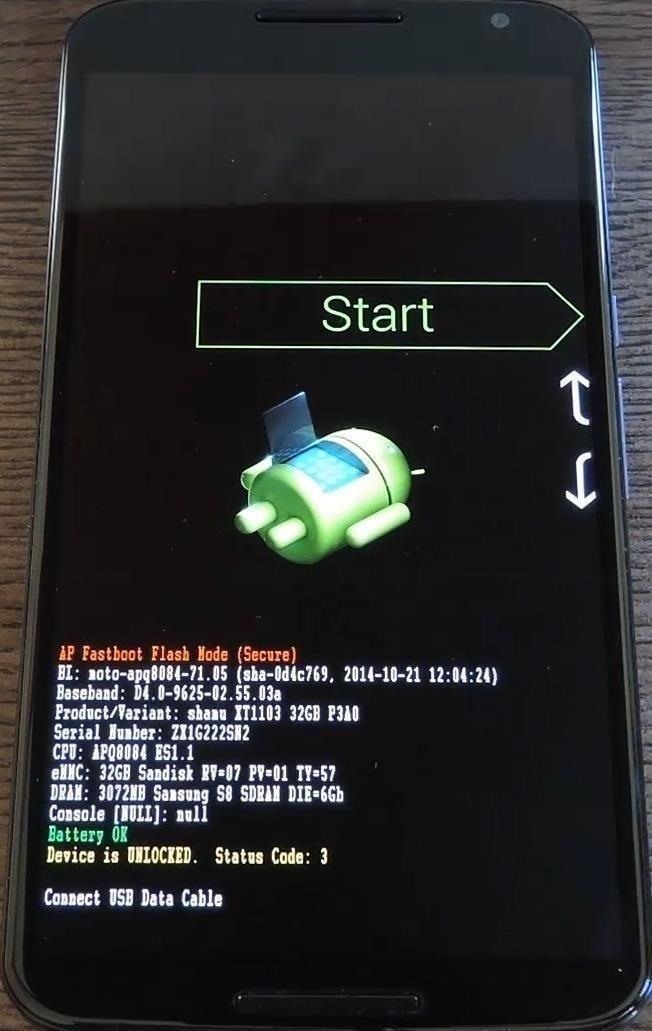
To make things easier, manually boot your Nexus into bootloader mode at this time. To do that, start by powering the device completely off. When the screen goes black, press and hold the volume down and power keys simultaneously. This will put your Nexus into bootloader mode, which is a black screen with green and white text. From here, just set your device aside and make sure it's still connected to your computer.
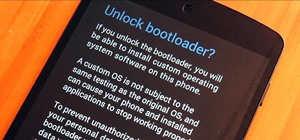
Step 4: Unlock Your Bootloader
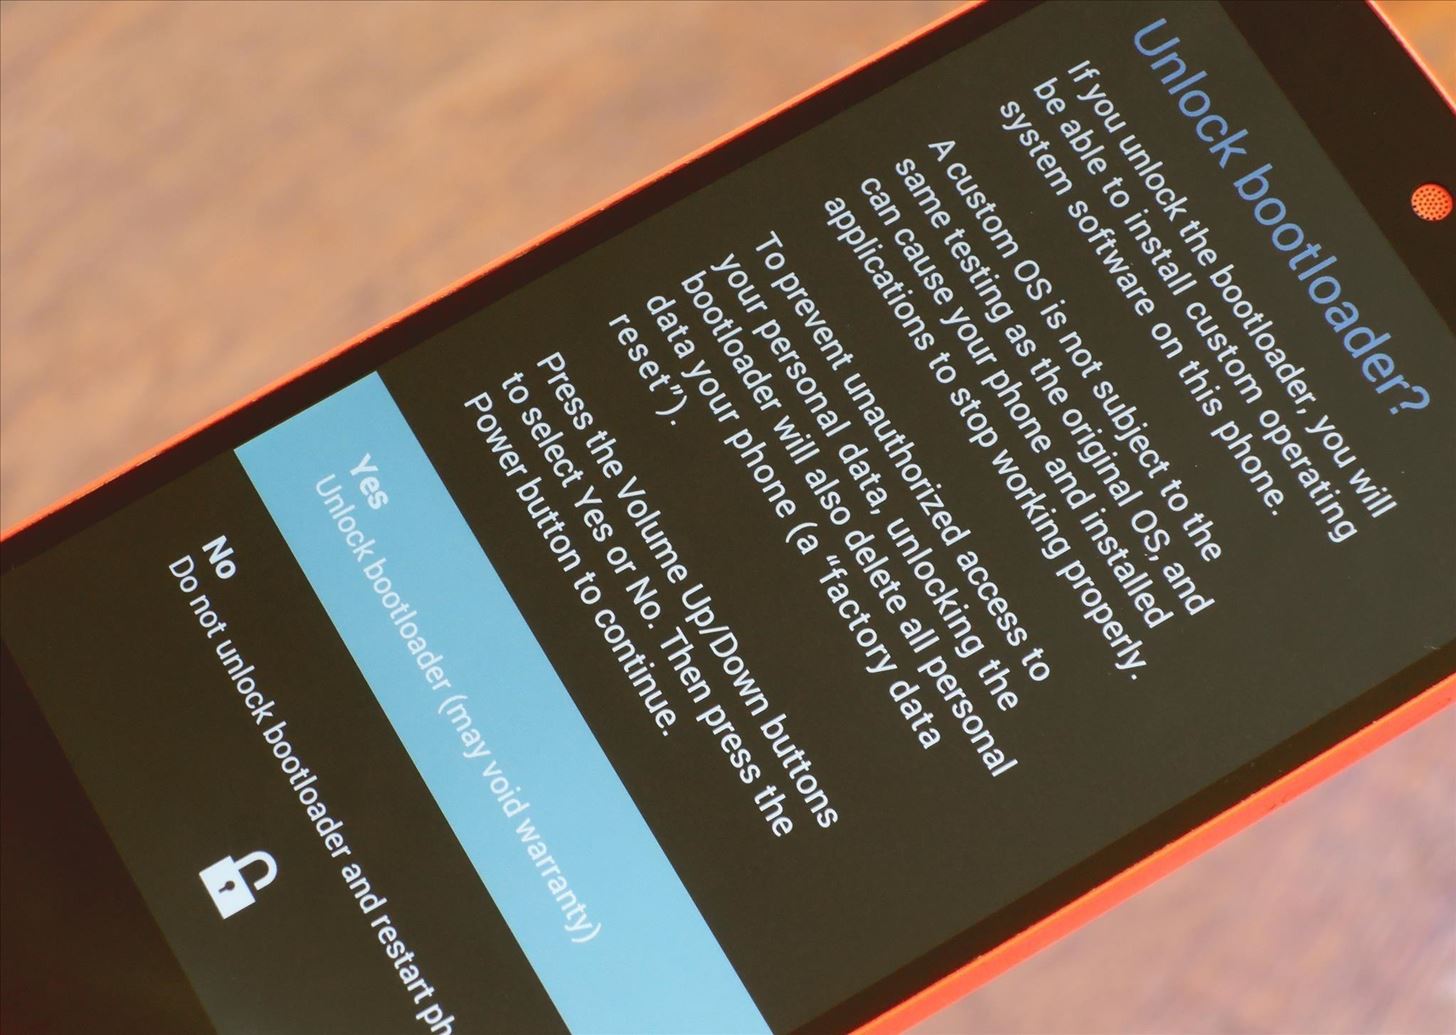
Warning: Unlocking the bootloader will reset your device to its factory condition. It is advised to back up all of your important data before proceeding. If your bootloader is already unlocked, you can skip this step.
On your computer, open a command prompt window and change directories to the "platform-tools" folder inside of your ADB and Fastboot installation directory. If you used the Windows ADB installation method linked in Step 1, simply navigate to the folder with the recovery.img file, then hold down the shift button on your keyboard, right-click any empty space in the folder, and choose "Open Command Window Here."
Next up, enter the following command to unlock your device's bootloader:
- fastboot oem unlock
At this point, you'll see a menu on your device asking if you'd like to unlock the bootloader. Press the volume up button once to highlight "Yes," then press the power button to confirm your choice. The process will take up to a few minutes, so wait until it's finished before proceeding to the next step.
Step 5: Flash TWRP Recovery
Now you're ready to install a custom recovery on your device. To make sure everything is still connected properly, enter the following command into the same terminal window:
- fastboot devices
If this returns a series of letters and numbers, that means your device is still connected via fastboot, so you're good to go. From here, enter the following command to install TWRP recovery on your device:
- fastboot flash recovery recovery.img
At this point, your computer will send the TWRP recovery image over to your phone, which in turn will install the custom recovery. When the command prompt window says "finished," disconnect the USB cable from your phone, but don't touch anything else.
Step 6: Make TWRP Your Permanent Recovery
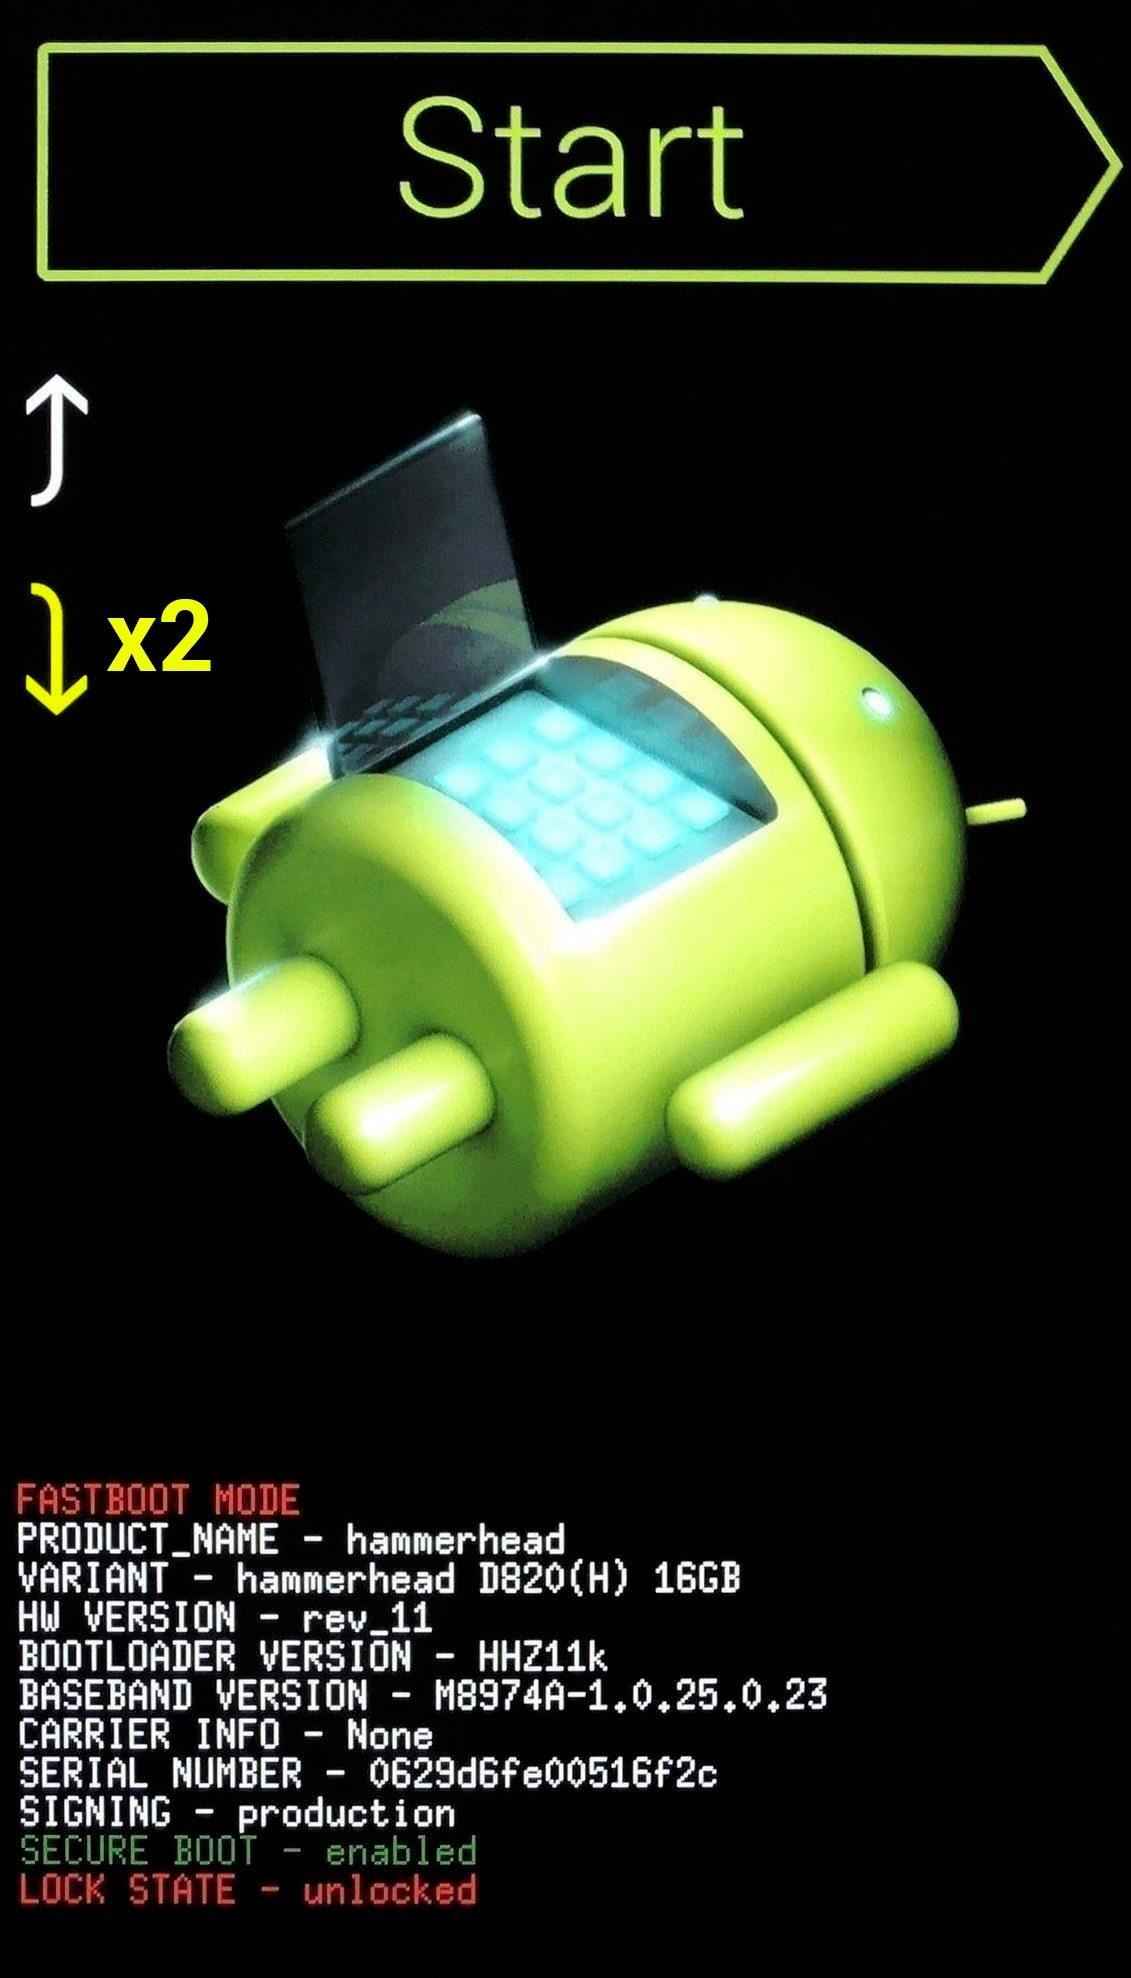
Back over on your phone, don't boot into Android quite yet. Instead, press the volume down button twice to highlight the "Recovery Mode" option in the bootloader menu, then press the power button to select it. When TWRP starts up for the first time, you'll see a menu saying "Swipe to allow modifications or keep read only." Make sure to swipe the slider at the bottom of the screen here to make TWRP your permanent recovery.
Once you've taken care of that, you'll have TWRP recovery installed on your Nexus. Now that you're all set up, be sure to check out this guide on using TWRP recovery to create backups and flash ZIPs.


16 Responses
What am I doing wrong.
I get this error when I try to flash with the downloaded image.
target reported max download size of 536870912 bytes
sending 'recovery' (5 KB)...
OKAY 0.004s
writing 'recovery'...
(bootloader) Invalid boot image
FAILED (remote failure)
finished. total time: 0.011s
Okay, I responded to your comment on the other article, but now it makes sense when posted here, so ignore that other reply.
Have you successfully unlocked your bootloader? What device are you using here? It looks like you might have a bad download, or depending on your device, it could be something else.
After I followed all the steps my phones keeps restarting and a menu shows up for a few seconds and goes away. It states "renamed stock recovery file in /system to prevent the stock rom from replacing twrp" Something like that, please respond I hope i didnt just destroy my phone.
have you gotten an answer?
i get the same problem with Ali Ahmed.. Can someone reply and try to solve this???
No I did not get an answer, but i fixed the issue by making sure my phone is unplugged from my pc before i accessed twrp. I also followed the steps in this guide all over again for a second time. Now I have a different problem where I don't know how to get kernel and supersu onto the phone.
The thing about renaming "stock recovery file in /system" is TWRP making sure that the phone doesn't detect it being installed, because if that happened, it would replace TWRP with the stock recovery and undo your work. So I think that part is normal and you guys did the right thing.
But the part about not being able to get the kernel and SuperSU zips onto your phone is troubling. Is your phone not booting right now? Or is it not getting into recovery?
Hi, I tried the above steps. Now my phone just keeps rebooting without getting into recovery mode. Can you help me out with this?
I'm pretty sure you're having the same problem that others were having. When you got to Step 6, did you see the "swipe to allow modifications" message? For some reason, it doesn't always seem to show up for everyone.
So I'd suggest to re-install the stock recovery image, which will fix your bootloop. Head to the Nexus factory images page, then download the stock package for your operating system version and device.
Once you're done there, fully extract all of the contents of that factory images package, then find the "recovery.img" file. From there, head to your ADB/fastboot folder and rename the TWRP image file that you downloaded in Step 2 to "twrp.img" to avoid confusion.
After that, move the new "recovery.img" file (the one from the factory images package) over to your ADB/fastboot folder, then put your phone into bootloader mode and flash the image using the same commands in Step 5 of this tutorial.
When that's done, reboot your phone and it should make it into Android now. If so, you can try to re-flash the TWRP image file at this point. So boot into bootloader mode again, then open a terminal window on your computer and change directories to your ADB/fastboot folder. This time, use "twrp.img" in the command since you re-named that file earlier.
When it's finished, make sure to boot directly into recovery mode before you do anything else. Hopefully this time it will ask you to "swipe to allow modifications," which should solve your issue. If not, and if it gets caught in a bootloop again, you can fix that by re-installing the stock recovery.img file.
Finally got everything working. Flashed the original Android 6 again into my phone from fastloader menu, then repeated the above steps to install TWRP. Then did 'wipe dalvik cache', 'factory reset' and 'wipe cache'. Rebooted the system and luckily it worked. Furthermore, rooted the device using your tutorial as well. https://nexus5.wonderhowto.com/how-to/root-nexus-device-running-android-6-0-marshmallow-0165131/
Thanks a lot, Dallas.
Awesome! Glad to hear you got it all worked out!
Where is the ADB and Fastboot installation directory?
It depends on what ADB and Fastboot utility you installed, and what kind of computer you're using. If you installed the official version from Google onto a 64-bit Windows PC, you should find it C:\Program Files (x86)\Android\android-sdk\platform-tools
thank you so much for this guide, well written. explained perfectly and that ADB fastboot by snoop05 EXCELLENT!
Hi! I'm trying to install the TWRP but the command prompt gives me this error "error: cannot load 'recovery.img'". I installed the ADB and Fastboot as explained by snoop5. What do I do?
Hello, everything worked like a charm until i got to the last step, after i disconnected the usb cable and tried to start recovery mode i got a message saying "Your device software can't be checked for corruption. Please lock the bootloader" and after that nothing happens, any idea's what i am doing wrong?
Share Your Thoughts